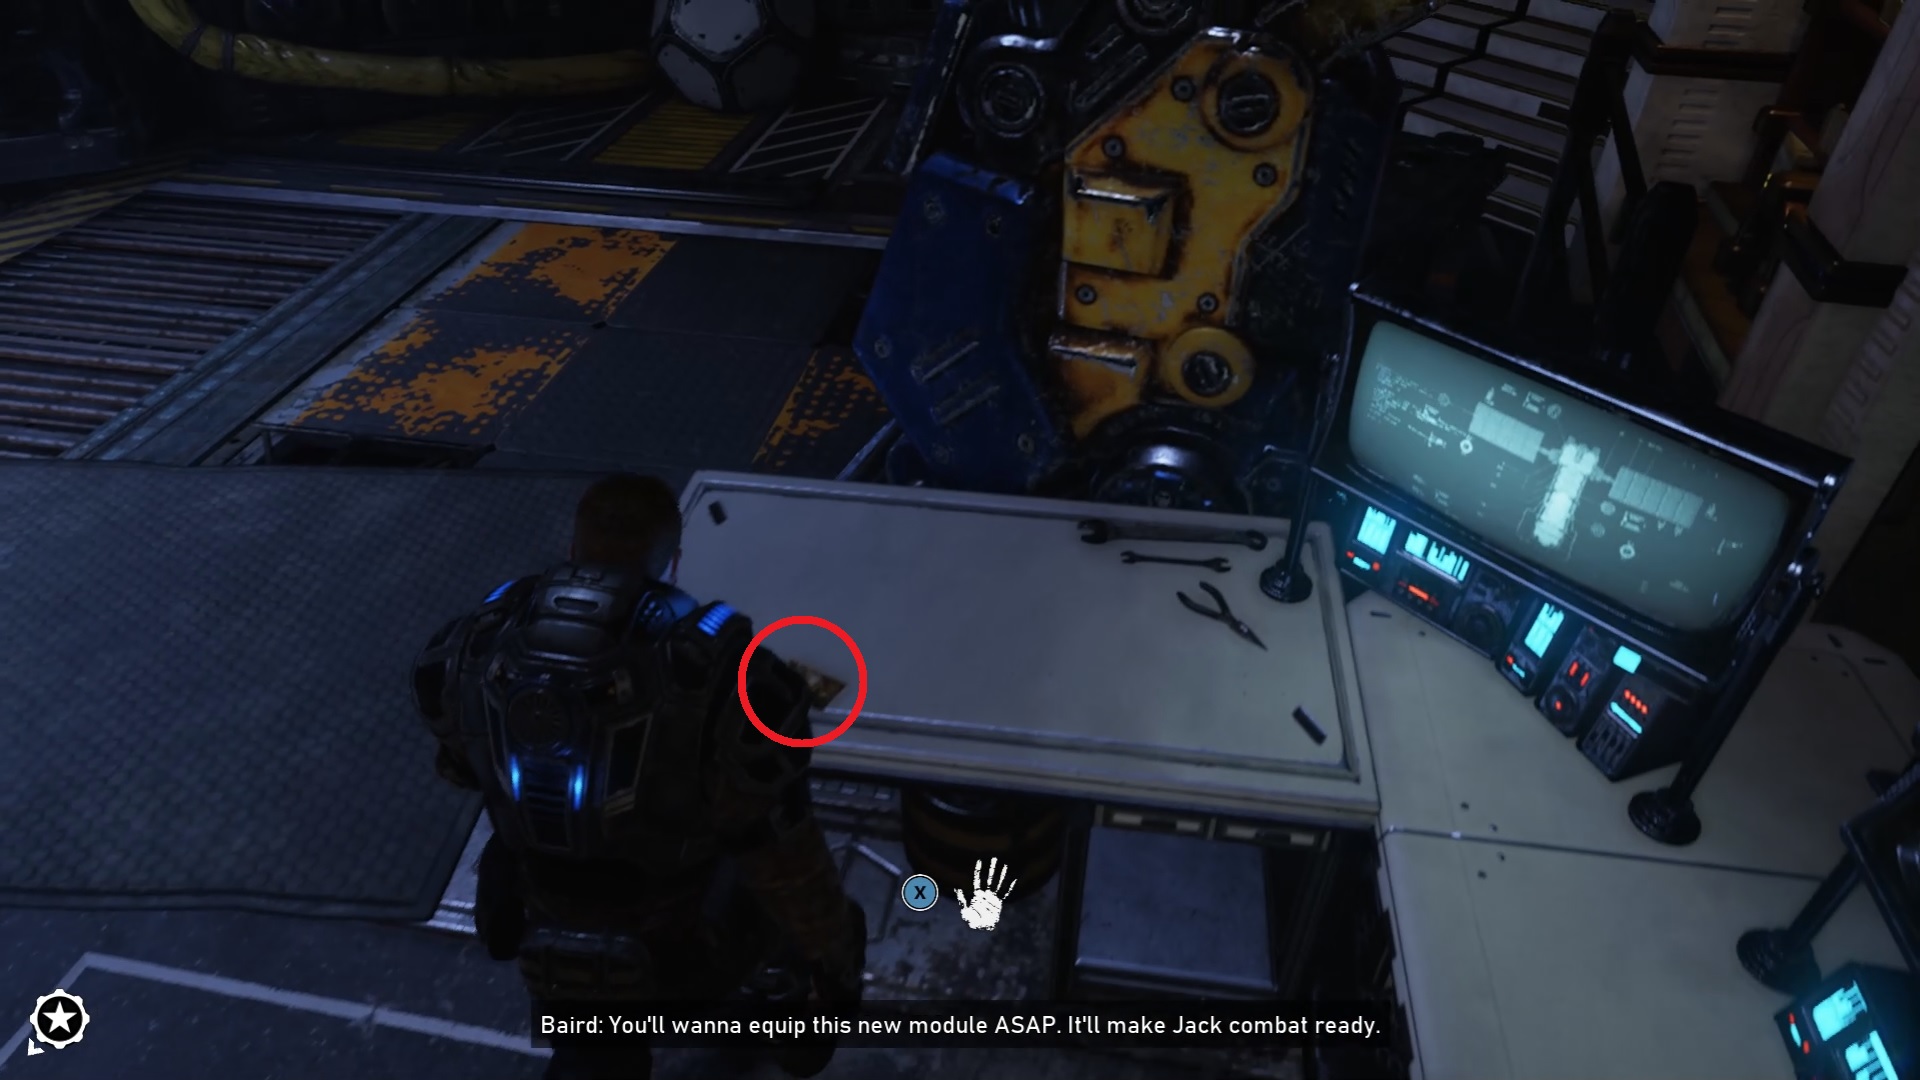
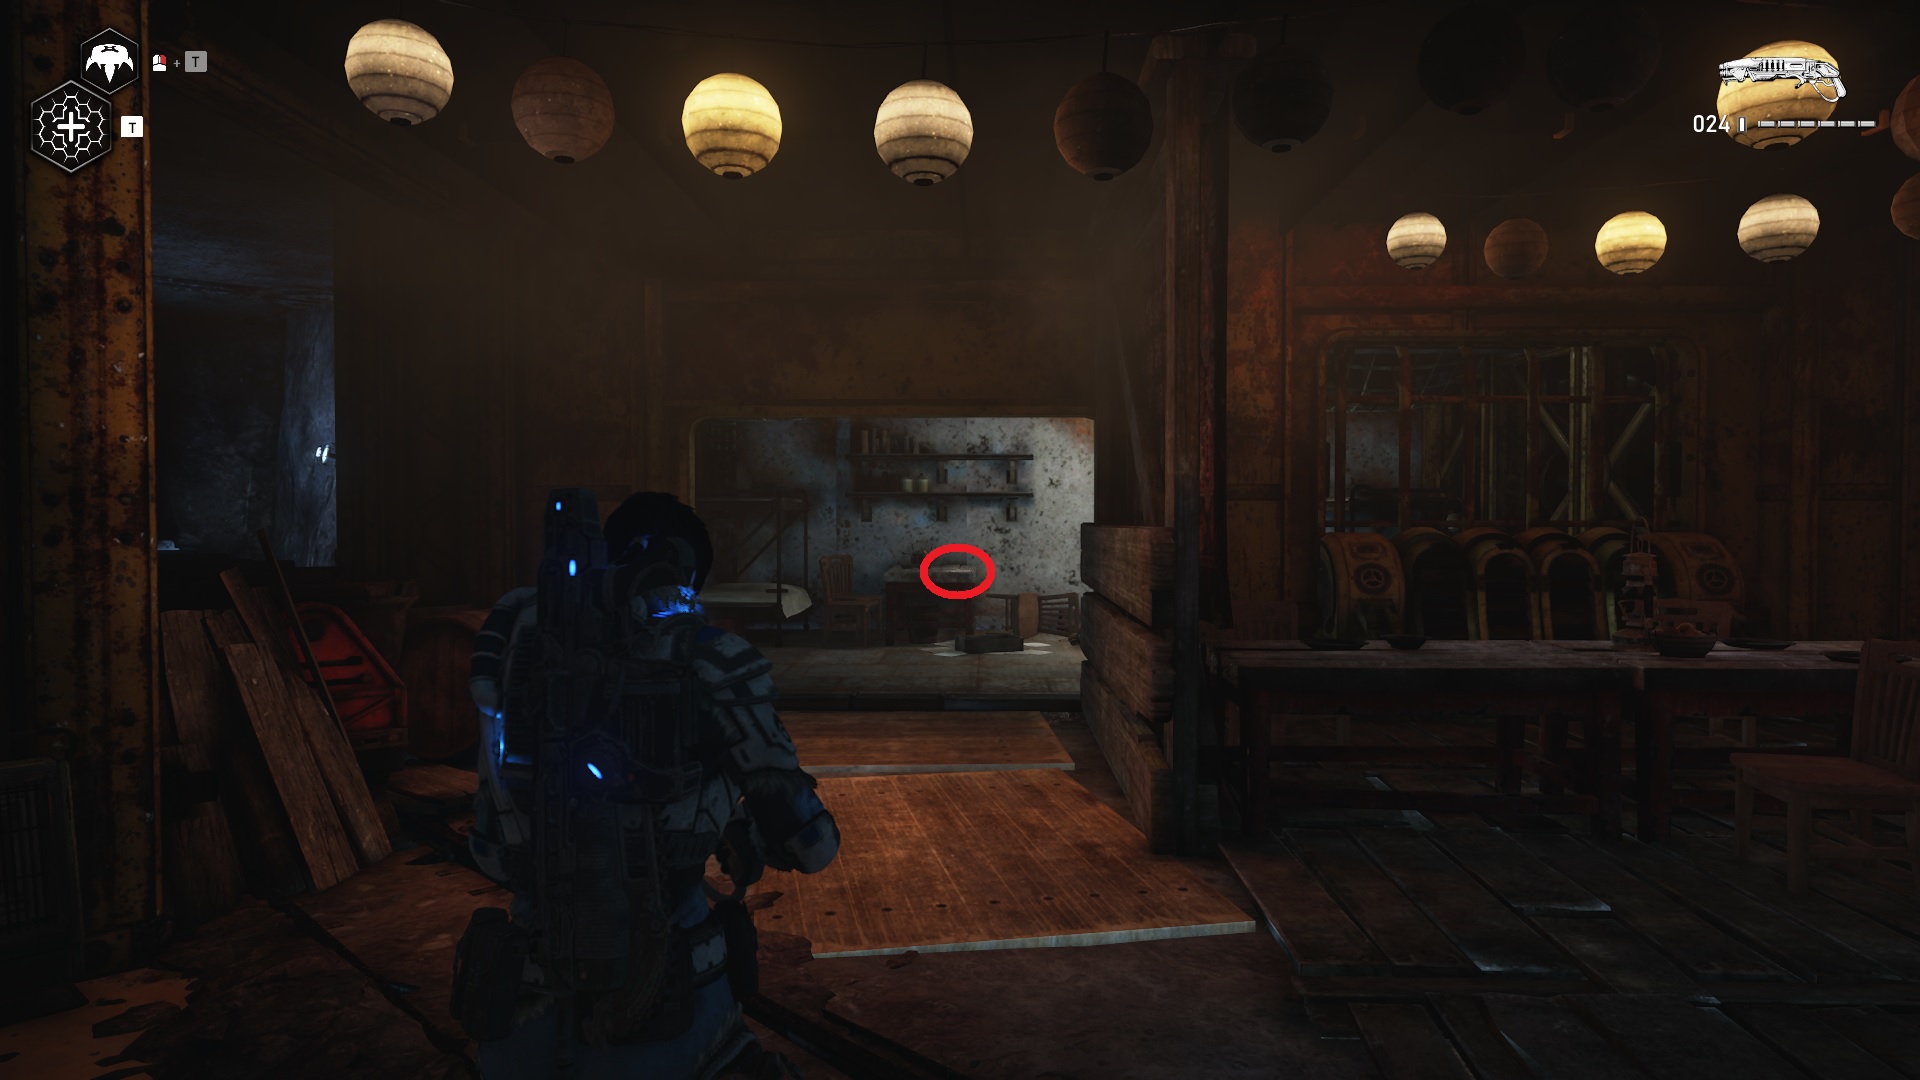
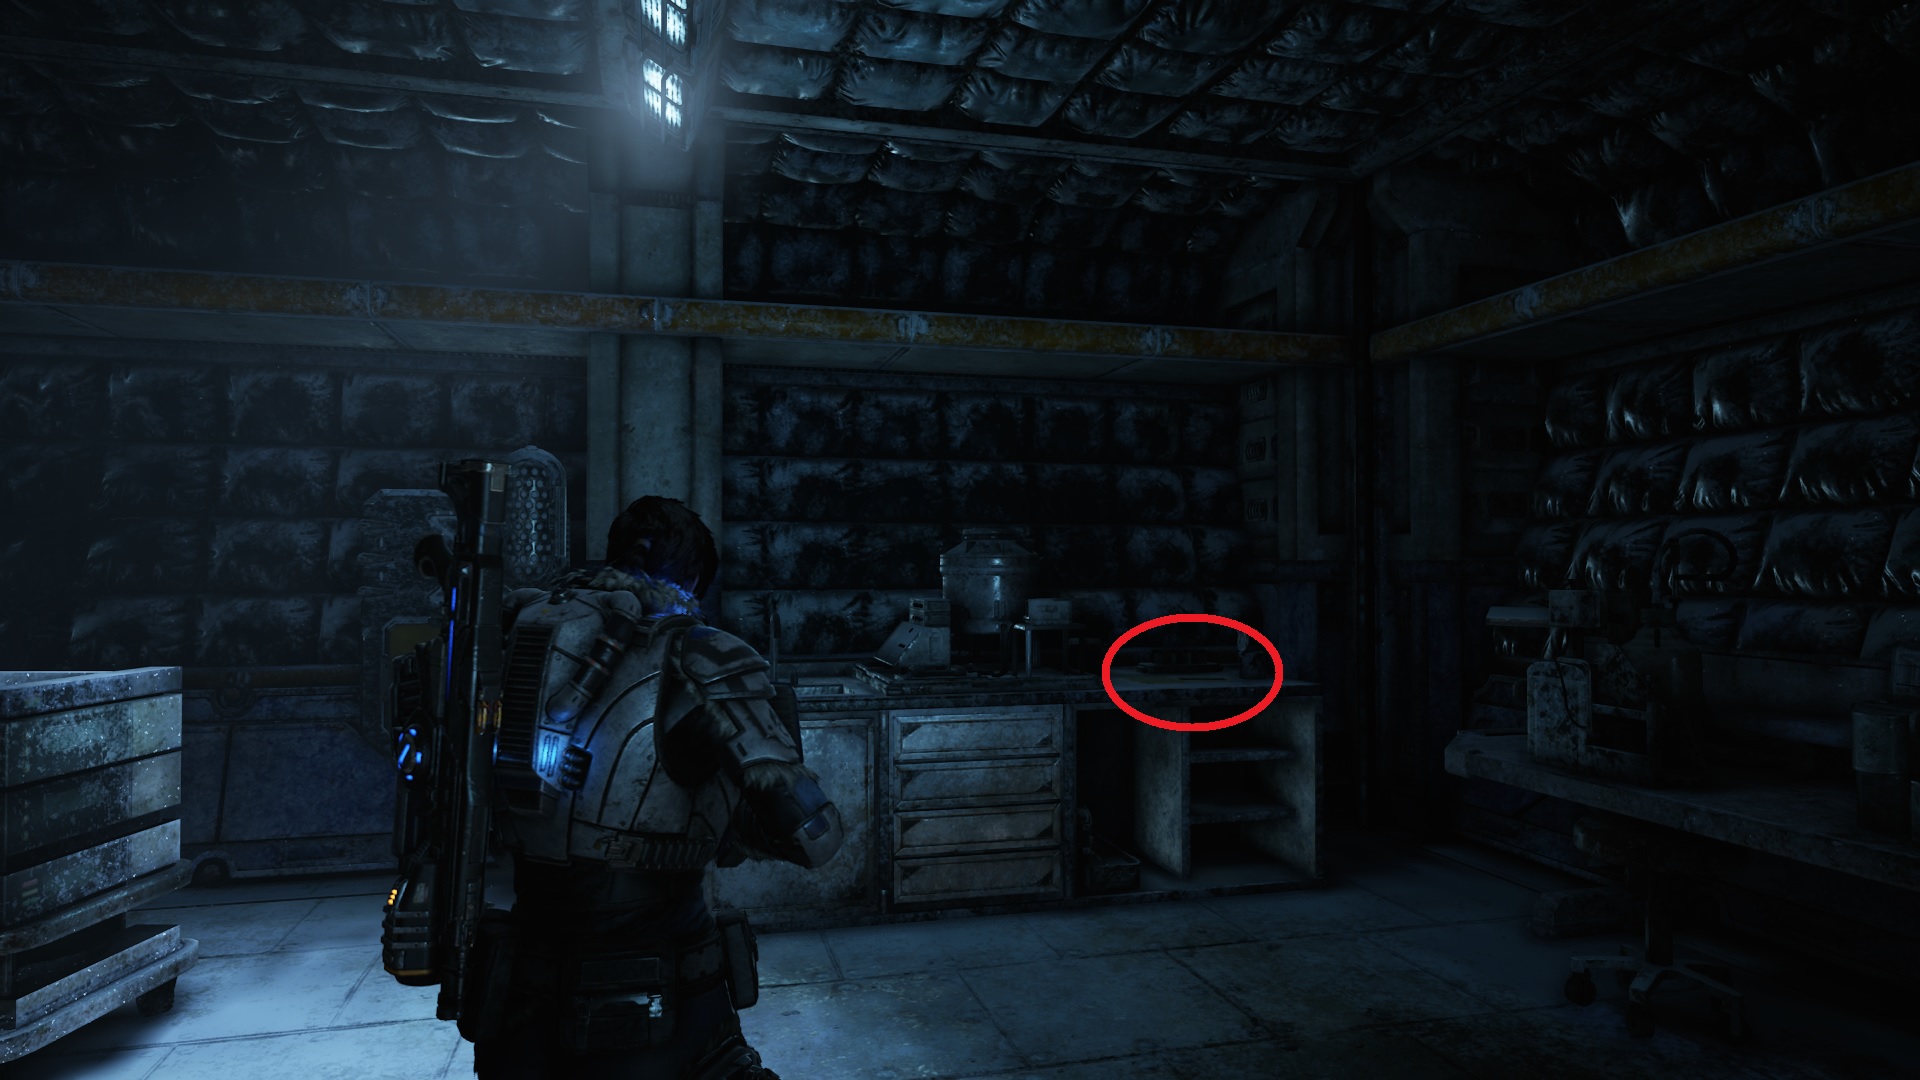
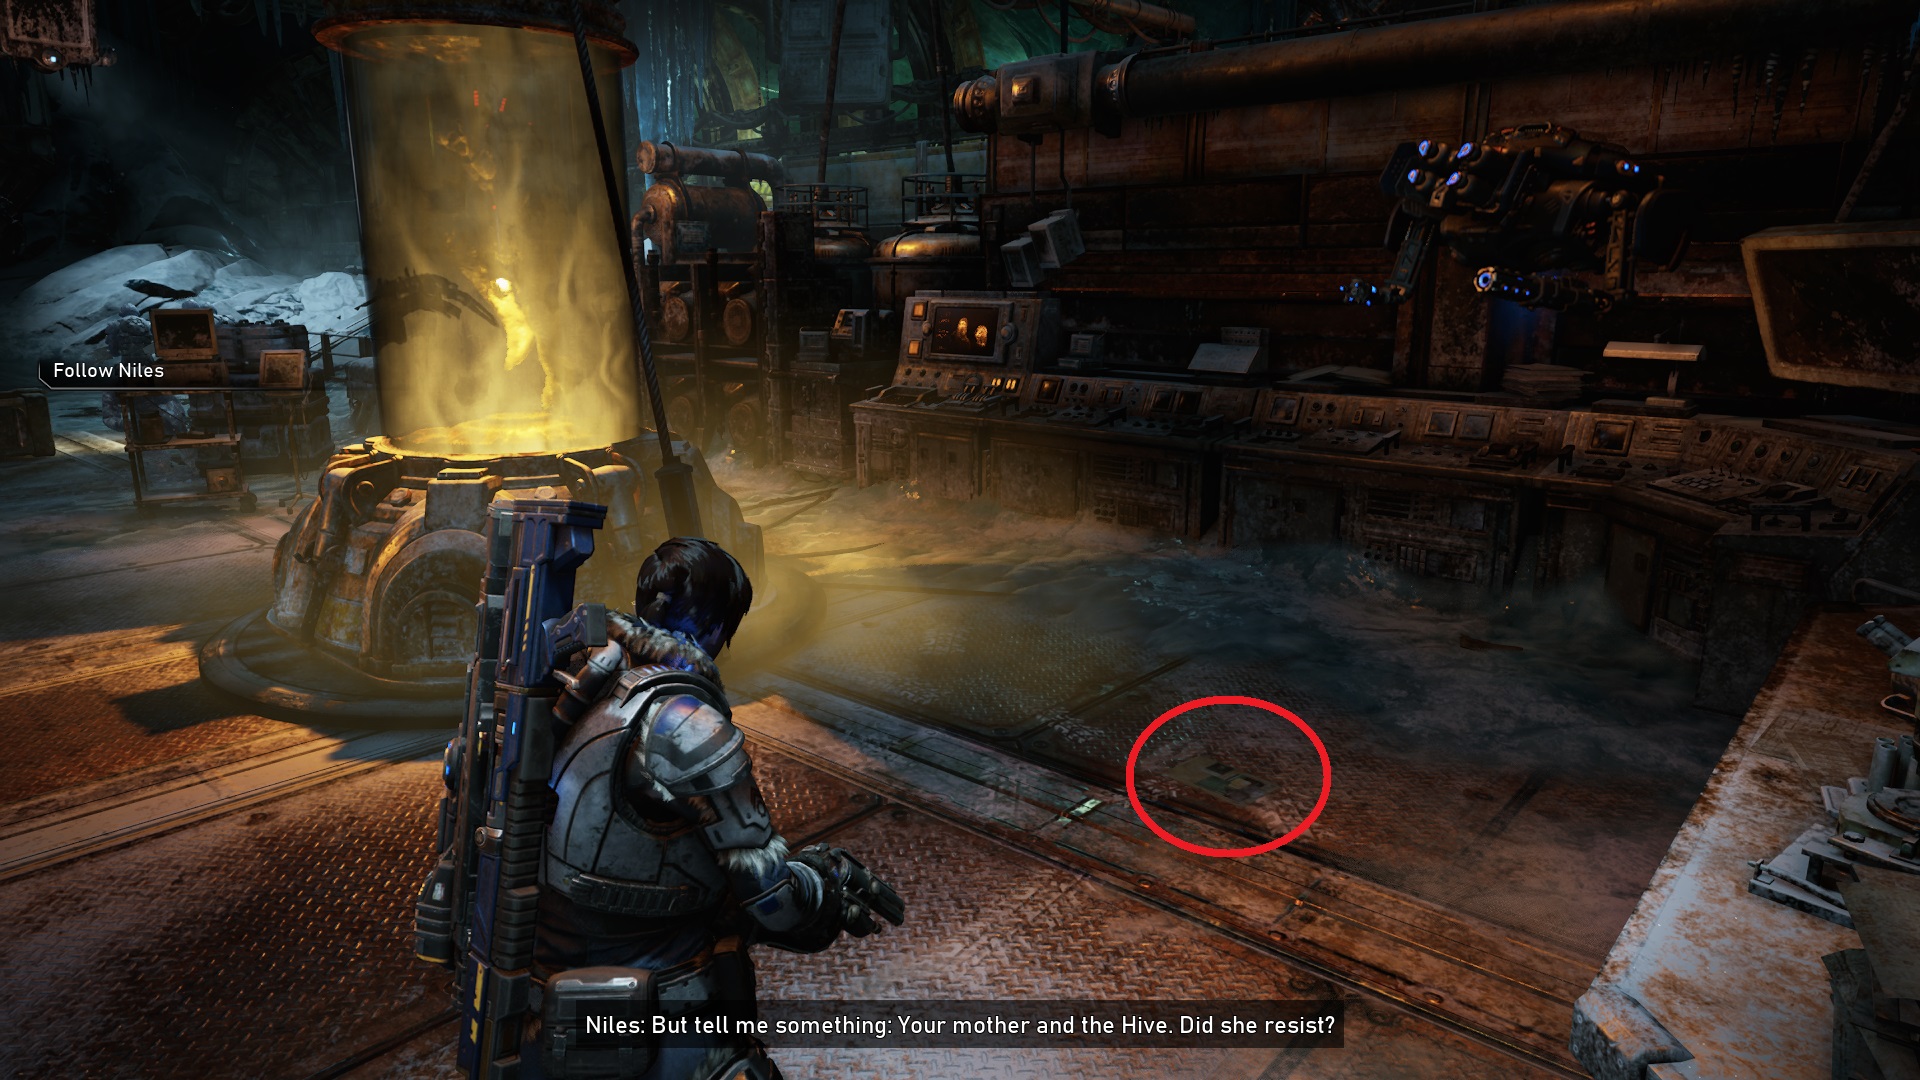
Gears 5 collectibles guide - all collectible and component locations

Gears 5 features a full campaign that will take hours to play from beginning to end normally, but is filled to the brim with components to upgrade your hover bot - Jack. These aren't the only collectibles as there are tons of hidden trinkets which are not immediately obvious to find. We now have directions and images for all of the Gears 5 collectibles and the whereabouts of most of the Gears 5 components.
Gears 5 collectibles guide
This guide contains all of the locations of the Gears 5 collectibles and components with clear directions and images to each one.
Gears 5 collectibles bugs
A note to begin this guide - make sure that if you're hunting for Gears 5 collectibles, that you ensure that you have completed the campaign and found all of the components first. The reason for this is that you can only have one save slot active in Gears 5 for campaign missions. If you go back into an older level, it will wipe all progress towards collecting all of the components. This is a massive pain in the backside to have to deal with, so save yourself some hassle and just save these until you've completed the game.
If you are finding that the game isn't registering your collectibles progress, which it did during Act 3 - Some Assembly Required and Act 4 - Homefront in my game, but has also been a problem for others in previous chapters, then this is the known bug. Unfortunately you'll just have to wait for The Coalition to fix it, which is a bit of a pain.
Gears 5 collectibles guide contents
- Act 1: Shot in the Dark - Gears 5 collectibles
- Act 1: Diplomacy - Gears 5 collectibles
- Act 1: This is War - Gears 5 collectibles
- Act 1: The Tide Turns - Gears 5 collectibles
- Act 2: Recruitment Drive - Gears 5 collectibles
- Act 2: Into the Wild - Gears 5 collectibles
- Act 2 - Forest for the Trees - Gears 5 collectibles
- Act 2 - The Source of it All - Gears 5 collectibles
- Act 2 - Dirtier Little Secrets - Gears 5 collectibles
- Act 3 - Fighting Chance - Gears 5 collectibles
- Act 3 - Rocket Plan - Gears 5 collectibles
- Act 3 - Some Assembly Required - Gears 5 collectibles
- Act 4 - Homefront - Gears 5 collectibles

Act 1: Shot in the Dark - Gears 5 collectibles
The first act takes place in an abandoned Hammer of Dawn launch base. Wildlife has taken over and the base is about to crumble. There are no components here, but there are a ton of Gears 5 collectibles to be found in this chapter. The first one, in particular, is an absolute pain to find.
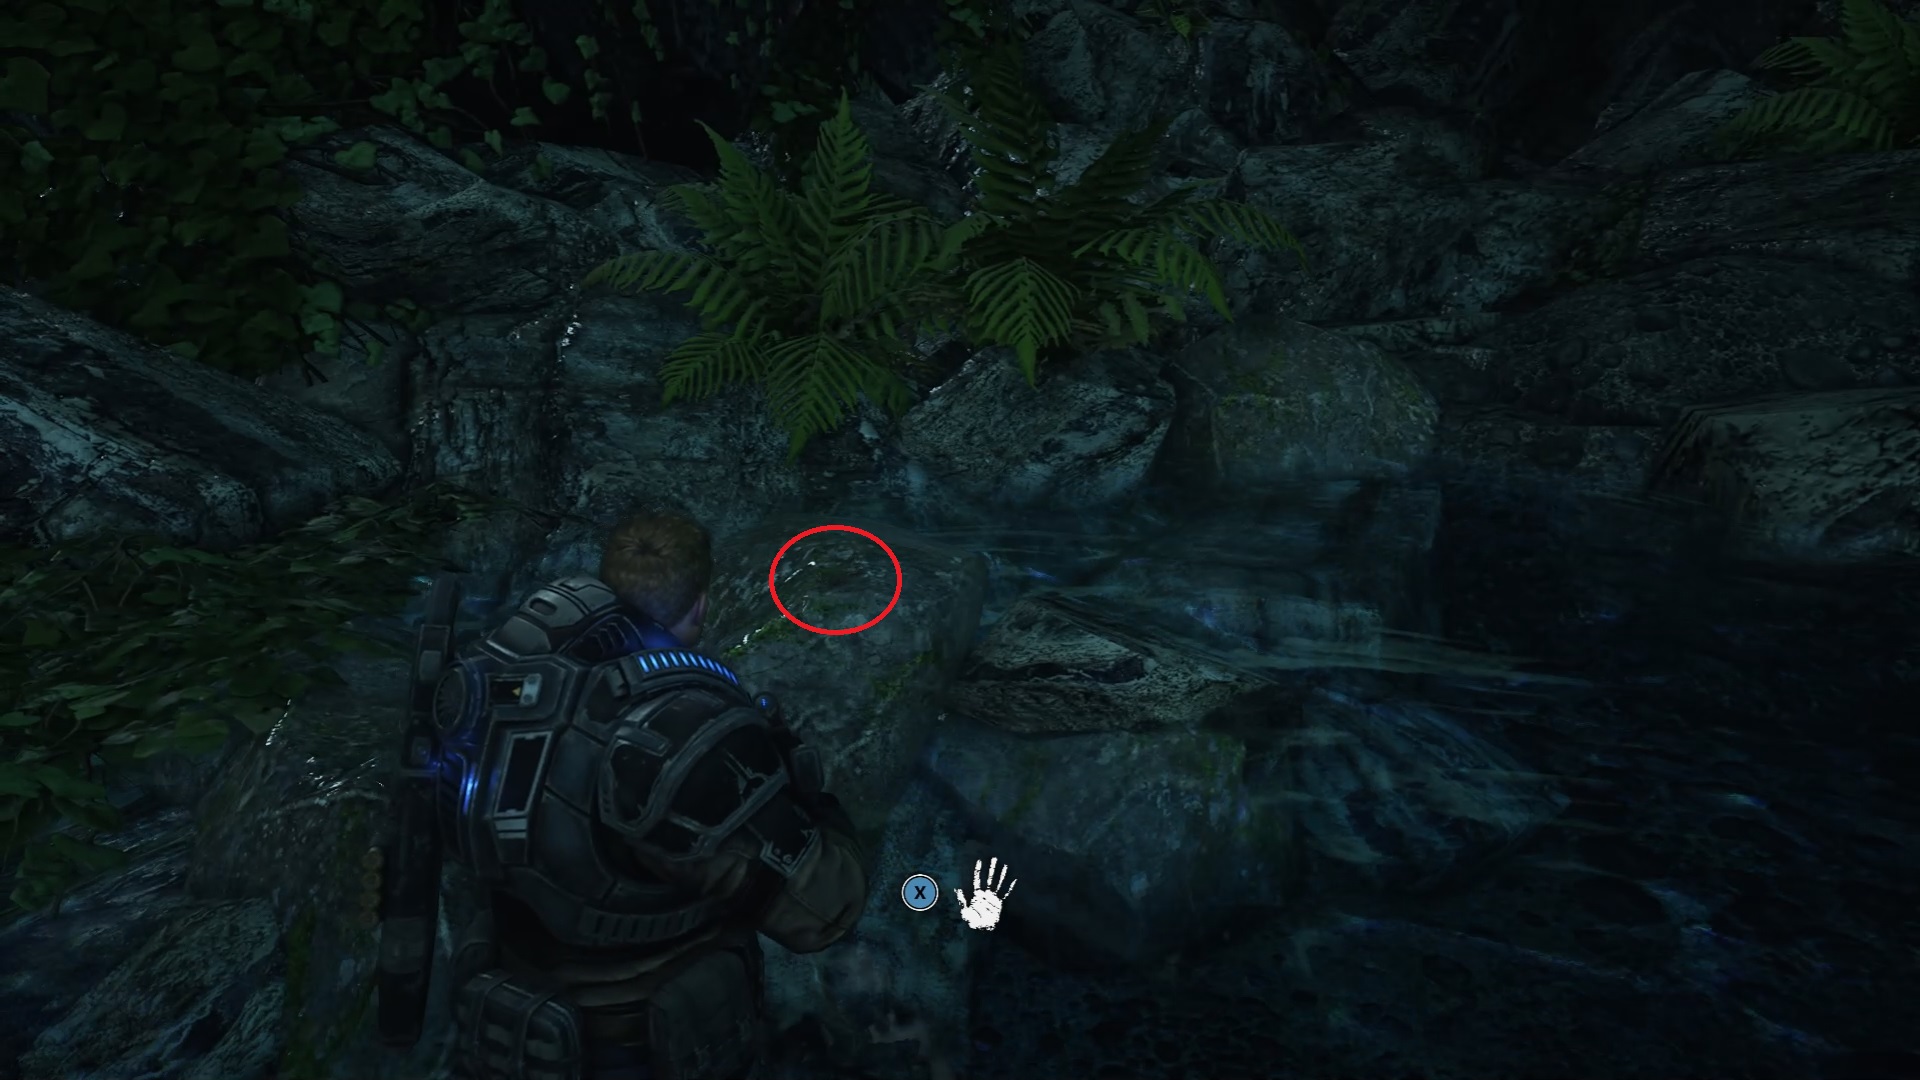
Weathered Spectacles location
This one is incredibly easy to miss due to not only how small it is, but also its location. As soon as you have descended from the rope into the waterfall, turn around and head towards the rocks to the back, right of the waterfall. It's past the ruins and hiding on the rock to the left. You will likely pass this a number of times.

Onyx Guard Challenge Coin location
As soon as you emerge from the water, head down the path to the left of the main path. Right at the end you'll see the Onyx Guard Challenge Coin lying at the end of this path.
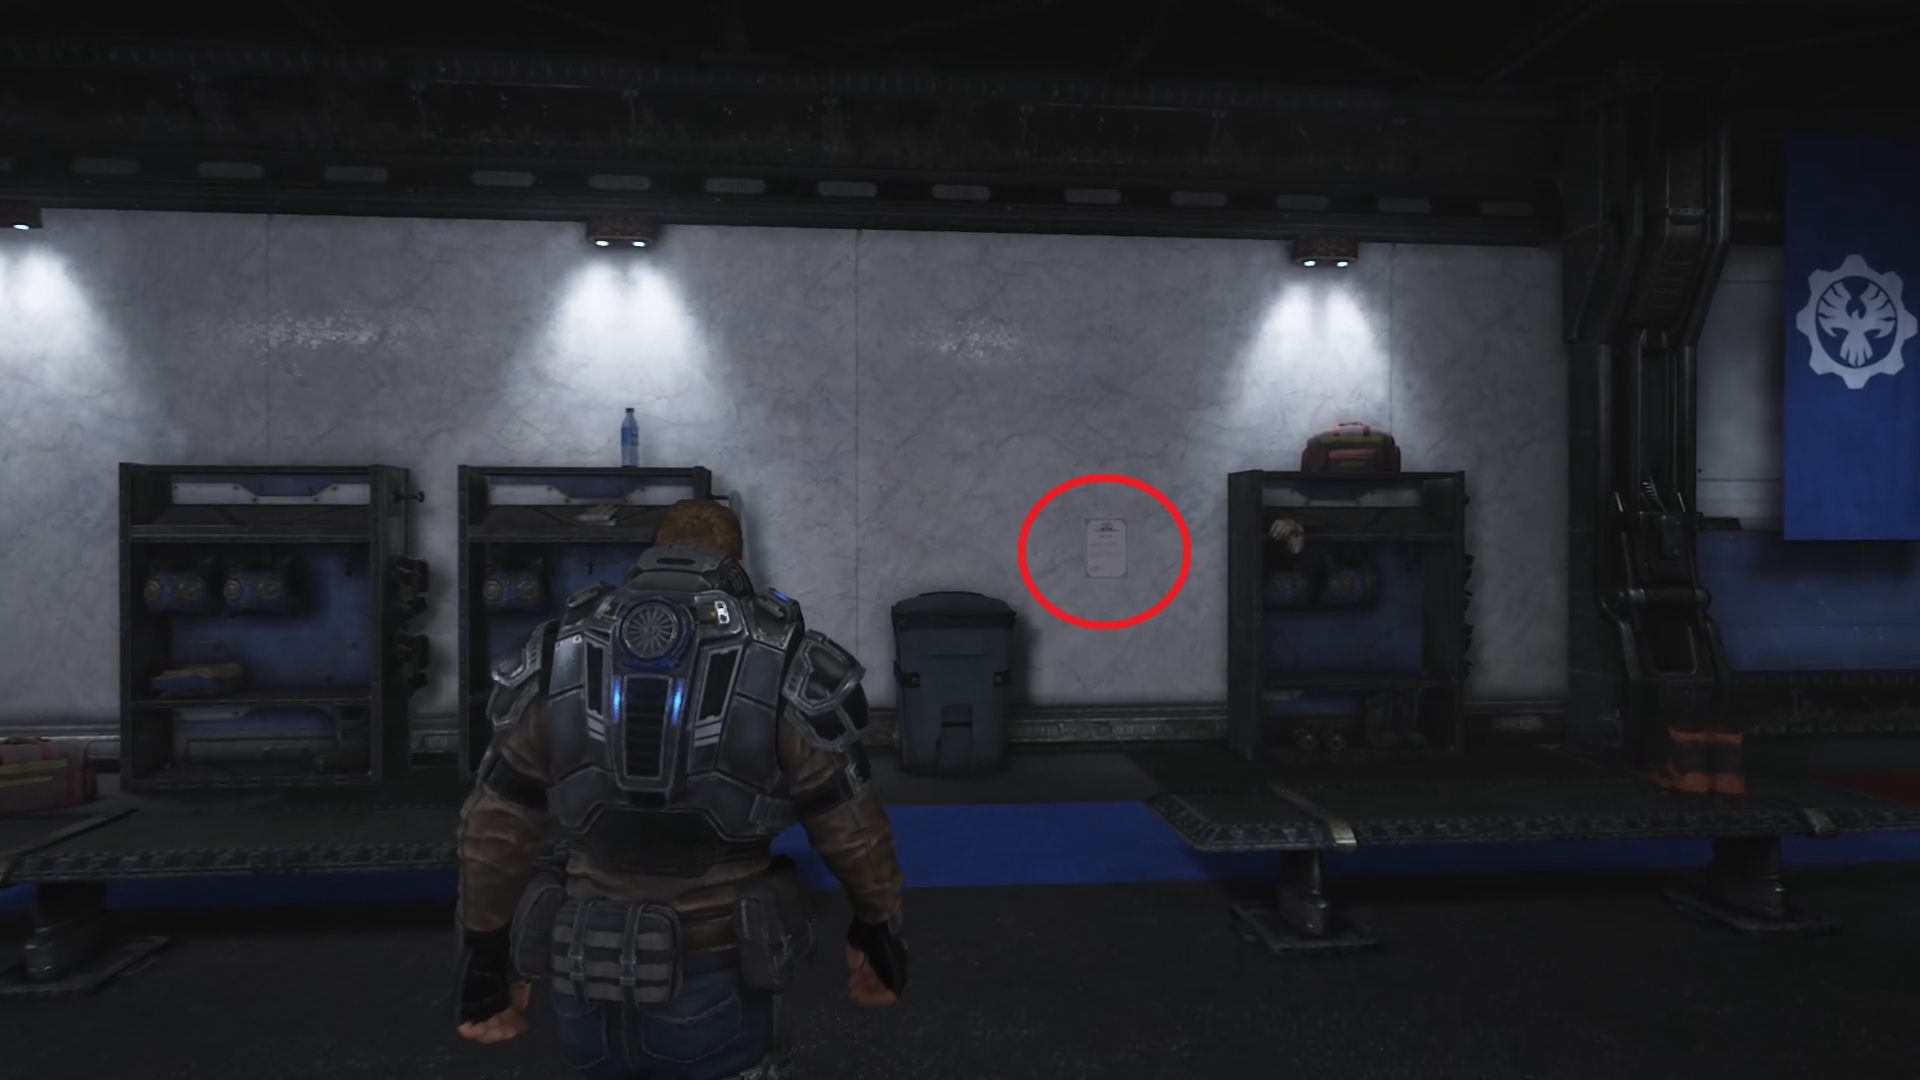
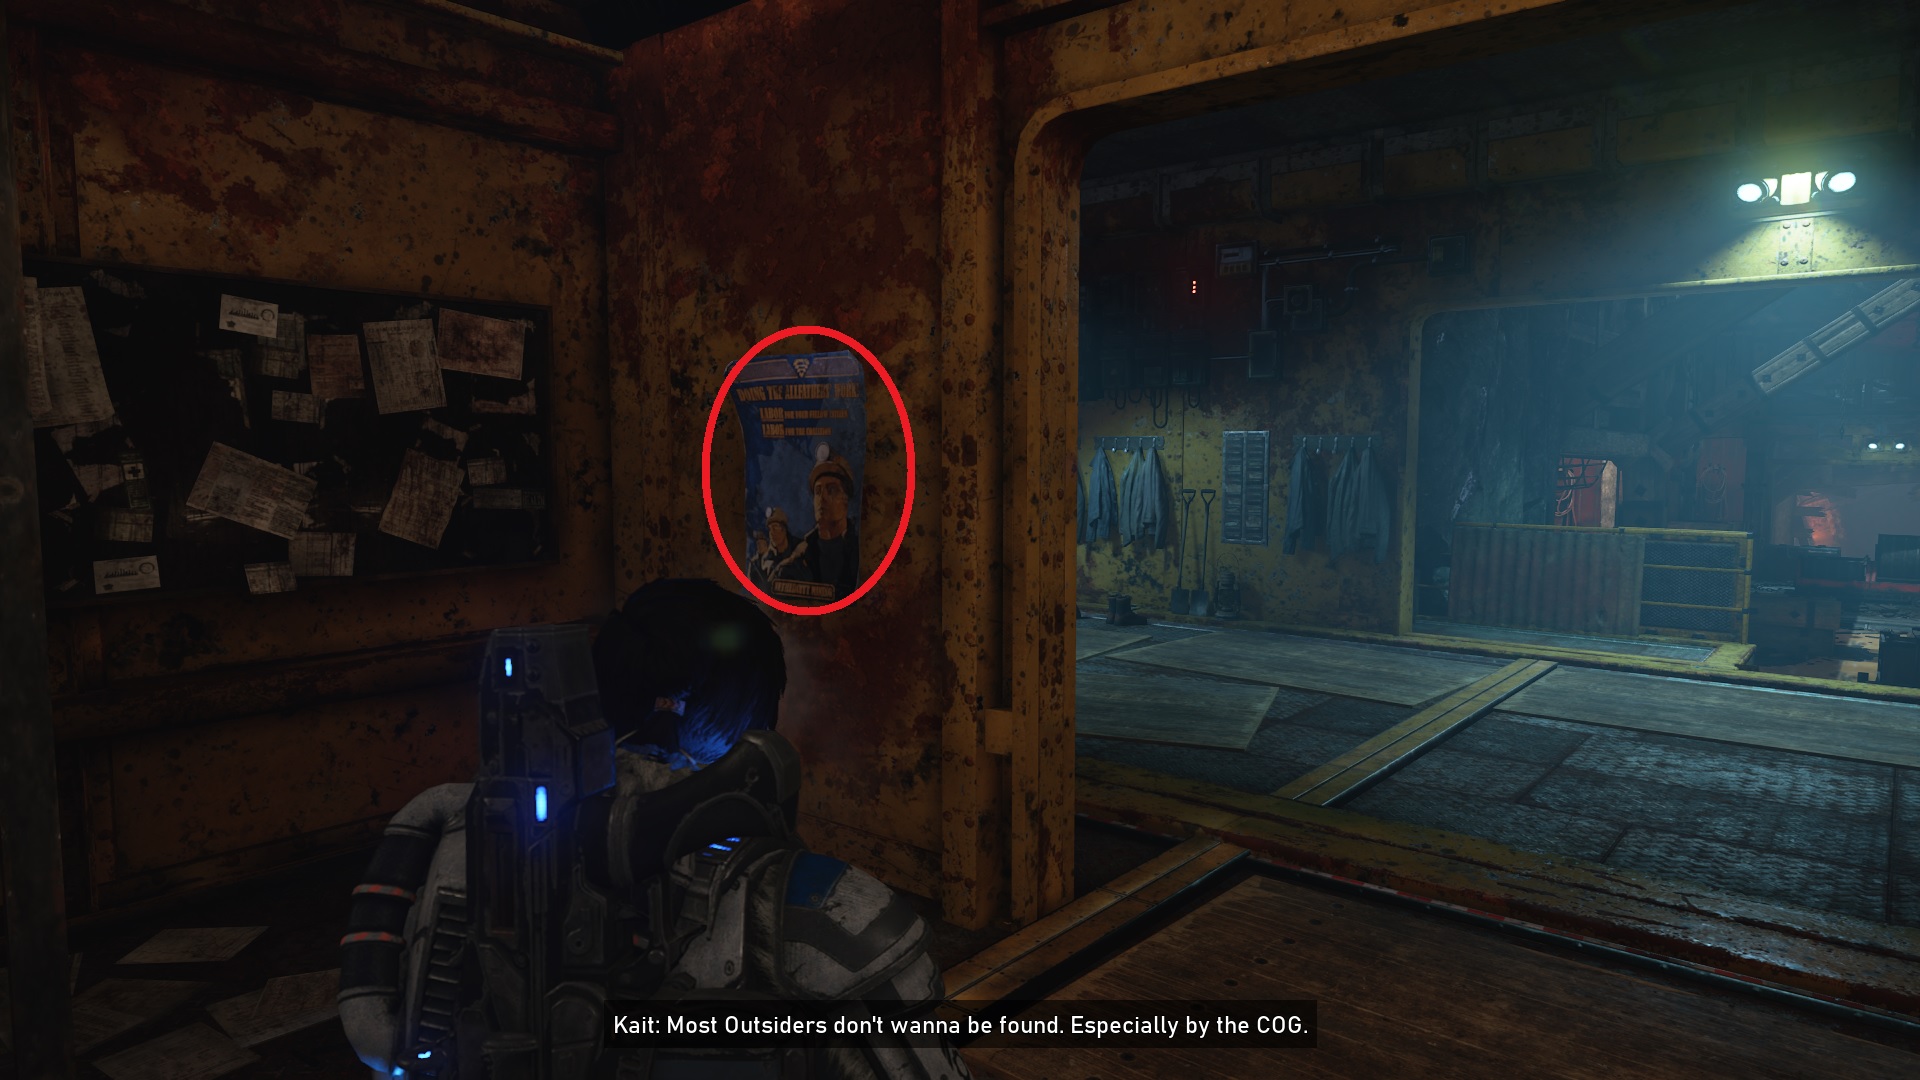
Wellness Advisory Poster
Along the main path, you'll come across a hall with "Shaft Access" and "Flow" written above it. Head inside, to find some urinals at the end. Turn left to find the poster hanging on the wall to the left of the urinals.

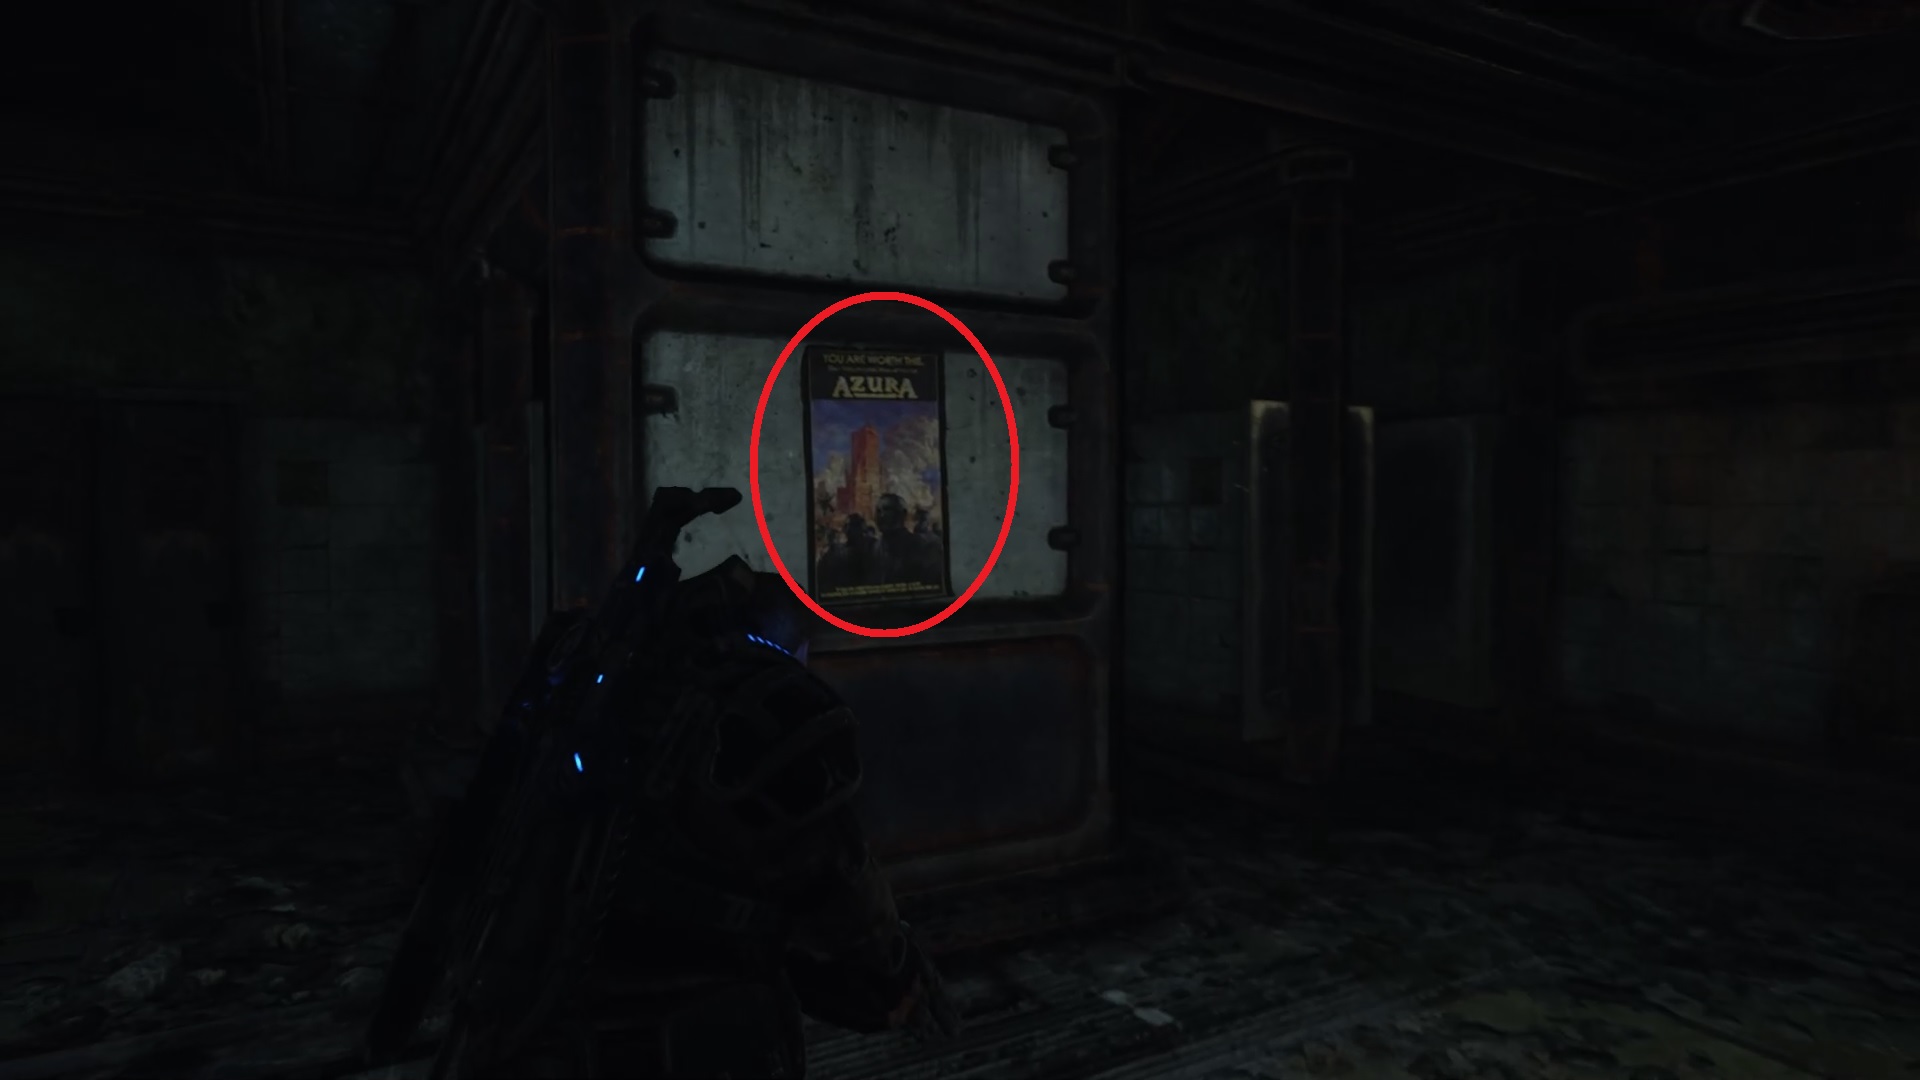
Cog Tags: Fallen Azura Gear
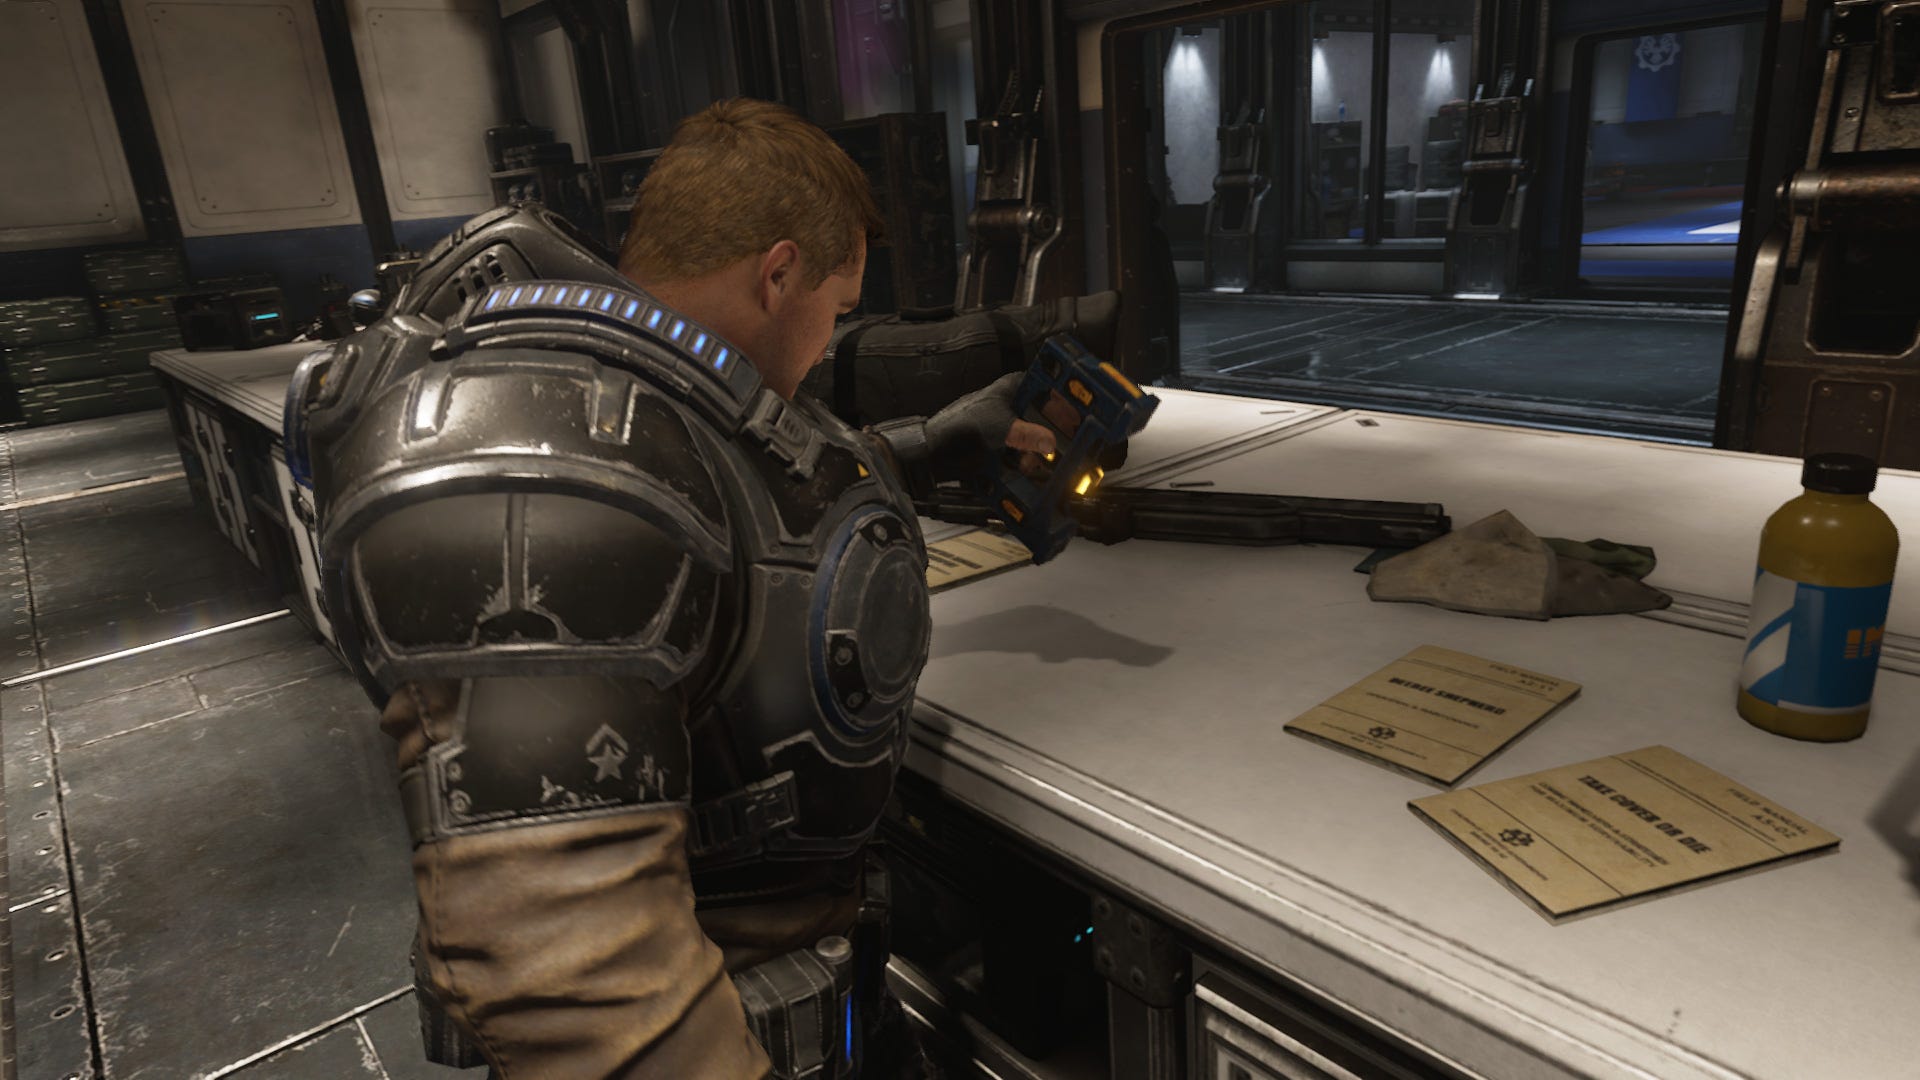
Proceed through the level up to the point where you send Dave to open a door. You're at the correct point when Baird starts talking about strange data. As soon as the second door opens, head straight forward into the next room. On the right as you enter it, there's a small gathering of guns and ammo. In amongst those are the Cog Tags.

Chairman's Wristwatch
From the door that Dave opens, turn left and head upstairs. There is a room to the left, which has some computer banks. Follow this room around and you'll find a small office with the Chairman's Wristwatch on the desk to the right.

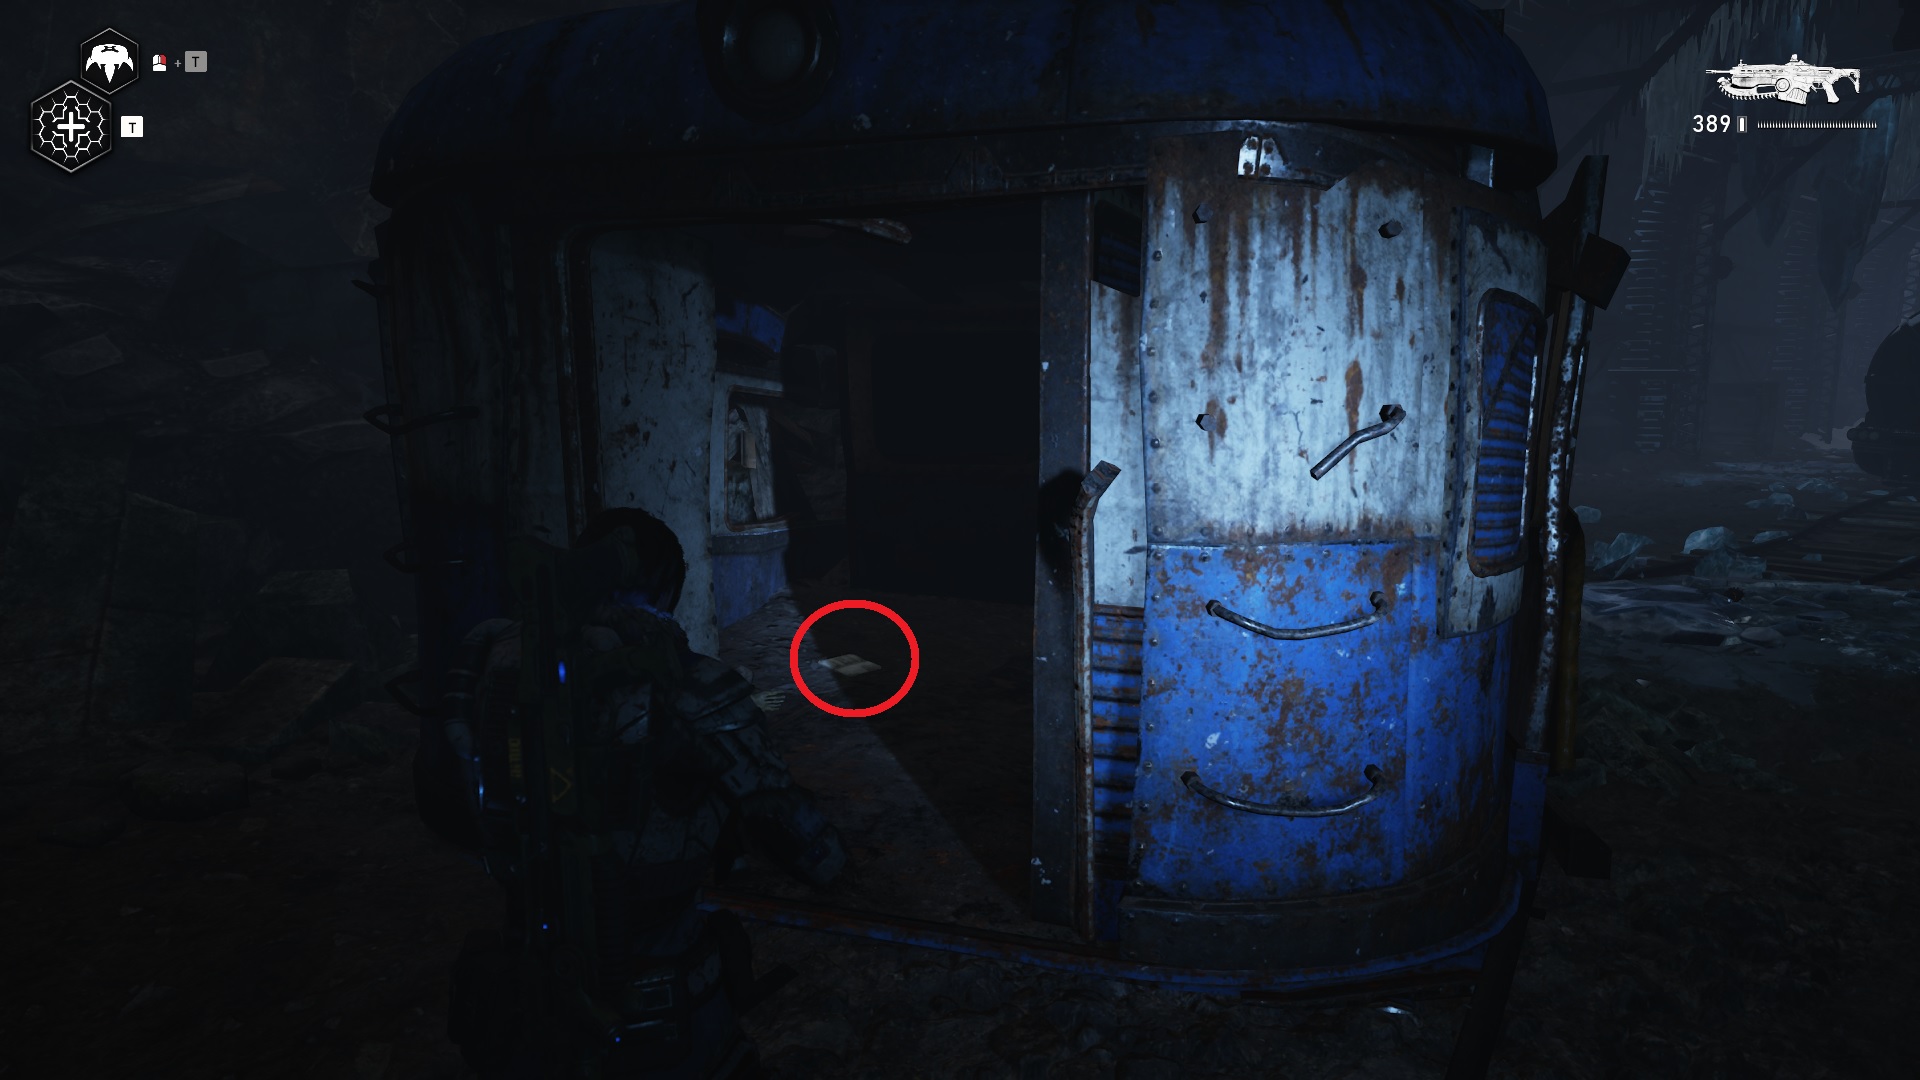
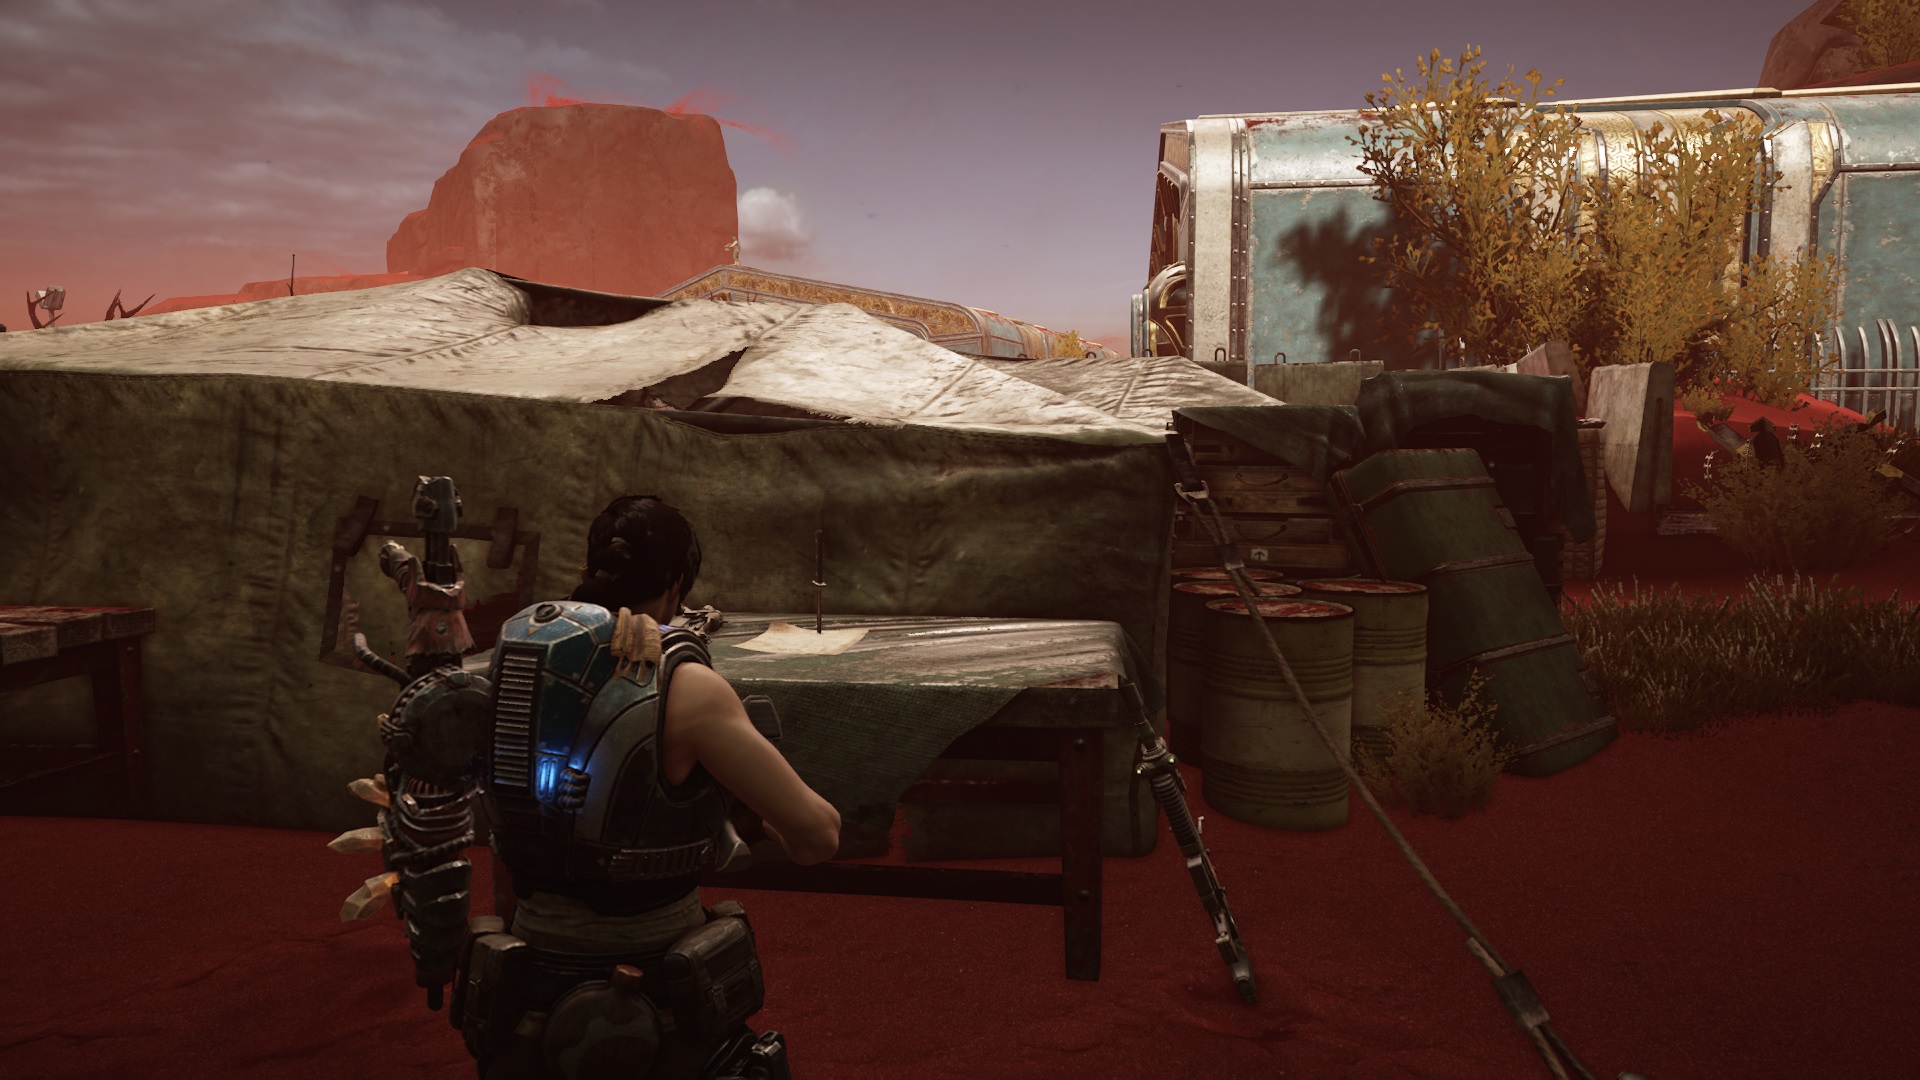
Lightmass Missile Strike Authorization
From the room where you fight the first Scion in the game, stick to the left-hand side. You'll see a door to the left. Head through and follow right to the end. You'll be in the right room if JD says "Not the commander's office". Right at the end of this room is a console with a sheet of paper on it. The paper is the collectable you seek.

UIR Hammer of Dawn Blueprints
After gaining access via Dave to the commander's office door, right at the back of where you faced the first Scion in the game, there is a room straight ahead of you. This room is easily identifiable by the poster at the back that reads "The UIR MENACE won't stop until you defeat it". On the desk is a bundle of papers in front of a globe-like object. These are the UIR Hammer of Dawn Blueprints.

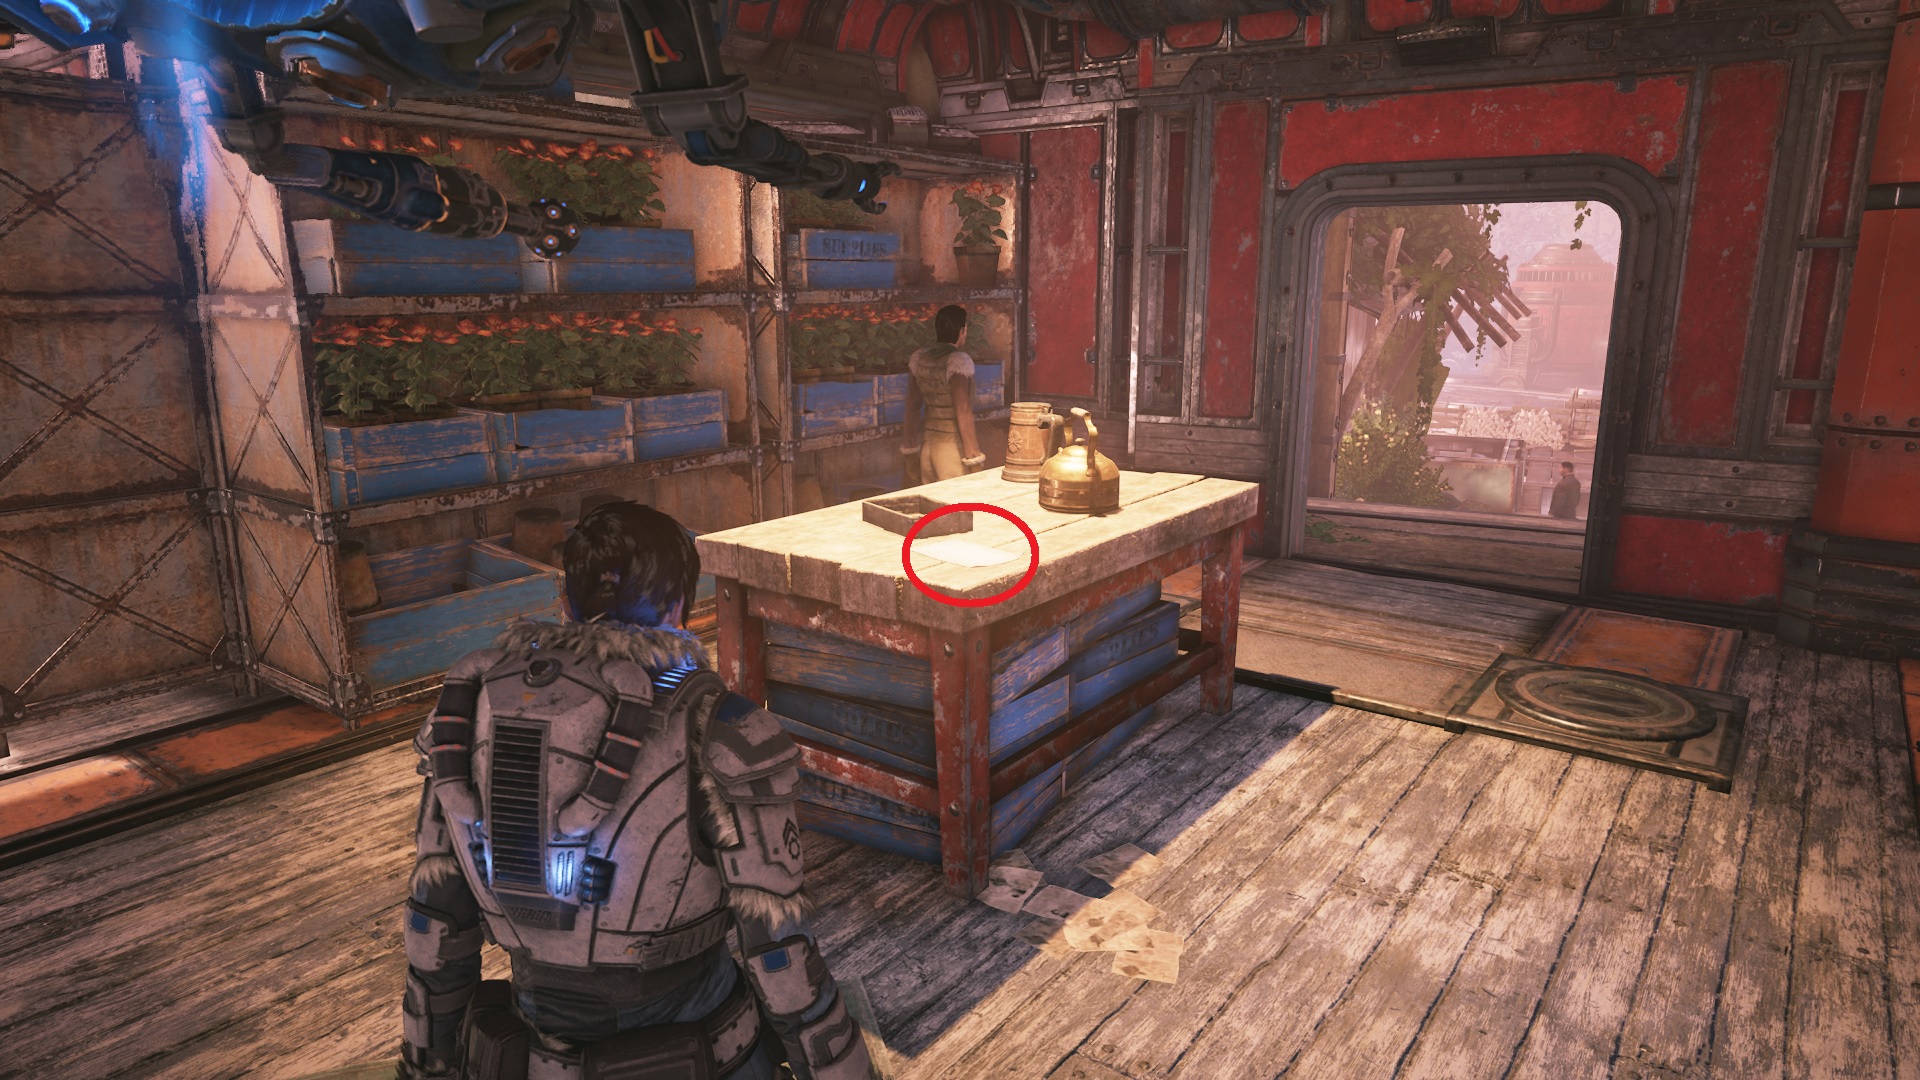
Act 1: Diplomacy - Gears 5 collectables
The second mission begins in Baird's laboratory. Despite the mess, this chapter is a tame, rather short-lived part of the game. It's also where you are introduced to the Gears 5 components, but don't stray too far into the level without picking up the various Gears 5 collectibles. Three of them are found within the confines of Baird's lab, while the final two are in the second part of the level.
Act 1: Diplomacy Component locations
- Inside the armory, lying on the table.
- Inside the armory, head around the back to find a locker with "Reed" on it. It's inside the locker.
Photograph of Kilo Squad
From the start of the level, turn left and go towards Baird's desk. There is a small photograph on the desk that should be relatively easy to spot.

Mark 3 Lancer Blueprint
Follow Baird further into the laboratory and you'll find some boxes on the left, marked as "Medical". The blueprint that you seek is on top of it.

Trauma Record - Marcus Fenix
Walk past Baird before going into the testing facility and you'll find a discarded Chinese takeaway box lying on a steel box. Beside it is the Gears 5 collectible that has Marcus Fenix's medical report.
Gym Notice to Trainees
After the cutscene where Fahz gets slugged in the face, turn to the left and look at the wall. You'll see a notice here that you can pick up that goes into detail about how Fahz has been expelled from the bi-weekly CQB training program. Why this is a Gears 5 collectible, I will never know, but it's certainly an amusing read.

DBI Marketing Brochure
Just before pushing the button that goes into Jinn's office, you'll see some grand paintings in a rather fancy looking lobby. On the bench to the left of the door, you'll see a discarded pamphlet just lying there. This turns out to be a marketing brochure for Baird's business venture.

Act 1 - This is War - Gears 5 collectables
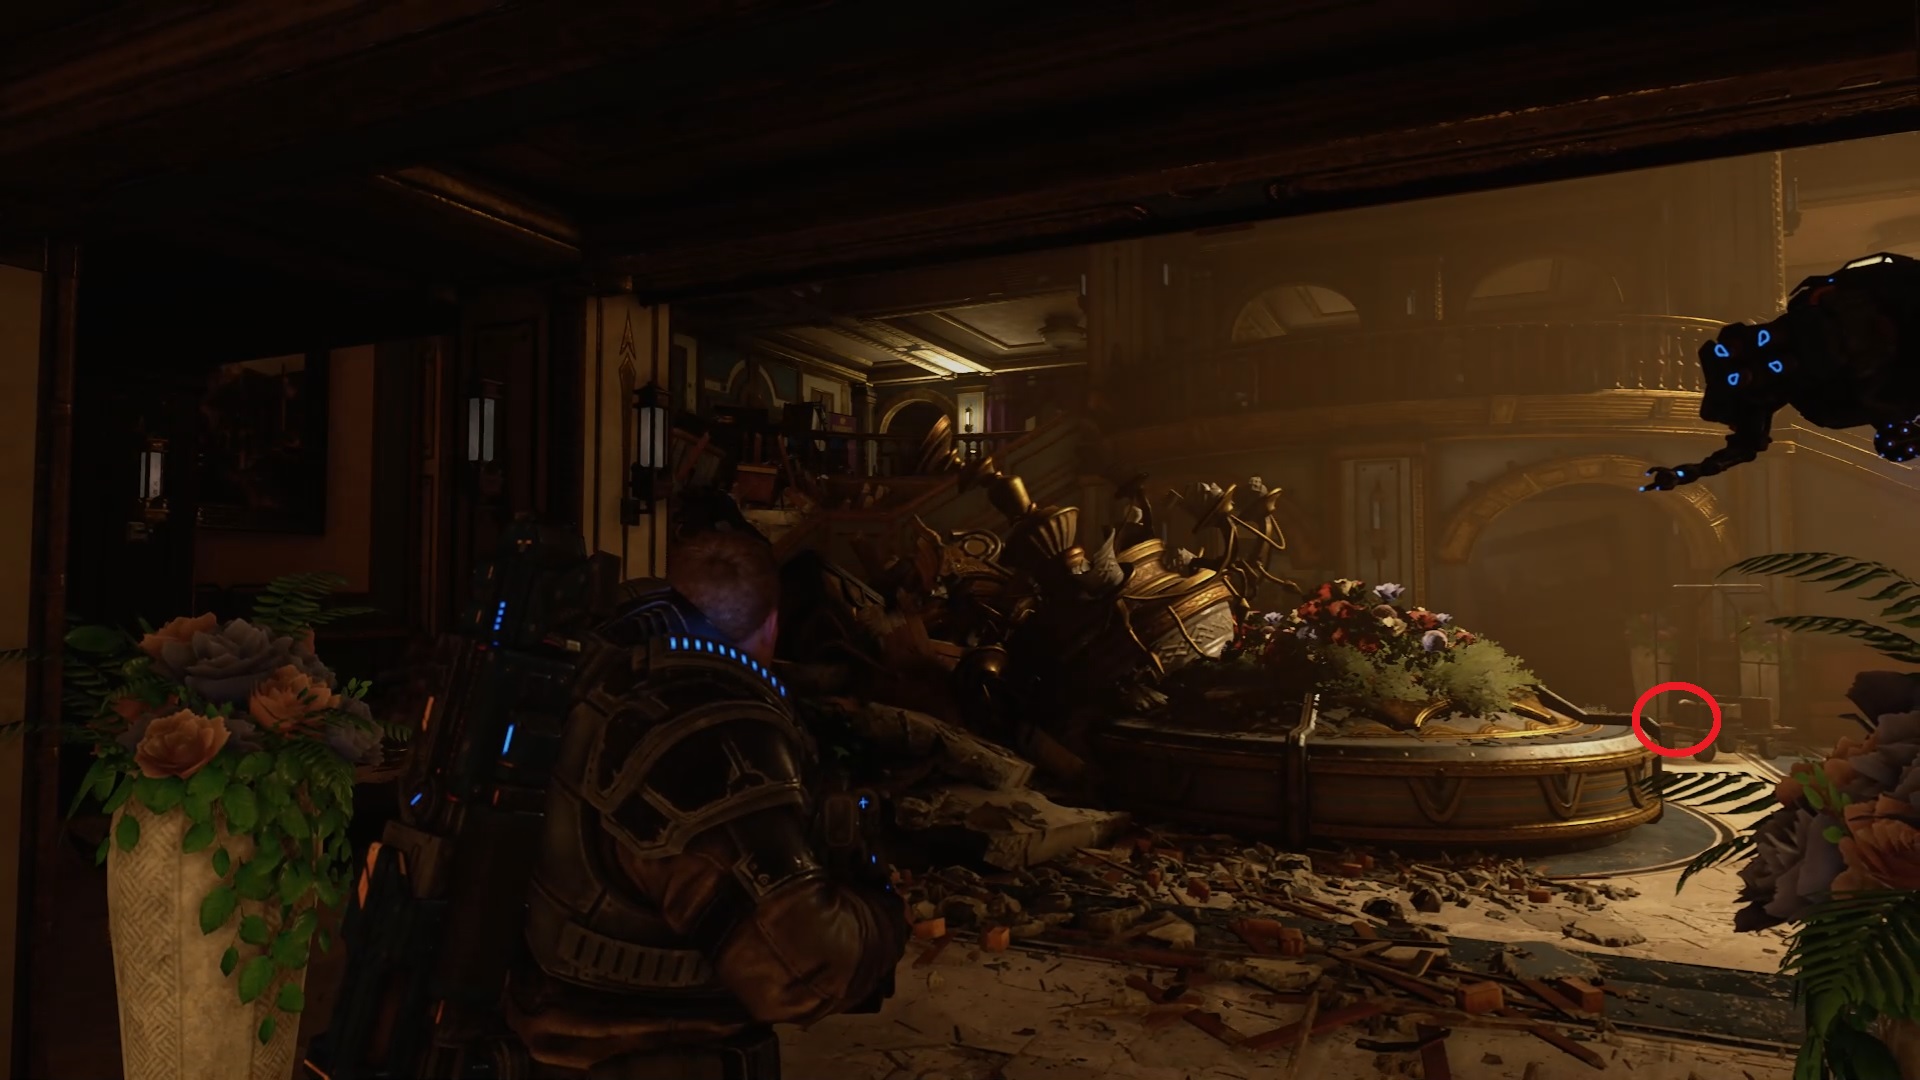
Well, this rescue mission went off to a great start. Not only did your whirlybird take a rocket to the hull, but you're now stuck in among the wreckage as a bunch of Juvies descend upon you to rip you to pieces. This is quite the long one with a lot of hidden Gears 5 collectibles, and one that is a little out of the way.
Act 1 - This is War components
- After fending off the Juvies, head from "The New Emphyran: 20th Anniversary Edition" to the other side of the room, through the door threshold. It's close to the wall. If you duck through the broken wall, you've gone too far.
- Head upstairs after defeating the first wave of normal Swarm. It's in the middle of the copy room.
- Heading downstairs after the friendly COG shoots at you, take a detour to the right of the staircase and investigate the wall nearby for 3 component points.
- After being asked if you came to rescue the civilians, head into the small room straight ahead and look to the right.
- After the mid-mission checkpoint, instead of heading left into the wreckage, head right to the broken bridge. Use Jack to bring over the component.
- When you've fended off the Juvies in the town, look for a shop named "All that Juice". Head inside and all the way around to the openable container.

COG Tags: Fallen Raven Pilot
Just steps from when you start the mission, head to the body in front of you to find the first Gears 5 collectible of this mission.

The New Ephyran: 20th Anniversary Edition
Head into the copy room just inside of where you start the mission and look to the desk on the left-hand side. It should be on the desk and have Jinn on the front cover.
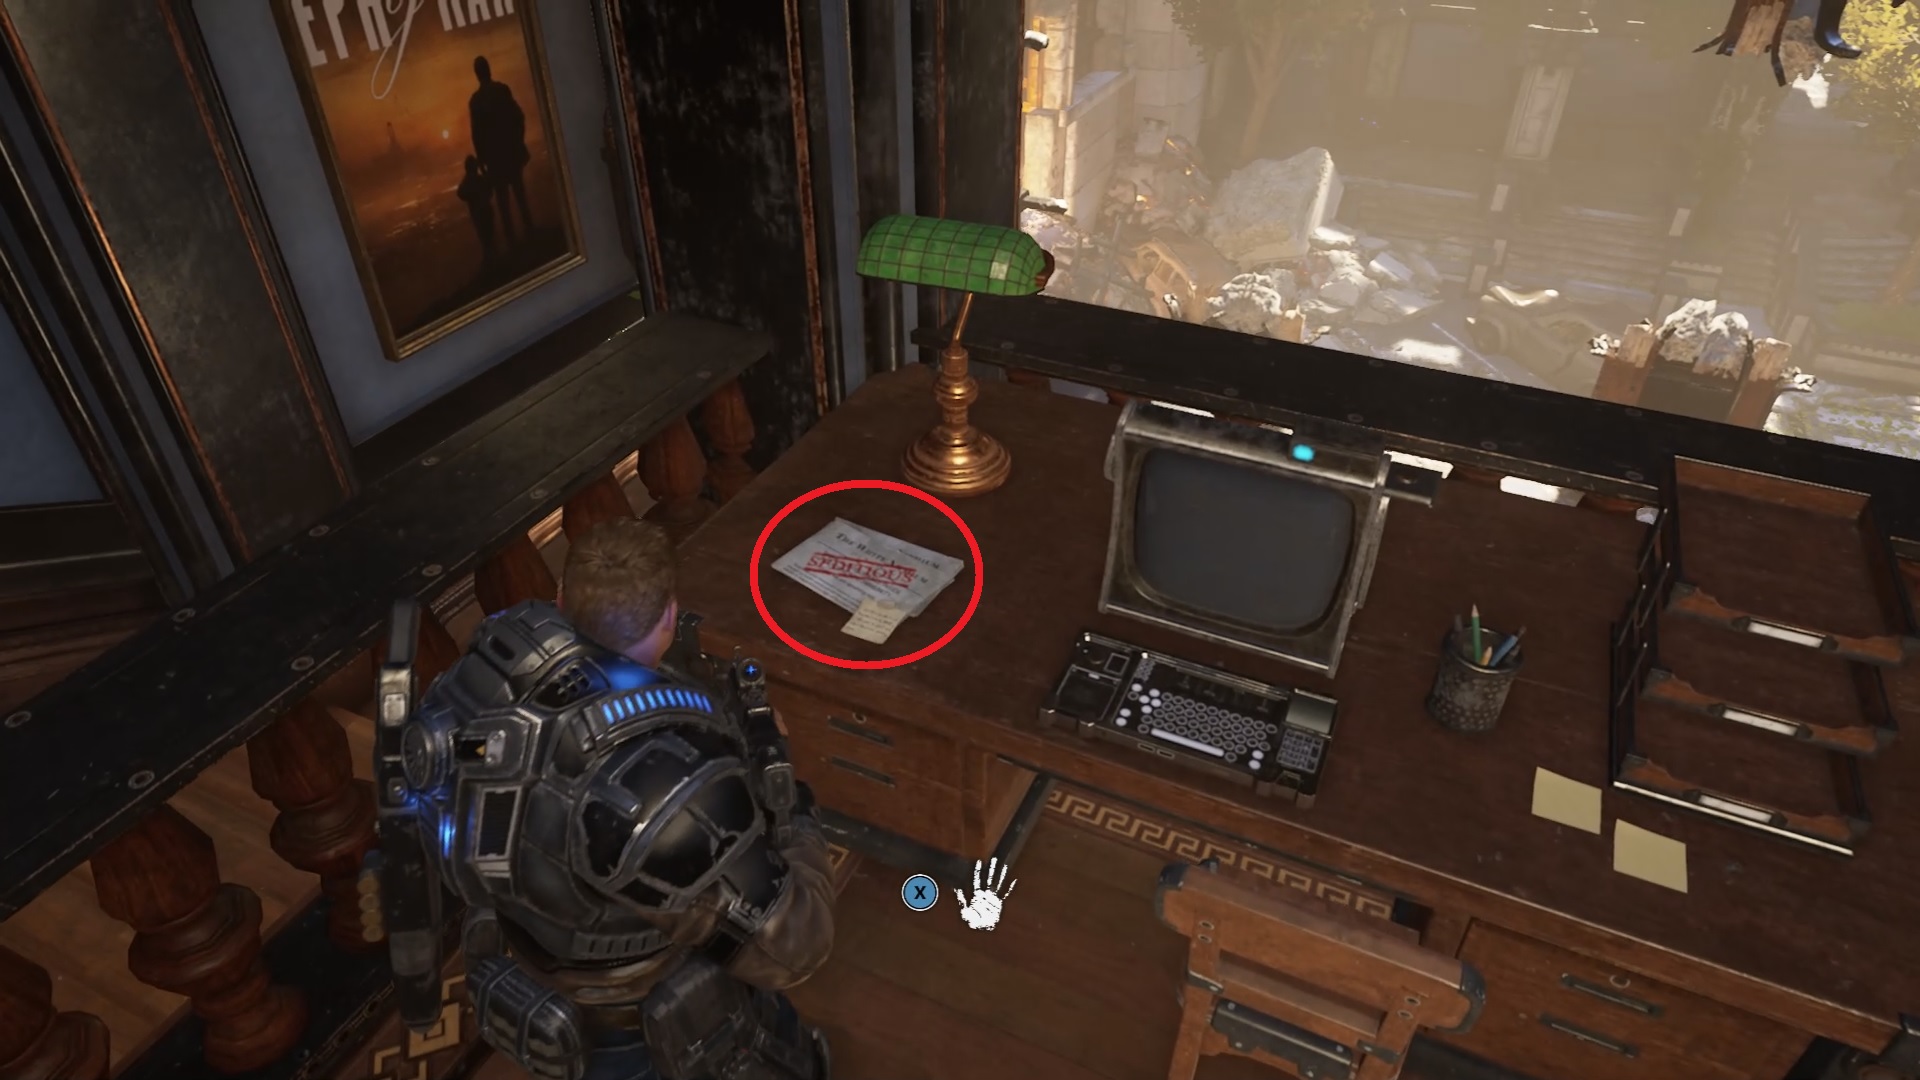
Seditious Literature
Head upstairs after shooting the Swarm in the office and you'll see some more desks in the newspaper office. On one of the desks is a sheet of paper with a red "Seditious" notice stamped on it.

Settlement 2 Welcome Package
After having the run-in with the friendly COG soldier and seeing the civilians that need to be evacuated, there is a room to the left, close to where the spare ammunition is. On the table to the right as you enter is the brochure.

Storied Embry Star
This Gears 5 collectible is very easy to miss. After defeating the two Pouncers, don't go through the gate just yet. Instead, head to the building where the Scion emerged from and head upstairs. Towards the back wall, there is a chest of drawers and a broken vase. In the open drawer is the Embry Star.

COG Tags: Fallen Gear at Condor Crash
Upon entering the doors to the mid-mission checkpoint, head to the left and towards the crashed condor. In amongst the wreckage, you'll find the tags. If you come to a door on the right, you've gone too far.

Seran Colossus
After being ambushed by the Juvies, there are several shops. Look inside the bookshop and to the table with books towards the front, with the gold statues reading books. One of them is the book you seek.

Act 1 - The Tide Turns - Gears 5 collectables
Things turned to hell when the leeches turned up. Now you have to escape the settlement, find your separated friends, and pick up some nifty gear along the way. Then there's the Gears 5 collectibles that you can find along the way.
Act 1 - The Tide Turns components
- From the beginning of the level, head inside the coffee shop and around the back into the kitchen to pick this component up.
- After picking up the Stim, run through the fire with the ability enabled. Head onward until you can see a shop on fire called "Blooming Wilds". Use the Stim to run through the fire and pick up the component inside.
- Head into the delivery point by the Hotel and before opening the double doors, circle around and lift up the garage door. On the vehicle parked next to it is a component.
- Heading into the theatre, turn left towards going into the dressing room, then turn right to the storage facility with the top hat. Use Jack to fish out the component.

Memo to Bohma Staff
When you reach the delivery point with a sign that says "Staff Only" on the front, head down the stairs on the left and climb up the open hatch. Walk all the way around to find the memo.

COG Tags: Fallen COG at Hotel
There will be a door to open inside the delivery point that leads to a very dark room. Straight ahead of you is a blood trail, leading to a fallen COG soldier. Pick up his tags nearby.
Lost Horse Plush
No matter if you succeeded or failed in keeping the Rejects asleep during the stealth section, you'll pass through some golden doors. Head underneath the stairs to find the discarded children's toy, close to a vase of flowers.

Settlement 2 Summer Birth Pamphlet
Head upstairs from the Lost Horse Plush to find a sign that says "Parents of Settlement 2". Look to the tables next to that sign to find the pamphlet, next to some baby bottles.

Song Lyrics
When you reach the theatre and reunite with Marcus and Kait, head into the dressing room to the left and turn left again into a side room. Look to the table on the right for the lyrics.

Worn Lighter
From the dressing room, head forward until you reach the backstage area. There is a dressing table with a bust on top of it and other trinkets. One of these is the worn lighter.

Octus Canon Scroll Prop
You'll eventually come to the stage, with the curtains currently drawn. Before opening the curtains, look at the storage crate near the switch for the prop. If you are looking at the switch, it's to your right and back a bit.

Act 2 - Recruitment Drive
The first mission in the second act has you take control of Kait as she tries to negotiate with the village elder. There's a ton of Gears 5 collectibles and components to find along the way and some are easily missed.
Act 2 - Recruitment Drive components
- Component - From start, head downstairs and turn left into Produce shop. It's by the apples.
- On the right side of the main street, follow the boy who shoots with the wooden lancer. Turn right again and head downstairs into the room with ice blocks to find the component.
- After the checkpoint gate, you'll see a building to the right of where the steam vent fails. Inside is a component on a shelf.
- Inside Salvage N' Trade, there's a component on the desk.
- Head downstairs after passing through the workshop to find a component on the floor in the room on the left.
- After the vision, head into the control room on your left and look for the component on the shelf.
- Heading down the stairs towards the steam farm, where people are planting things. Head around the back of the red building to find a component on the floor.
- In the garage after the cutscene towards the end of the chapter, head to the right-side of the garage and open the yellow hatch.
- In the garage, climb the ladder on the left to find three more component parts on a console.

Hand-carved Riftworm Flute
Head downstairs as soon as the mission starts. You'll see a doorway leading into a shop. Look to the till to find the flute.

Ilima City License Plate
Walk down the main road of the town to find a furnace alongside the path on the right-side. Head close to the fire to find the license plate.
Lost Gear Helmet
When you find a giant painted bone on the main path, head into the nearby bushes. Within you'll find a helmet from a lost COG soldier.

Wooden Lancer Toy
After the checkpoint gate, you'll come across the main town. Make your way past the steam vent and a boy will taunt you by calling you fascists before running away. leaving his toy lancer behind the cement block to the right-hand side of the street.

Major Howl and the Battlin' Ants
When you reach a shop called "Salvage N' Trade", head inside and check the display case next to the lantern. The shop is on the left side of the main path.

New Village Rules Mandate
At the end of the path, there is a workshop you enter to progress further. Upon entering it, look to the lockers on the left and you'll see the mandate hanging there.
Note to the Chief
After the vision, walk into the yellow building that's in front of you. There will be a note on the table.
Norsko's Letter
Upon arriving at the steam farm, stick to the right of the path. There are some tires, along with a wooden crate nearby. Check the crate to find the letter.
Outsider Skiff Schematic
Make your way back to the first section of town - the bit with the furnace. Upon arriving at the workshop to the left, find the silverback mech and the nearby Gears 5 collectible that's on top of a container.
COG Tags: Oscar Diaz
Upon leaving the village and entering a garage of sorts, there are some tags in the corner of the room next to a red tool cabinet.

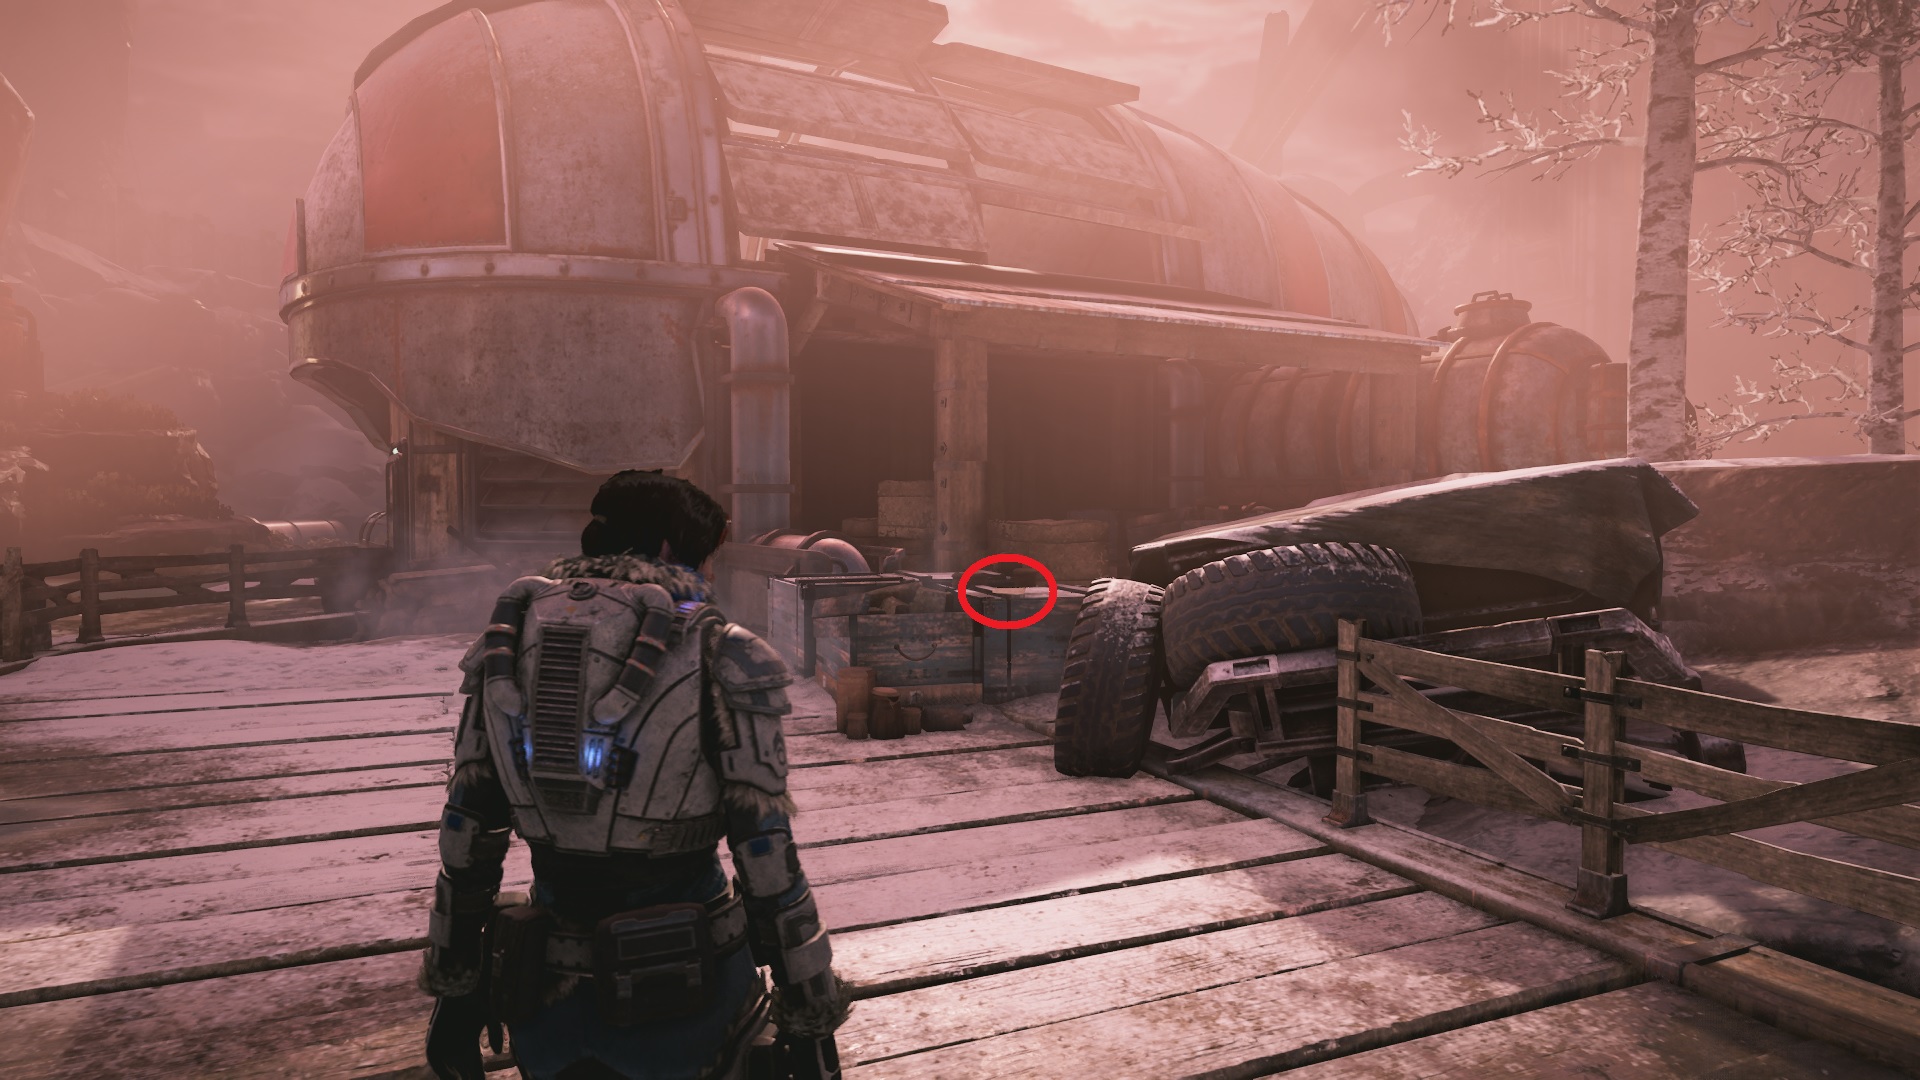
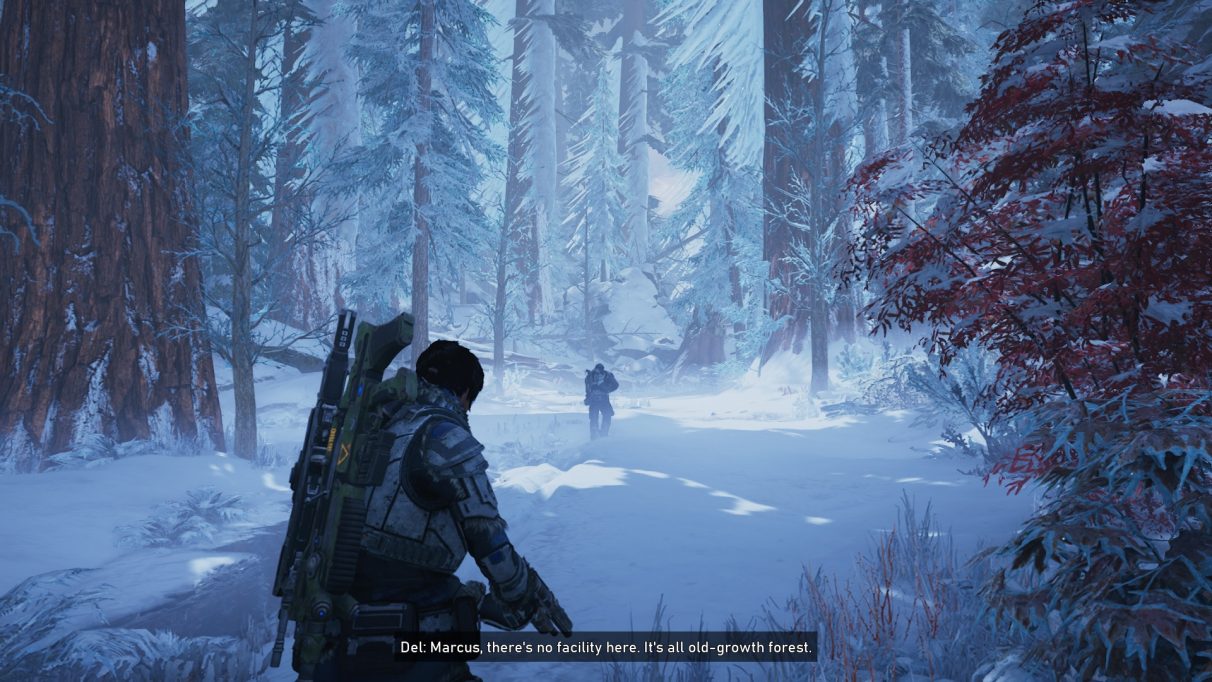
Act 2 - Into the Wild
It's time to take out the Skivv and glide around the frozen landscapes towards New Hope. This massive open-world section has some hidden surprises and that means a few Gears 5 collectibles to nab along the way. We're listing these ones slightly out of order as one is much easier to pick up along the way, rather than
Act 2 - Into the Wild components
- Inside the train tunnel, after defeating the Carrier, open the train car to find a component.
- Towards the gate to the east of the first gate, look at the wrecked vehicle closest to the gate. On the right-hand side, there is a buried component.
- At the camp on the way to New Hope, there is a component there.

Islander's Lost Earing
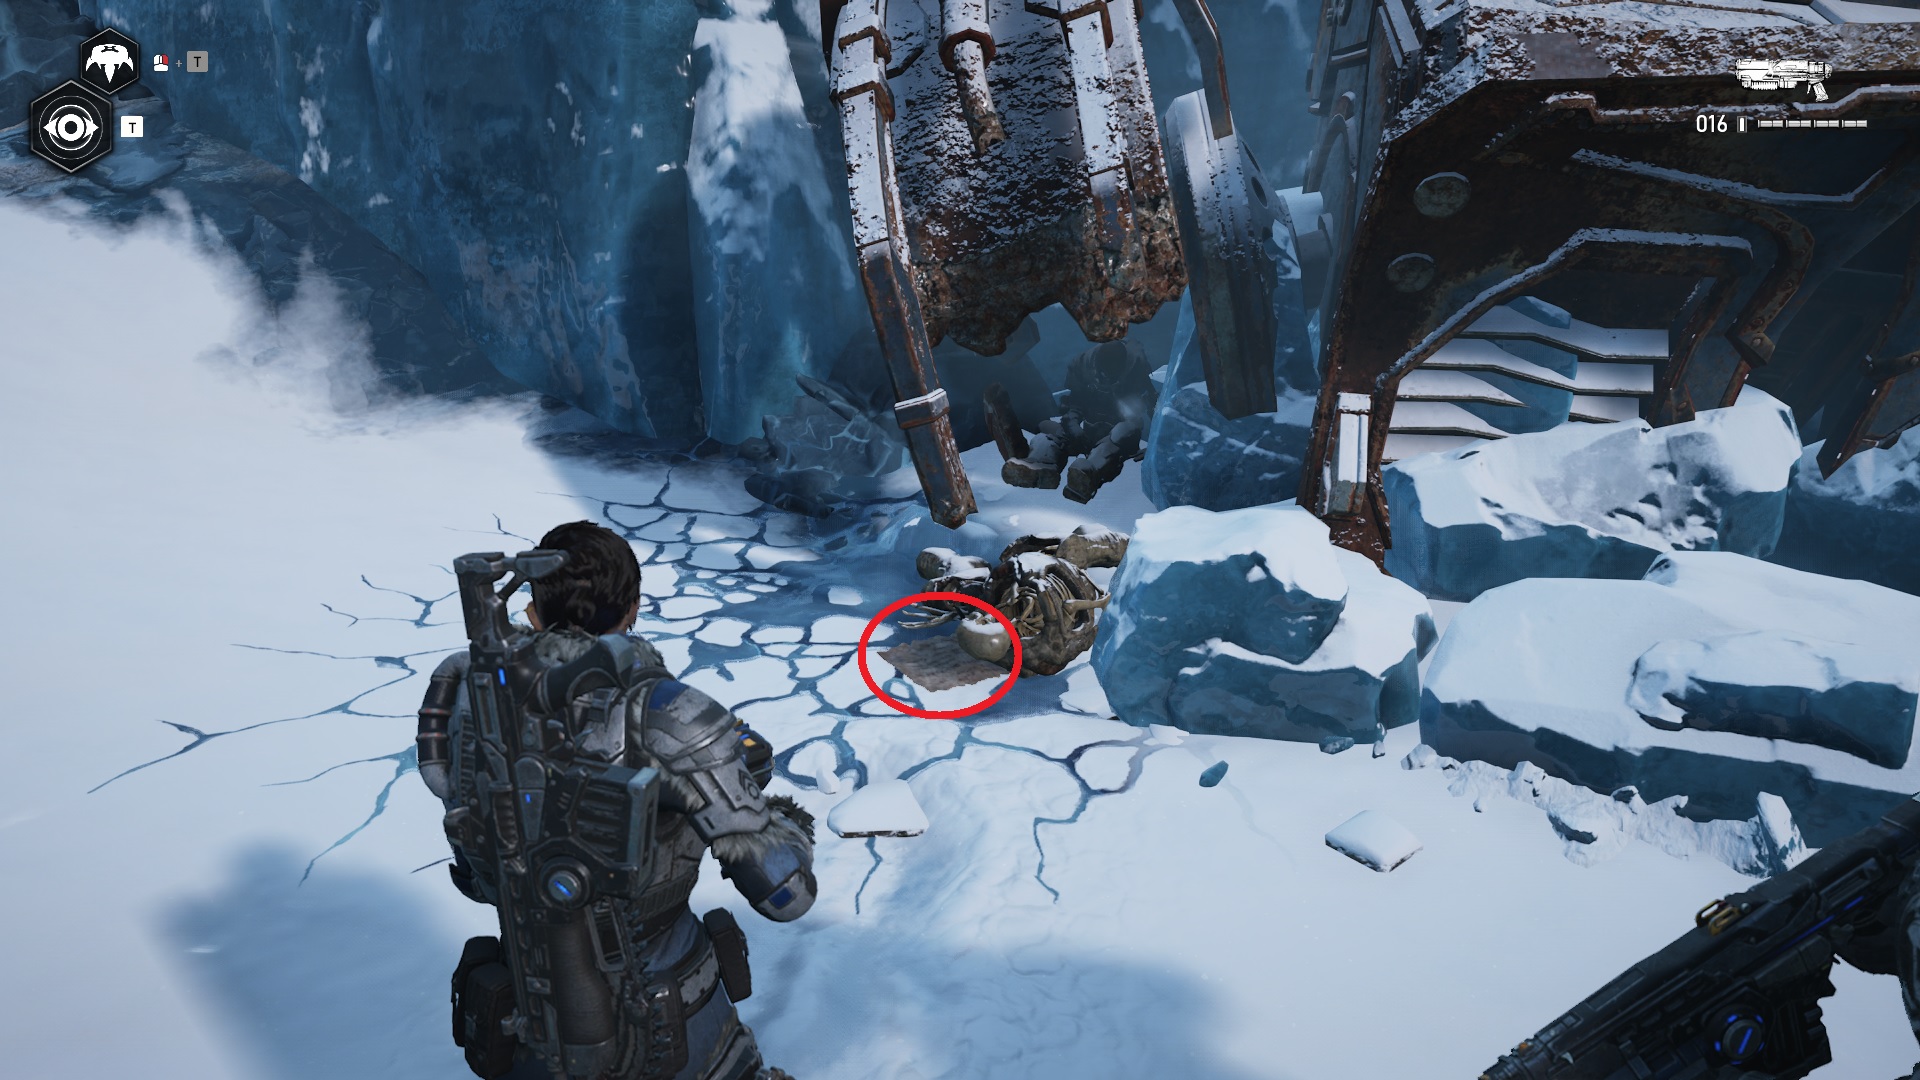
From the COG gate you opened at the beginning of the mission, head due east to the larger gate. There are two vehicles submerged in snow slightly west of this. The one closest to the frozen river has a nearby skeleton has the earring and a Torque Bow.
Grindlift Maintenance Notes
When you come across some train tracks, follow them to the nearby tunnel. There's a cave south of the tracks and at the end of it there's a blue COG train and a carrier. Kill it and kick the train door open for the notes.

Faded Photograph
Leave the tunnel and follow the tracks to the train car that's crashed into debris. A body inside the train car has a photograph on its person.

Lena's Journal
Carrying on with the path towards New Hope, there is a small campsite with green tents. Investigating this area will uncover a journal on a snow-covered stone next to the kettle near the fire itself.
Act 2 - Forest for the Trees
Upon reaching the marker for New Hope, Kait and Del arrive at a forest. There's a fair number of Gears 5 collectibles scattered throughout the facility found within, together with a host of components.
Act 2 - Forest for the Trees components
- Once you've defeated the Warden on the bridge, cross it and enter the tomb on the right. Head downstairs and use Jack to open the safe containing the three components.
- After dropping into the prison cell, head out into the hallway and look for a room emitting gas. Put on the Stim perk and run through to grab the three components.
- Jack into the door to the right of the hallway to find three component parts.

Intercepted Letter
As soon as you make your way inside the New Hope research facility, there is a locked gate on the right-hand side of the room. Head there to find a letter sitting on the desk.
Sovereign Directive 10345
After falling into the cells, head out into the hallway and turn right. Keep walking until you see a locked door on your right. You'll need Jack to open the door, which contains the directive on a desk.

Patient Analysis AX-331-2
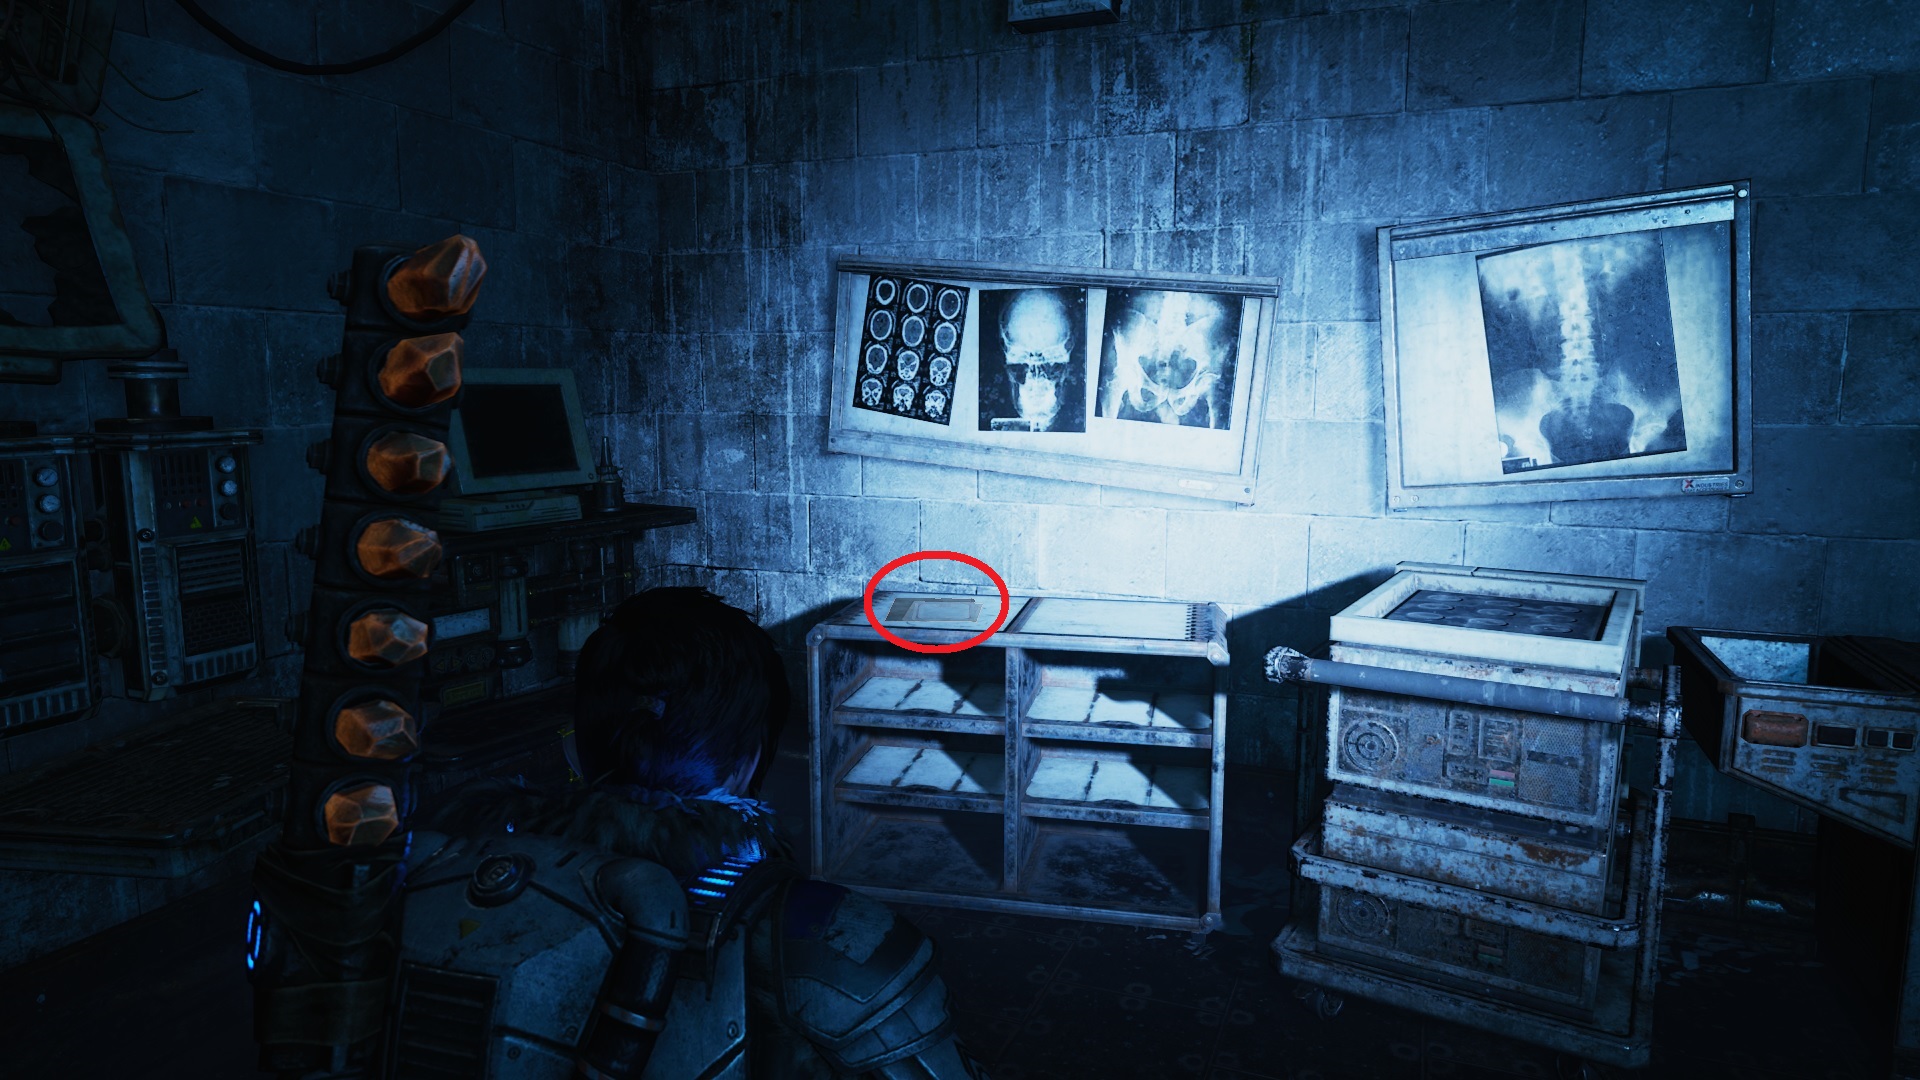
Once you've obtained the Sovereign Directive, head back into the hallway and continue until you reach a laboratory on the right. On the left-hand side of the room as you look at it, you'll find the collectible you're looking for on the small table next to the bloody surgical bed.

Patient Analysis EV-184-9
Eventually you'll enter a kid's room and vault through a window. Keep to the left until you come across a computer workstation. To the right of the PC is the file you seek.

Patient Analysis RK-619-4
After arriving at the stasis tanks, you'll drop down into a hallway. Take the first door on the right and enter the room with the dead Sire on the central table. Look to the table next to it to find the file.

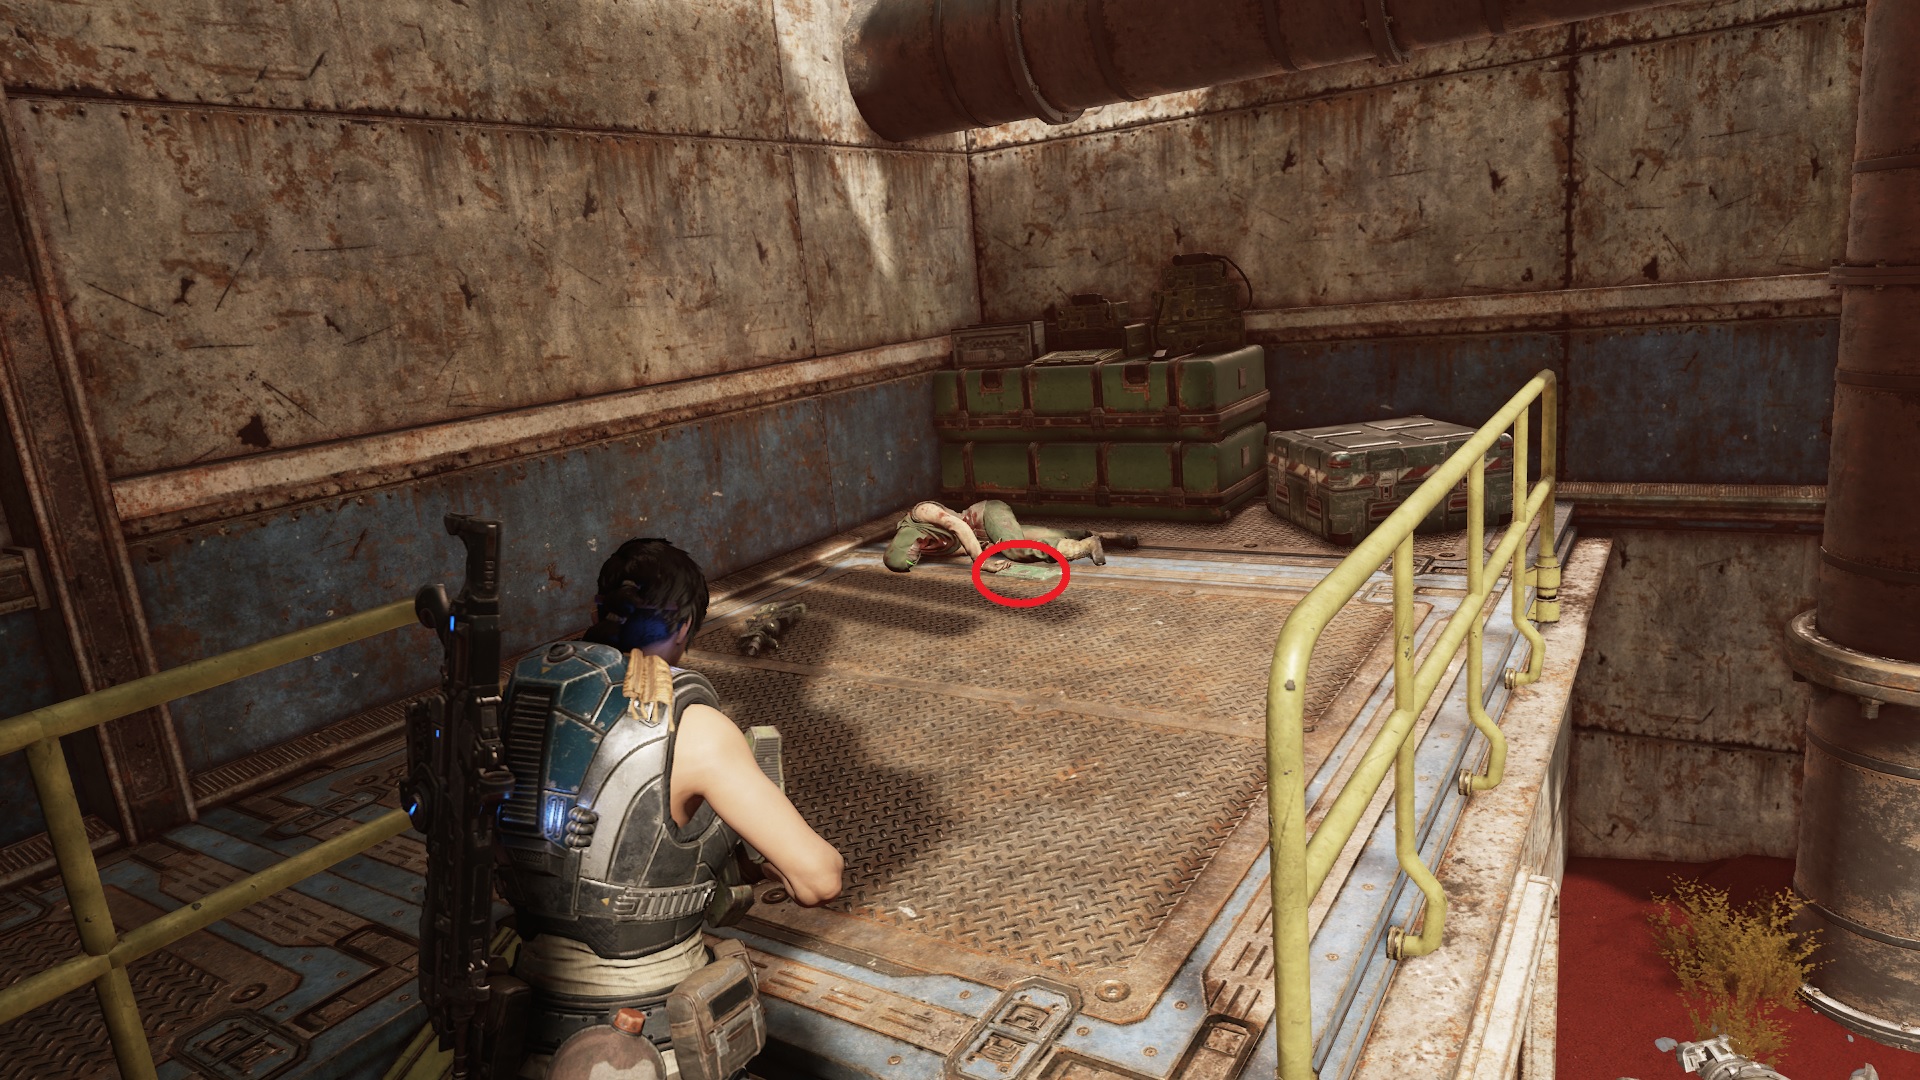
Timeworn Data Drive
In the server room, keep to the right and follow the wall. Looking at the shelf near a number of computers will give you the data drive.

Act 2 - The Source of it All
Well, I don't know about you, but I'm kinda glad to see the back of New Hope. It's not a very nice place. There's plenty more Gears 5 collectibles to find in the next chapter too, in fact, this one has 10 in total.
Act 2 - The Source of it All components
- After defeating the Scion and snipers at the gate, head into the control room and open the hatch for three components.
- Before the first communications tower in the east, take a detour around the left side and up the hill. Cross the ice bridge and head for the fuel tank. It's on the western side of it.
- Just before getting to the communications tower in the east, check the orange building to the left of the path. Inside you'll find a component hidden between a console and an inactive generator.
- Once inside the eastern communication's tower, after dealing with the razor hail and boulders, head downstairs and look back at them to see the component.
- After hacking into the computer, enter the door on your right. You'll need Jack to grab the component off the top of the shelf to your right.
- Just before reaching the first set of turrets in the easter comms tower, circle back to the left of the bottom of the stairs to find a yellow hatch to find a whopping five component parts.
- In the Abandoned Mines area, as you descend down the first slopes, you'll drop to an area with some yellow trailers. The one blocking the tunnel contains a component part. Don't descend down the red girders as you won't be able to get back up.
- Upon opening the metal door inside the mine after going up the lift, check the room on the right and have Jack open the safe. It'll contain five component parts.
- When you enter the room in the mines with the pods, look to the left and head inside the shack with paper lanterns. Once inside, turn around to find a yellow hatch on the wall with three component parts.
- At the Condor site, once you've fought off the Rejects and two leech swarms, head into the wreckage and turn left. There are three component parts on the right.
- At the northern Condor crash site, as you walk through the gap in the wall, head forward while looking to the right side. Three component parts are by the opened pods.
- Before you run out of the northern Condor site, keep an eye on your left to find a single component part. It's easy to miss if you're sprinting.
- In the central Old Derrick Site, head to the main courtyard and pan to the left. There's some ice blocking a small clearing. Get rid of it and look to the right for three component parts.
- Just outside of the western Old Derrick Site, there is a skeleton left of the entrance. Look behind him for three component parts.
- In the substation near the northern communication's tower, there is a single component part located near the console on the left as you walk in.
- As you walk to the northern communications tower, you'll find an abandoned Condor. Crack open the safe in the wreckage for three component parts.
- As you approach the northern communications tower, you'll see some Rejects. Clear them out and crack open the safe on the right drawbridge for three component parts.
- Inside the communications tower, turn left before descending the stairs to find a small room. There is a hatch with a single component inside.
Act 2 - The Source of it All Ultimate upgrades
- Marked for Death - Attacks against Pulsed enemies deal 20% more damage.
- Location - At the Condor crash site in the centre of the map, clear out the enemies and head into the wreckage. Open the safe to find the upgrade.
- Brawler - Melee damage is tripled while Stimmed.
- Location - At the northern Condor crash site, clear out all enemies, including the Kestrel. It'll crash, exposing a safe, which Jack can unlock.
- Seeker - Shock-Bots chase targets and do double damage.
- Location - This is found at the sub-station near the northern communication's tower. You'll need the access code found near Lena at the other sub-station to unlock it. Once done, unlock it and learn the fate of the other survivor. There is a safe that Jack can open up which contains the upgrade.

Security Memorandum
Just before accessing the communications tower to the east, there is a large orange building to the left of the path. Head inside to find a frozen body and the memo.

Krav's Locust Tag
South of the northern comms tower is an Old Derrick Site. However, don't go inside just yet. Instead, look left of the entrance to find a skeleton and some metal debris. The tags are next to the skeleton.

Grindlift Actuator Component
The northern Derrick site has a large abandoned vehicle that's seen better days. The half-ton of snow on top of it is a clear indication of this. You'll be fighting a little bit here, but once the action has calmed down, head on top of the vehicle and look for a yellow panel to open up.

Lena's Scribbles
While you're heading to the northern comms tower, there is a substation right of the path. Head over to the door and the scribbles are attached to the lock.
Orders from Ketor Skorge
In the centre of the map, across a massive sheet of ice, there is an Old Derrick Site. Look for a yellow flag and stick to the right to find a skeleton trapped underneath a dilapidated machine. The orders are next to the skeleton.

Grindlift Radiator Component
Head inside the second Derrick site and find a large vehicle towards the back of the cave. You'll eventually come across a yellow panel. Interact with it and you'll face off against some regular enemies and two Pouncers. Once they're defeated, make sure you interact with it once more for your prize.

Letter to Momma
Heading towards the Abandoned Mine in the south, there is an ice bridge that you'll need to cross. Don't just yet. Instead, head past the bridge until you come across a small vehicle and a wooden crate. The collectible is lying there on the crate.

Frayed Pouncer-tooth Necklace
Find the Abandoned Mine next to the eastern comms tower. Fight off the Swarm and proceed up the lift, making sure to kick down the green door. Climb up the wooden tower that's in front of you and you'll find the necklace on the ground when you reach the platform.
Nethercutt Mining Poster
Upon entering the mine, there is a metal door that needs lifting to continue onward. As soon as you do so, enter the room on your right to find the poster hanging on the wall right of the doorway.
Nethercutt Miner's Journal
Upon reaching the part of the mine with the pods, walk left towards the shack with hanging paper lanterns decorating the outside. The journal you seek is on top of the dinner table inside.

Act 2 - Dirtier Little Secrets
This mission is a lot shorter than the previous one, which was as open-world as Gears 5 gets. Still, now that you've found the lab, there's a ton of Gears 5 collectibles to find here, most of which are related to test subjects - again.
Act 2 - Dirtier Little Secrets components
- When you come across the main gate, there's a room guarded by two turrets to the left. This houses a generator you need to unlock, but also a hatch that has five component parts inside.
- Once inside the laboratory, head upstairs to the left and into the control room. There's a component on a table in front of you as you enter.
- After disabling the cryo-jets, head down past the frozen COG soldiers, then up the ramp to the kickable door. Inside there is a hatch with five component parts.
- Continue the tour until you get to a room with more frozen statues and some unstable experiments. Up the ramp, there is a component part to the right on a table.
- After disabling the second cryo-jet, found after the cutscene, head back into the freezing room to find the three components.
- After smashing through the ice pillar, there is a freezing room ahead. Towards the back, there is a component part on a shelf.

Nethercutt Helmet
As you progress, you'll see a large door that's being guarded by gun turrets after a vision. Turn around and walk down the path to the left. The path will fork, so head to the right until you come across a pit with a few corpses. In the centre of this is the helmet Gears 5 collectible.
Subject Analysis UL-119-2
Once you've turned off the cryo-jets in the laboratory, walk downstairs and past the frozen soldiers on the right. Continue up the ramp and kick down the door to find the file on a desk in the room ahead.
Subject Analysis TE-872-3
When you enter the room with a yellow stasis tank, there will be a story cutscene. The collectible will be on the floor in front of you once this cutscene concludes.

Lexigram Board
Make sure you equip Stim for this one. You'll need to run past a frozen room while following Niles in order to deactivate a generator. Look at the skeleton next to it to find it holding a board.

Subject Analysis EV-184-9
After shutting down the freezing contraption that's been making the facility as a whole rather chilly, turn around to walk towards the desks that are now glowing a nice orange hue. You'll find this file on the desk to the left of the lab equipment.

Sketchbook
Leave the room with the hand-scanner through the door that has a white light above it. As soon as you do, immediately look to your left to find the sketchbook on the floor.

Act 3 - Fighting Chance
After finally escaping the frozen wastelands, we rejoin the COGs as they head to a desert for their next mission. This first mission has a few Gears 5 collectibles scattered throughout, but this chapter has the fewest available.
Act 3 - Fighting Chance components
- From the beginning of the chapter, enter the small office on the left to find one component.
- Head downstairs from the beginning of the level. You'll see arrivals and departures on your right. Keep walking straight until you see a door to your right. Enter and immediately turn left, before sending Jack to pick up three component parts.
- Pass through the arrivals gate and follow the path around until you reach the room ahead. Turn left immediately and open the hatch for three more component parts.
- Beside Baird's makeshift lab, there is a small pile of scrap to the right. A component is lying there.
- Once you've picked up the Hijack upgrade, follow Baird to the training grounds. The three components are a little further on to the right, half-submerged in the sand.
- Behind the tent where you speak to Paduk, there is a hackable safe that contains five component parts.
- On the far left side of Hangar 1 inside of the main base, there is a hatch containing three component parts.
- When you get to head out on the Skivv, hang a right and head to Hangar 3. On the right side of it is a hatch that has five component parts inside.

Corisku Newspaper
As soon as the mission begins, turn around and you'll find the collectible on the bar to the right of your position.

Doomed Empire, By Logan Hobbs
Head downstairs and straight towards the baggage carousel. Once you pass the large green boxes, look to the doorway on the right to find the collectible on a baggage trolley.

Missive to Agent 9
Upon passing the metal detectors by the arrivals gate, continue along and around the path until you enter an office. The missive is on the desk in the left-hand corner of the room.
Nomad's Creed
Once you've left the building and spoken to Paduk, walk left towards the green tents. There is a note next to a gun and a knife outside of the tent on a green surface.

The Astounding Lightning Rangers!
As you get to the runway, go past the plane into hangar 4. To the left of the helicopter is a metal container with a comic book on top of it.

Act 3 - Rocket Plan
Reunited with a couple of familiar faces, Kait and her crew are venturing down to a UIR command centre of sorts. Here there are a bunch of items to collect, as well as some components. Note that while you could have picked up some items along the way from the abandoned airport to this base, they will be listed in the following chapter so as to put all the open-world Gears 5 collectibles in one place.
Act 3 - Rocket Plan components
- From the beginning of the chapter, head down and back up the other side of the stairs. Turn right to find a component hidden amongst some green containers.
- After entering the main hangar, head right downstairs one floor. Turn right and wrap around the orange pipe and you should see some lockers and a sign in foreign text. A hatch with three components is on the left of that.
- Once Fahz has ferried you across the hangar, take a left and follow the path to the end. It is a little hard to see, but there is a hatch at the wall on the end, containing three components.
- You'll eventually come across a door with the number 2 on it. Instead of going in, vault over the hump on the hill to the right, then follow the path around to find three components on some containers.
- When you get to the lift after defeating the carrier, turn right and head to the second lift. There is a hatch there with three components.
- At the Train Turntable, once you've defeated the Warden, head into the control room to find a hatch with three components inside.

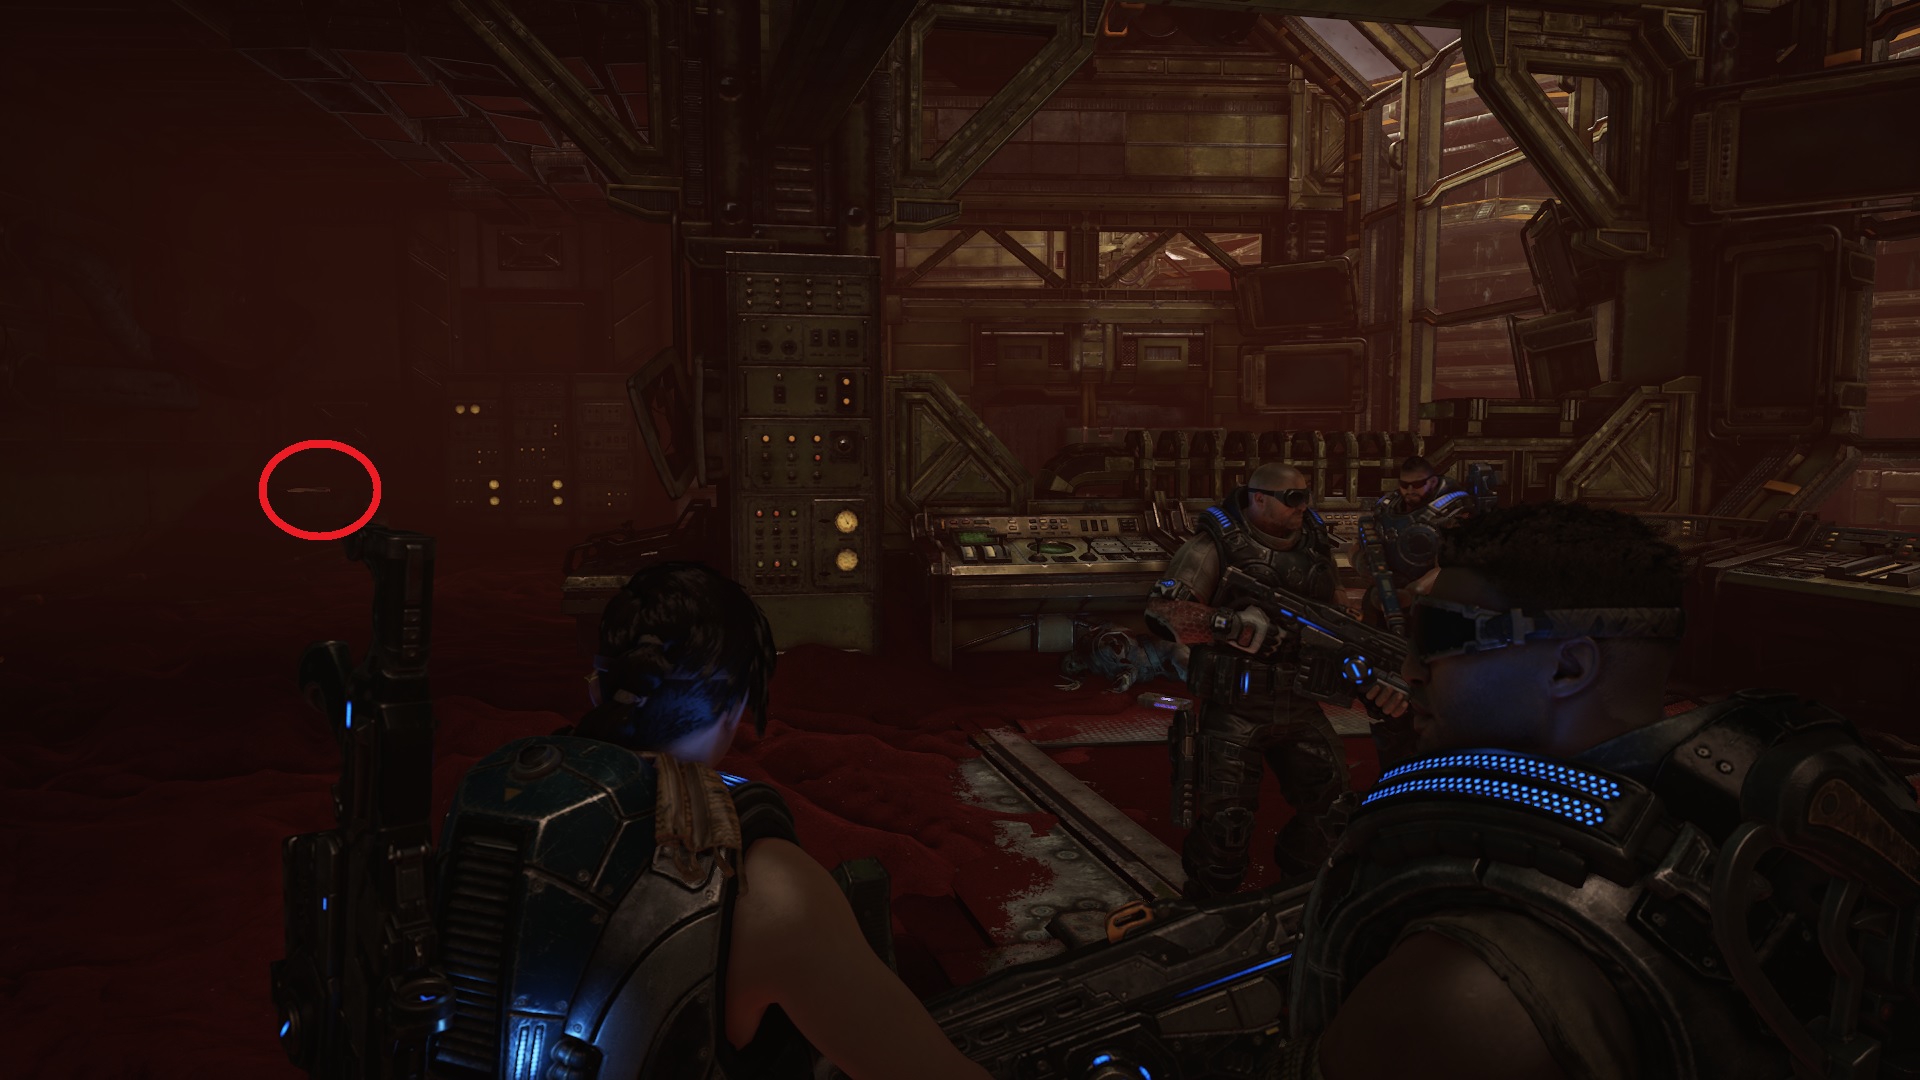
Hammer of Dawn Command Case
From the beginning of the chapter, head downstairs and through the double doors. The control room is very dark, so head forward hugging the right side of the room. There will be a command case by a skeleton and green ammunition boxes, and some sandbags.

OZP-11 Termination Directive
Inside the rocket hangar, head downstairs to the right, then down the stairs to the left. Turn to the left here and continue onward. You'll come across a control station, with some barrels nearby. The termination directive is on top of the barrels.

UIR Space Mission Brief
There is a part of the mission where you need to sneak up on some enemies. Once you've finished taking them out, go to the right-hand side of the room from where you initially entered and vault onto the staircase. This leads to a hidden room, with the brief lying there on a metal table.

Loyalist Order from Major Toly
As soon as you first see the giant circular hatch where the Hammer of Dawn satellites are, jump over the sandbags to the right and find the orders on the green crate near the Longshot rifle.

UIR Tag: Major Toly
When you enter the large sand-covered room, you'll see an inactive tank in front of you. The tags are next to a body on the ground near the tank.

The Major's Speech
We may know the major's fate, but he has more to say. When you're heading down a dark staircase, you'll see an illuminated room nearby. The speech is on the console table.

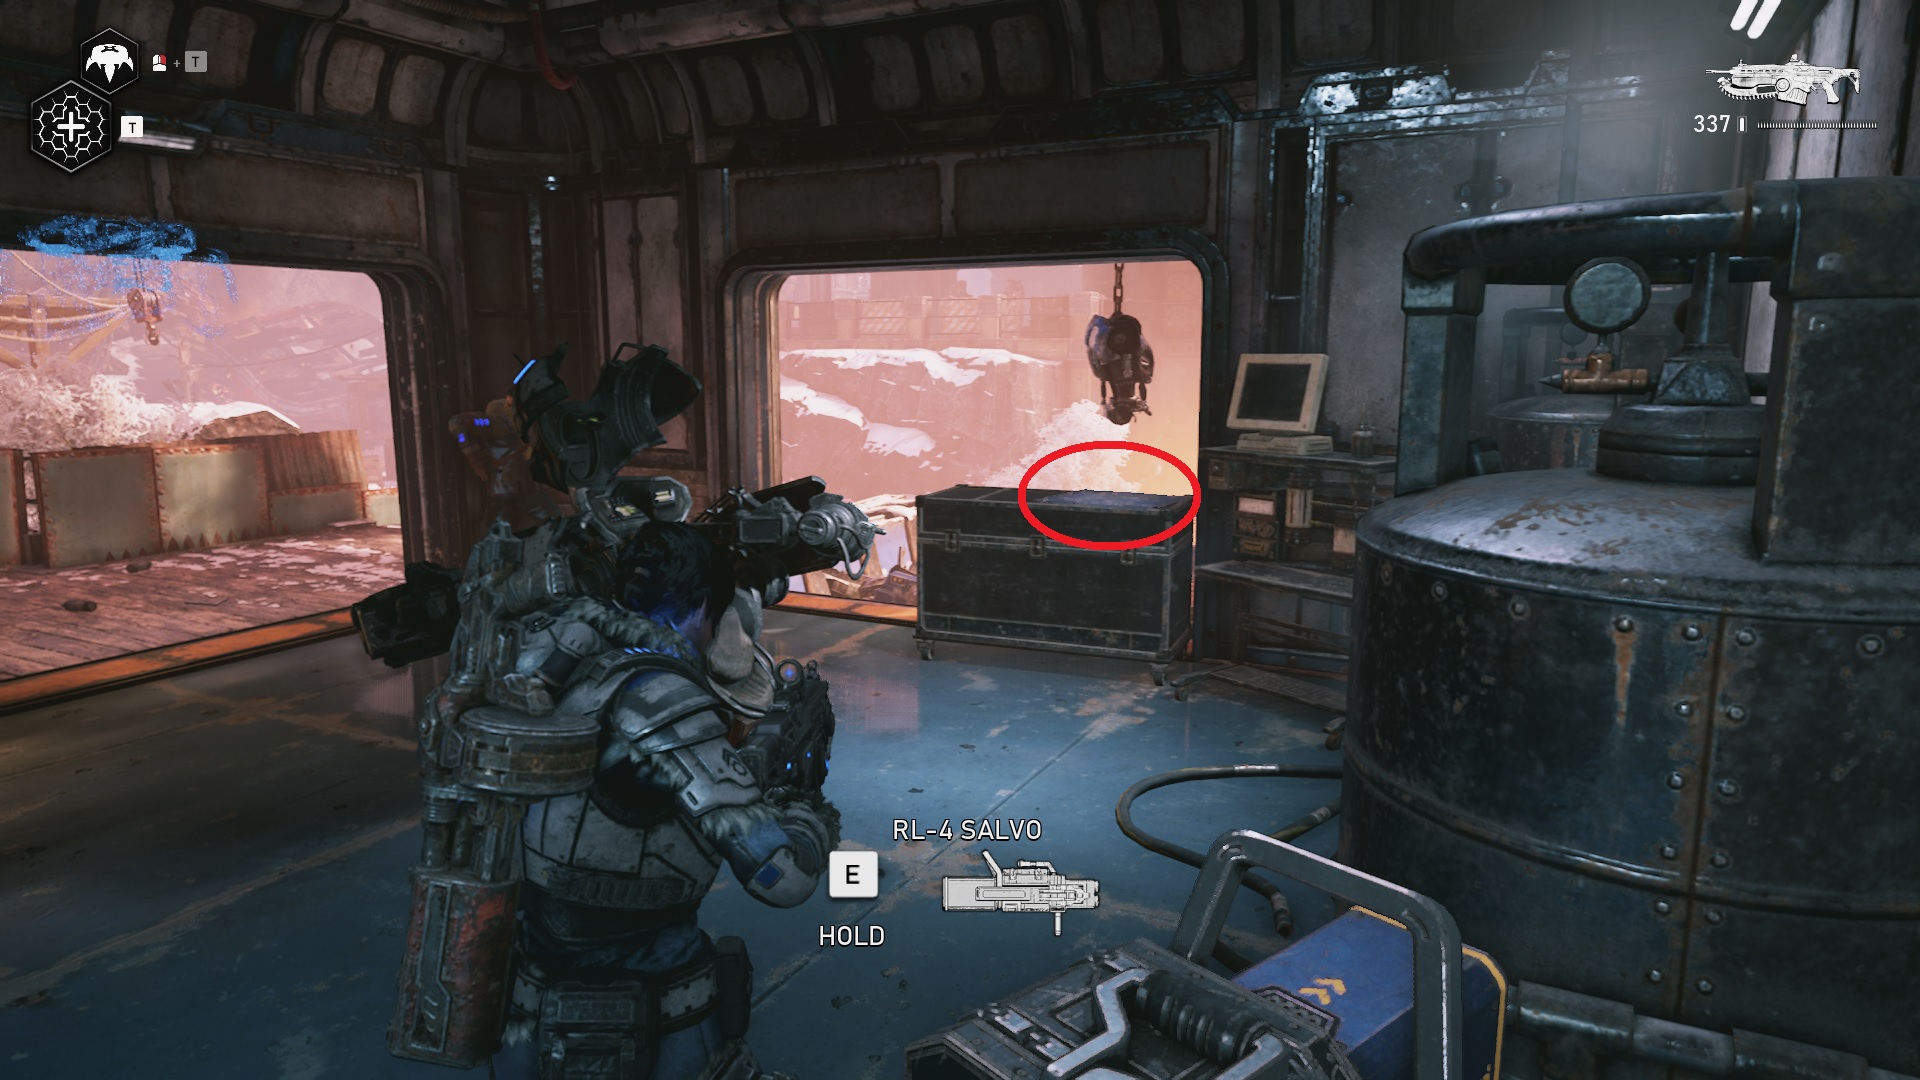
Act 3 - Some Assembly Required
Once more, we have an open-world section that frankly is quite ridiculous. There are a whopping twelve Gears 5 collectibles to scavenge in the desert and many more components to boot. If you're going to be spending a lot of time in Gears 5, it is this level and its many side objectives.
Act 3 - Some Assembly Required components
- After clearing out the water tower, head around the back of the main building to find a hatch for three more components.
- Head up the walkway after clearing the water tower. Use Jack to collect the component on the other side of the broken part of the walkway.
- After fixing the pump station, look to the crates to the right of the thing that Jack used to repair the pump to find a single component part.
- As you're exiting the ruins west of the Harbour Docks, past the exploded room with the flag on the back wall, there is a set of double doorways. Turn left as soon as you go through them to find three component parts.
- At the Harbour Docks, there is a submerged boat. At the back of the boat, where the engines are, there is a single component pice on the surface. These are not the fully submerged ones towards the big structure itself.
- As you enter the Cosmonaut Training Facility, take a detour by the tank to the left of the main path. Follow this around to find a single component buried near some scrap metal.
- Enter the hole in the Cosmonaut Training Facility main building and turn left. You should see a hatch with three component parts inside.
- As you enter the Cosmonaut Training Facility sub-level, head down the slope, then turn left when you reach a big room. You should eventually see a small doorway. Inside is are three component parts next to a bunch of skeletons. This is before using the terminal.
- After you crack open the Cosmonaut Facility with Jack, the big doors will open. Run through and hang a right, before vaulting the ledge. There is a small room on the right with a safe, containing five component parts.
- When you defeat the first Swarm enemies inside the Cosmonaut Facility, kick down the door upstairs. Turn right and walk to the end of the room. A hatch containing three component parts is on your left.
- When you make a pipe descend to make a bridge, cross it and follow the path until you drop down. Turn right and break the lock. Inside this room is a hatch with five components.
- After picking up the Beacon, follow the path and hang a right into an audience chamber. In a side room on the other side of this room is a single component part on a container.
- From the previous component, there's a door behind you and to the left. Inside is a hatch containing five component parts for you to collect.
- Outside the Abandoned Airfield, where the flags are, there is a single component part near the sandbags to the right.
- Back at the Abandoned Airfield, Baird will have a new upgrade for you. To the left of his desk is a component part.
- Over by the ambushed convoy and the Beacon parts at the back of the location are three component parts.
- After taking out the enemies at the Artillery base and freeing the nomads, head upstairs and look in the hatch to the right. There are three component parts to be found.
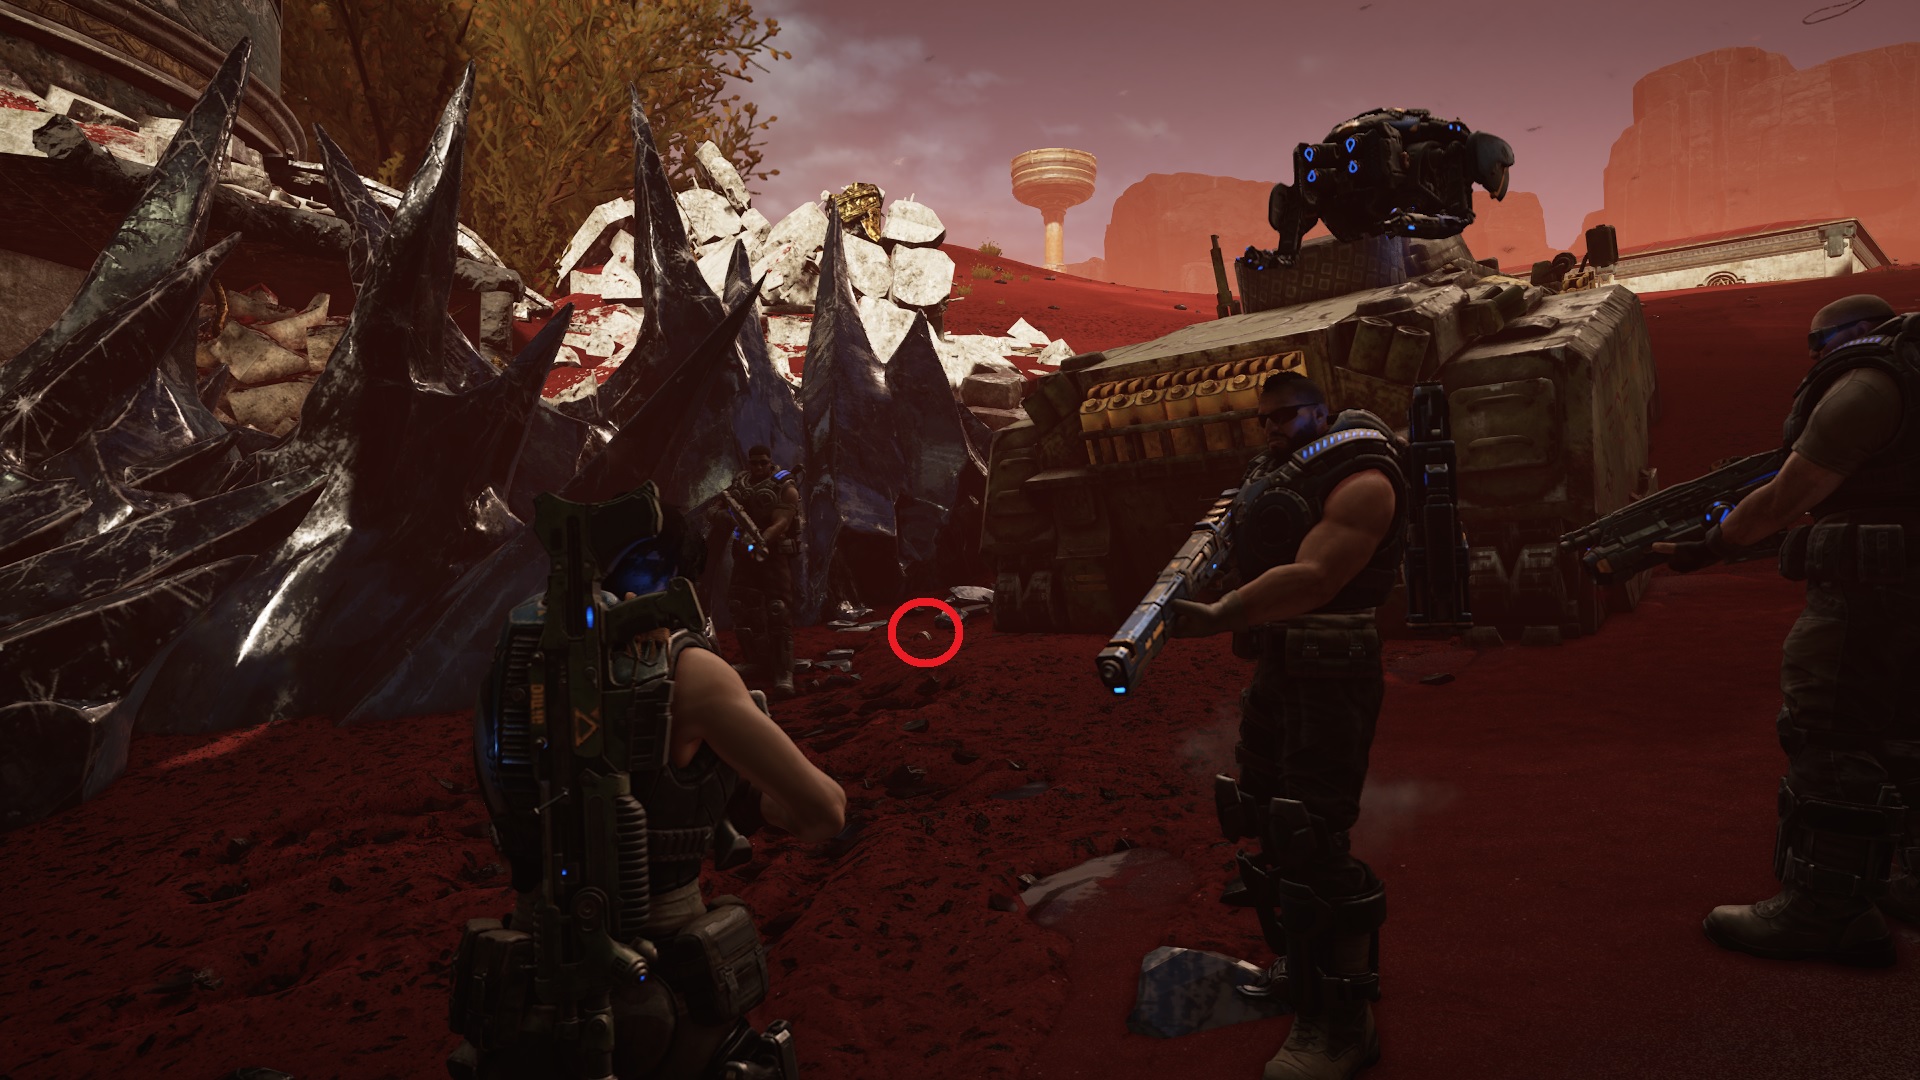
- South-east of the sandstorm there is a crashed condor site. Killing the DeeBees and venturing into the wreckage will reward you with five components, provided you get them out of the safe with Jack.
- Not far from the crashed condor site, there is a bit of wreckage to the west. Inside is a component sitting on a container. Two DeeBees will ambush you when you take it.
- Outside of the Cargo Ship to the east of the Artillery Battery, clear out the enemies inside, then head towards the entrance to the container. Before going up the stairs, take the three component parts on the ground.
Act 3 - Some Assembly Required Ultimate upgrades
- Slayer - Remain cloaked for the full duration, even while shooting.
- Location - Complete all three water tower related sub-missions (Water Tower, Pumping Station, Harbour Docks) and one of the nomads will give you this upgrade.
- Detonator Implant - Hijacked enemy explodes on death.
- Location - Collect all three of the LC circuit boards (they're Gears 5 collectibles detailed below) to get this upgrade.

Nomad's Sketchbook
After fighting off the Swarm at the water tower, open the door to the control room with the nomad inside. The sketchbook is on the desk next to her.

UIR LC Circuit A1
West of the Harbour Docks are a few trucks parked outside some ruins. You'll need to fight your way inside the ruins against some Elite Hunters, who use cloaking devices and smoke grenades. When you get inside, turn right and head straight until you come across a comms room. The collectible you seek is on the table.

Well-worn Vasgari Flag
From the UIR LC Circuit A1 collectible in the ruins west of the Harbour Docks, turn to the right to leave the room. Walk forward until you head through a doorway into the destroyed room. The flag is nearby on the back wall on your right and is collectible, despite its size.

UIR Tag: Fallen Loyalist
The end of the mission will take you inside the Rocket Hangar. Do not go in this just yet. Instead, at the entrance to the Rocket Hangar, near the green flags, walk to the right by the cement blocks to find a skeletal soldier and some tags next to it. If you passed through the barrier, go back as it's not inside there, and it's definitely not inside the Hangar itself.

Loyalist orders to Lieutenant Melich
From the Harbour Docks, head south to find some abandoned armoured vehicles. The eastern-most vehicle has a body near it which has the orders from Lieutenant Melich. You should be able to see it by looking at the bridge.

UIR LC Circuit C1
There is an artillery battery to the south of the train bridge. You'll be doing some fighting here, but once the enemies have been taken care of, head upstairs to the second floor to find the circuit in front of you on a green table.

Emergency Loyalist Radiogram
Still in the artillery battery control room as the UIR LC Circuit C1, go to the panel right at the end of the room facing the window. Find the radiogram on the left control panel.

RNV Borascu Captain's Log
East of the artillery battery, you'll find a cargo ship that's looking a little worse for wear. Enter the wreckage and follow the wall on the right to find the captain's log inside a blue shipping container.
UIR LC Circuit B1
Inside the cargo ship, head upstairs to find a collectible next to a dead scavenger and near a green container.
UIR Tag: Lieutenant Melich
There is a control room in the Train Turntable, which is where you went to send the train back to the Abandoned Airfield at the end of Chapter 2 of Act 3. The tags are found in the rear-left corner of the room, hidden on top of a box in the dark area. It can be difficult to spot, but it's right at the back.

Lightmass Missle Fragment
The Cosmonaut training facility has a massive gaping hole on the bottom of it. Walk to the right of the hole to find the missile fragment on the ground, past a pile of rocks and some cacti.

UIR Tag: Captain Tagger
After you've defeated the Swarm in the room with the Hammer of Dawn beacons, there will be a new exit. Head on through to find some tags on the ground.
Fallen Nomad's Visor
When you need to meet up with the convoy in the desert, head around the armoured vehicle to the right to find the visor on the ground in the sand.

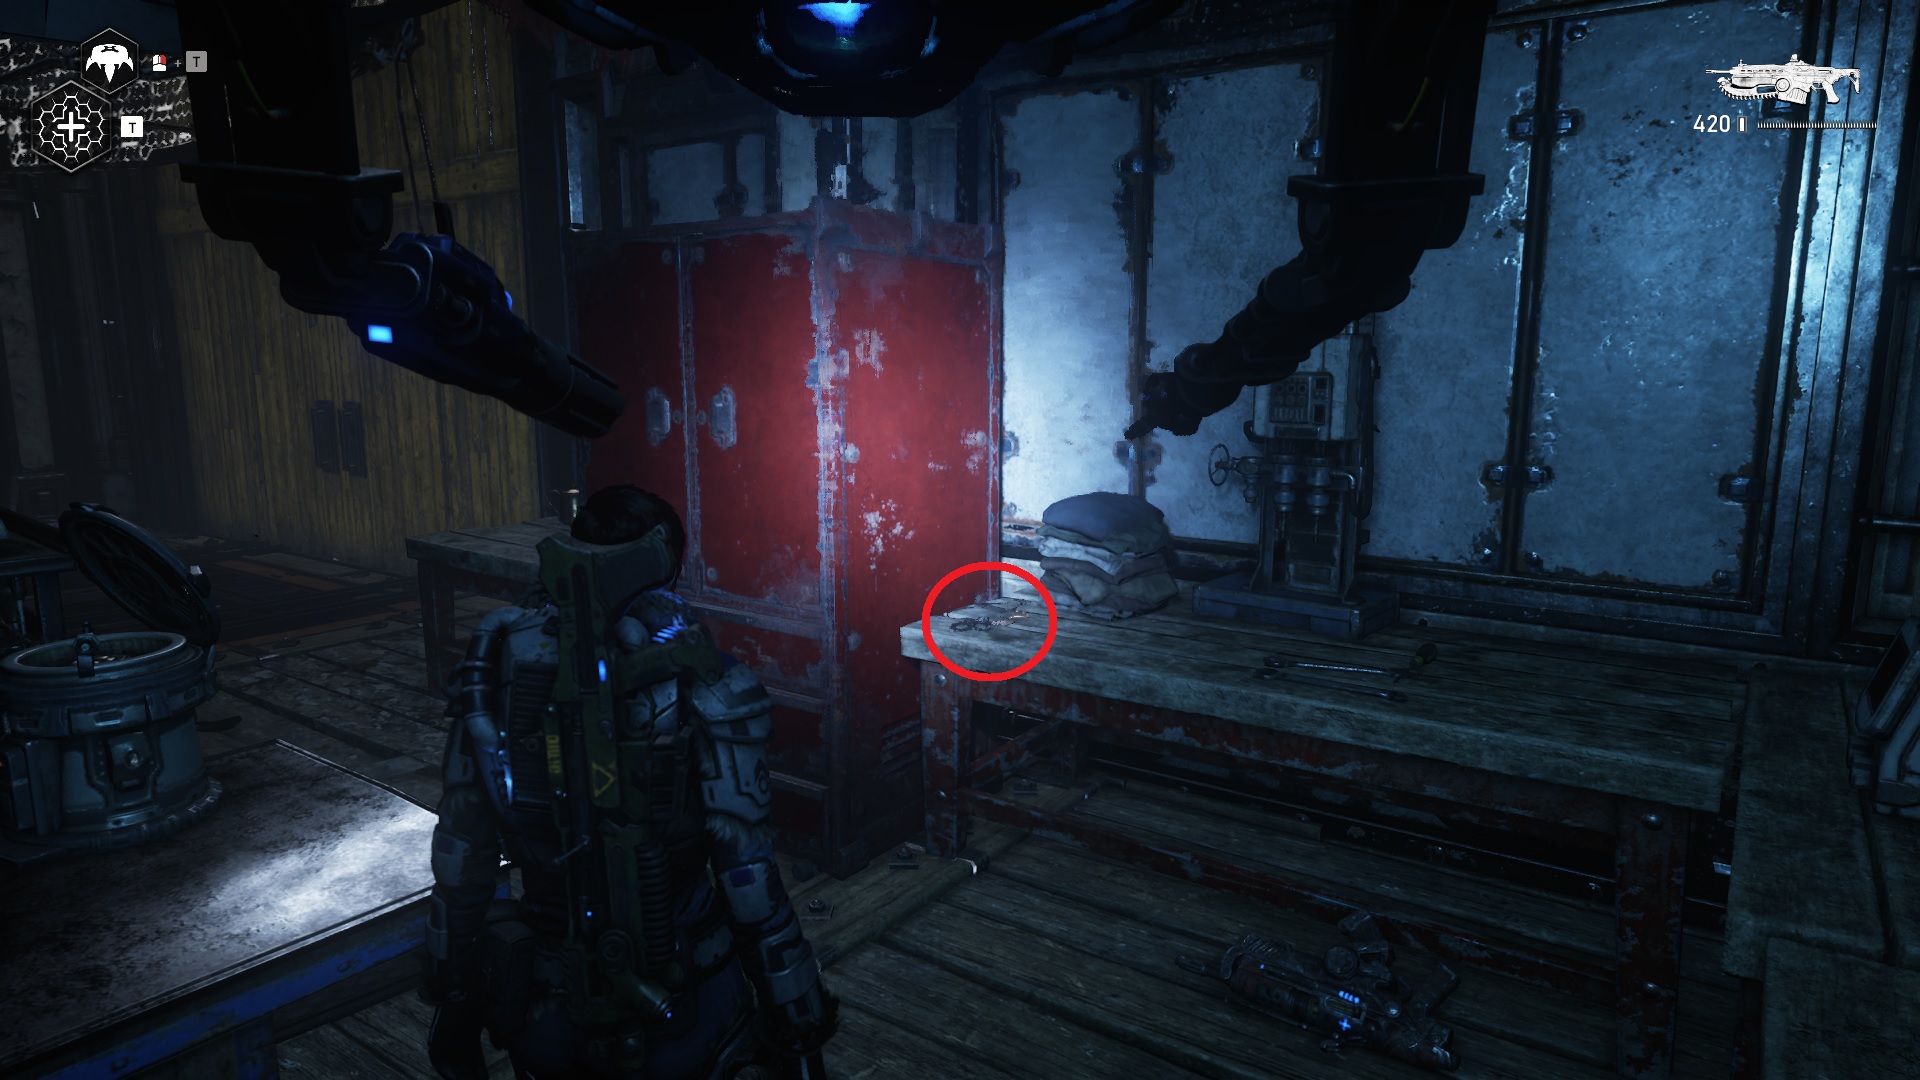
Act 4 - Homefront
This is the final chapter where you can find Gears 5 collectibles and thankfully there are only a handful of them. There are also a total of 15 components in the entirety of Act 4, so also more manageable than the previous act. You're almost there, so look to the tips below for the whereabouts of the final few collectibles.
Act 4 - Homefront components

Encyclopedia of Tyran Military History
After being lifted into the building, walk through the building until you descend through a flight of stairs. Walk from there into the right-hand corner of the flooded room to find the encyclopedia.
- To the left of the main gate of the "Tomb of the Unknowns", there are three component parts lying on the ground.

Ruptured Gear Helmet
As soon as you've ended the fight with the Swarmak, walk onward until you come across a street with a derelict van just ahead. Walk to the right of it and follow the road until you come across the helmet lying on the left of the road.

COG Tags: Minh Young Kim
Upon reaching the "Tomb of the Unknowns", keep to the right side, opposite the tomb gate, and keep walking until you reach the blue car buried in the rubble. The tags are on top of one of the rocks and should be in plain sight.

Restoration Notice: Tomb of the Unknowns
The last Gears 5 collectible should be a nice easy one to pick up. Just walk up the steps to the door to the "Tomb of the Unknowns" and you should notice that there is a notice attached to the right of the doors. Grab it and you're done!