CSGO Danger Zone Battle Royale guide: best upgrades and purchases, weapons and drones, how to play
Stay outta my hex

Counter-Strike: Global Offensive's latest major update brought with it one of the finest battle royale game modes we've yet played. Using CSGO's tried-and-true physics and gunplay mechanics as a foundation, Valve's new Danger Zone game mode flips the battle royale formula on its head, introducing a number of major innovations which set Danger Zone well apart from its rivals.
Our CSGO Danger Zone guide will answer all your questions about this exciting new foray into the overwhelmingly popular battle royale genre. Whether your question is "how to play", "how to improve", or "how to win", we've got you covered. Below you'll find detailed information on how Danger Zone is different from other battle royales, how to gear up quickly, the best weapons and upgrades you can find or purchase, and general tips and tricks to increase your kill- and win-rates.
CSGO Danger Zone guide
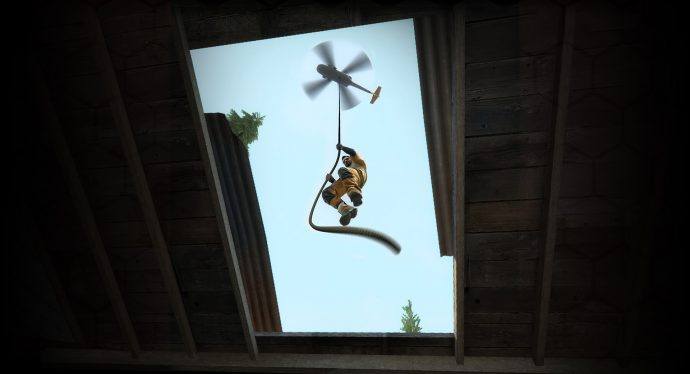
Danger Zone pits between 16 and 18 players against one another in a swift and violent last-man-standing struggle for survival. Games generally last up to 10 minutes, making Danger Zone one of the fastest-paced battle royales on the market. Unlike most battle royales, there's no plane or bus from which everyone drops; instead, players choose a spot to land on the map, and then everyone rappels down from their respective choppers simultaneously.
Some of the standard BR formula is still present however. The titular "danger zone" steadily encroaches upon the map like some awful chemical blight, forcing players closer together and damaging those caught inside it. You deploy with nothing but your fists to hit people with, so in a similar fashion to Fortnite or PUBG you must quickly scour your surroundings for gear. There are crates to break containing items such as weapons and explosives, and there are even periodic supply drops which contain some of the more powerful weapons you can find in this mode.
Danger Zone Tablet and Drones
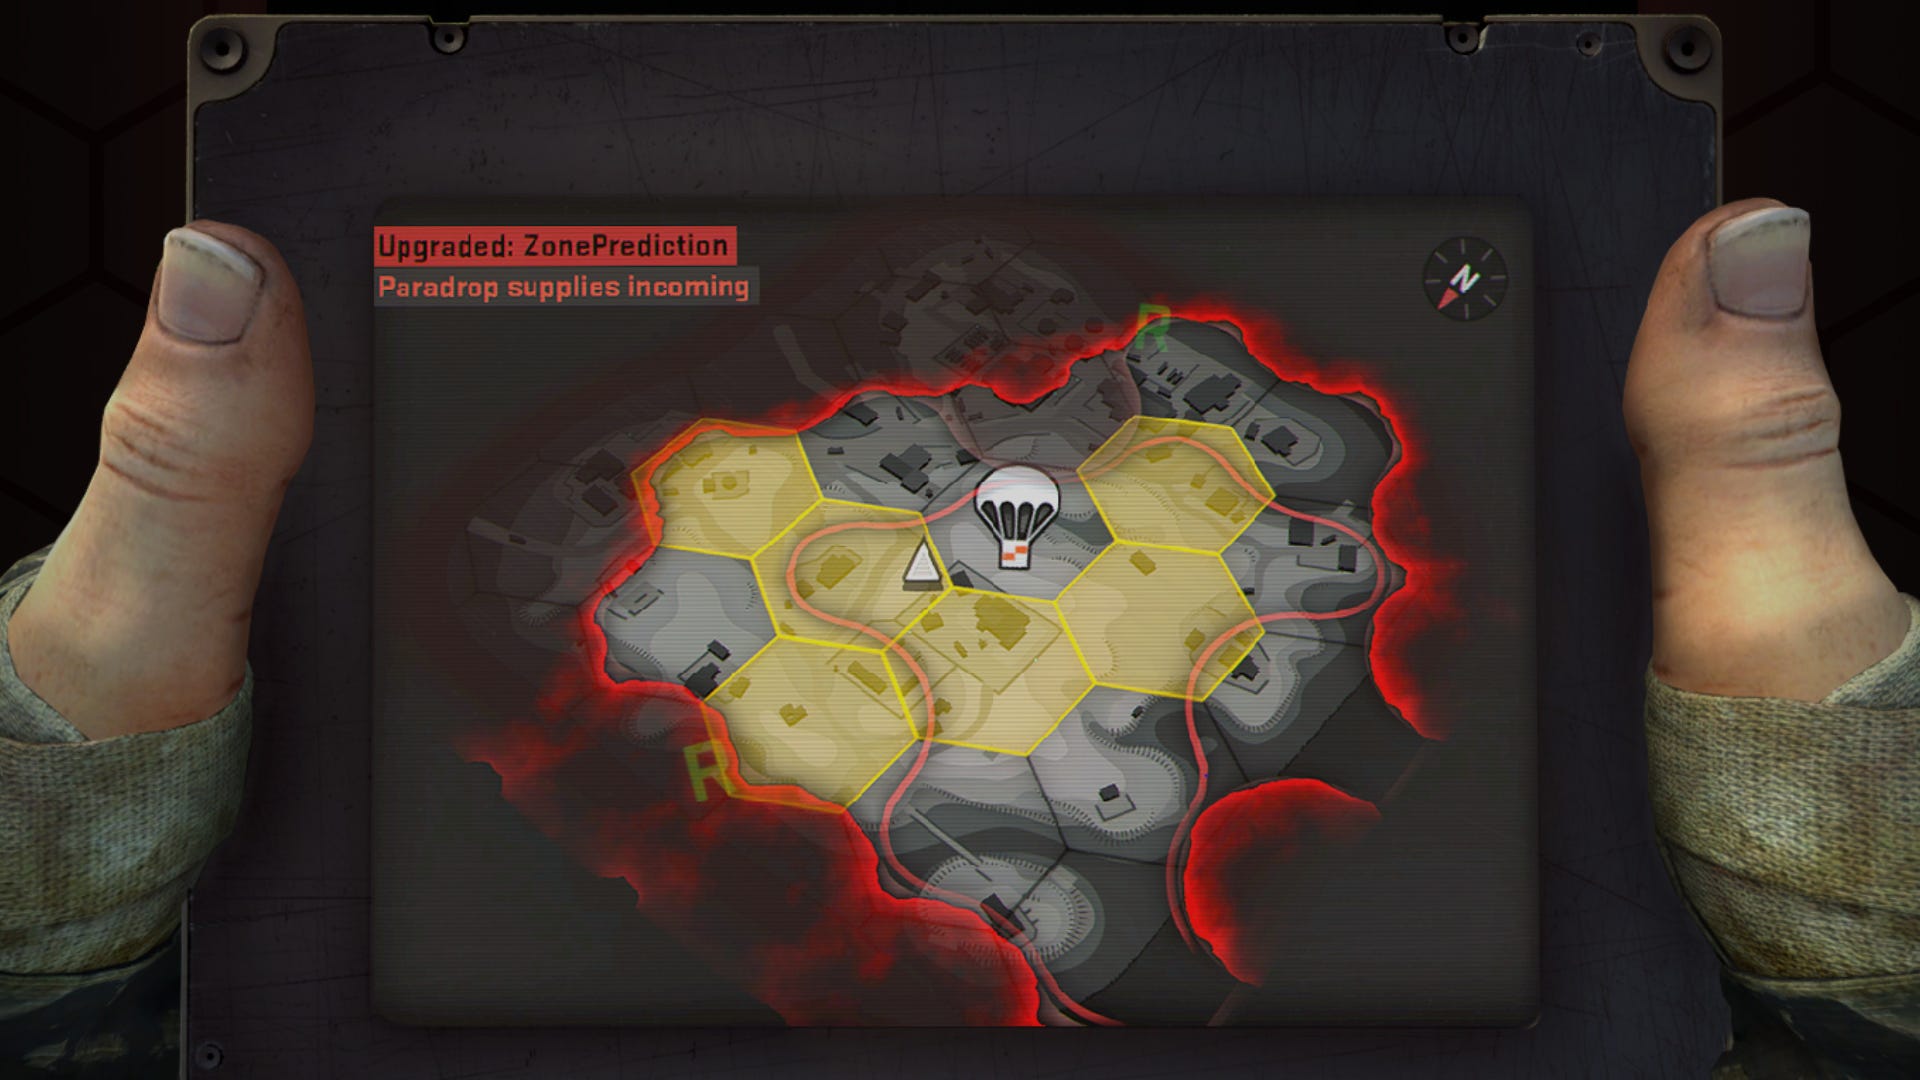
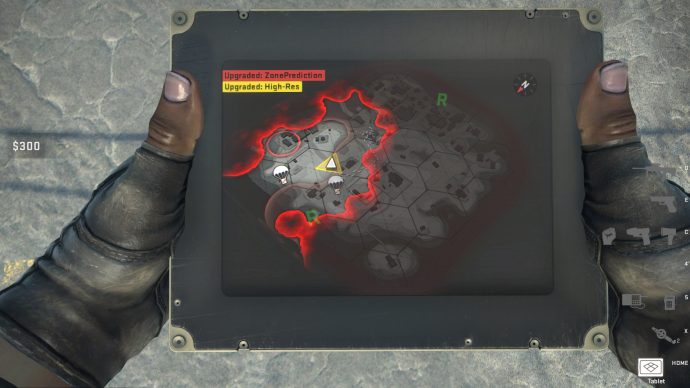
But where CSGO's Danger Zone mode really starts to innovate is with the addition of the tablet you carry with you, which displays the map, divided into hexes, and - get this - highlighting in real-time all hexes (including your own) where an enemy is present. This game-changing mechanic all but eliminates long-term camping from the game, and forces players to constantly check their tablet to see roughly where their opponents may be. It also introduces some serious paranoia and self-inflicted mind-games upon players, because you have no way of knowing if an enemy is in the same hex as you.
The tablet also doubles as a purchasing screen, where you can buy upgrades, utility items, and weapons using money obtained by looting or completing various objectives such as escorting hostages to safe zones, or destroying safes using some good ol' C4. All your purchased items are flown in by your own personal drones - but this is a double-edged sword, because your drones can be easily followed by enemies looking to discover your location, and they can even be shot down by enemies en-route, and the contents of your package stolen.
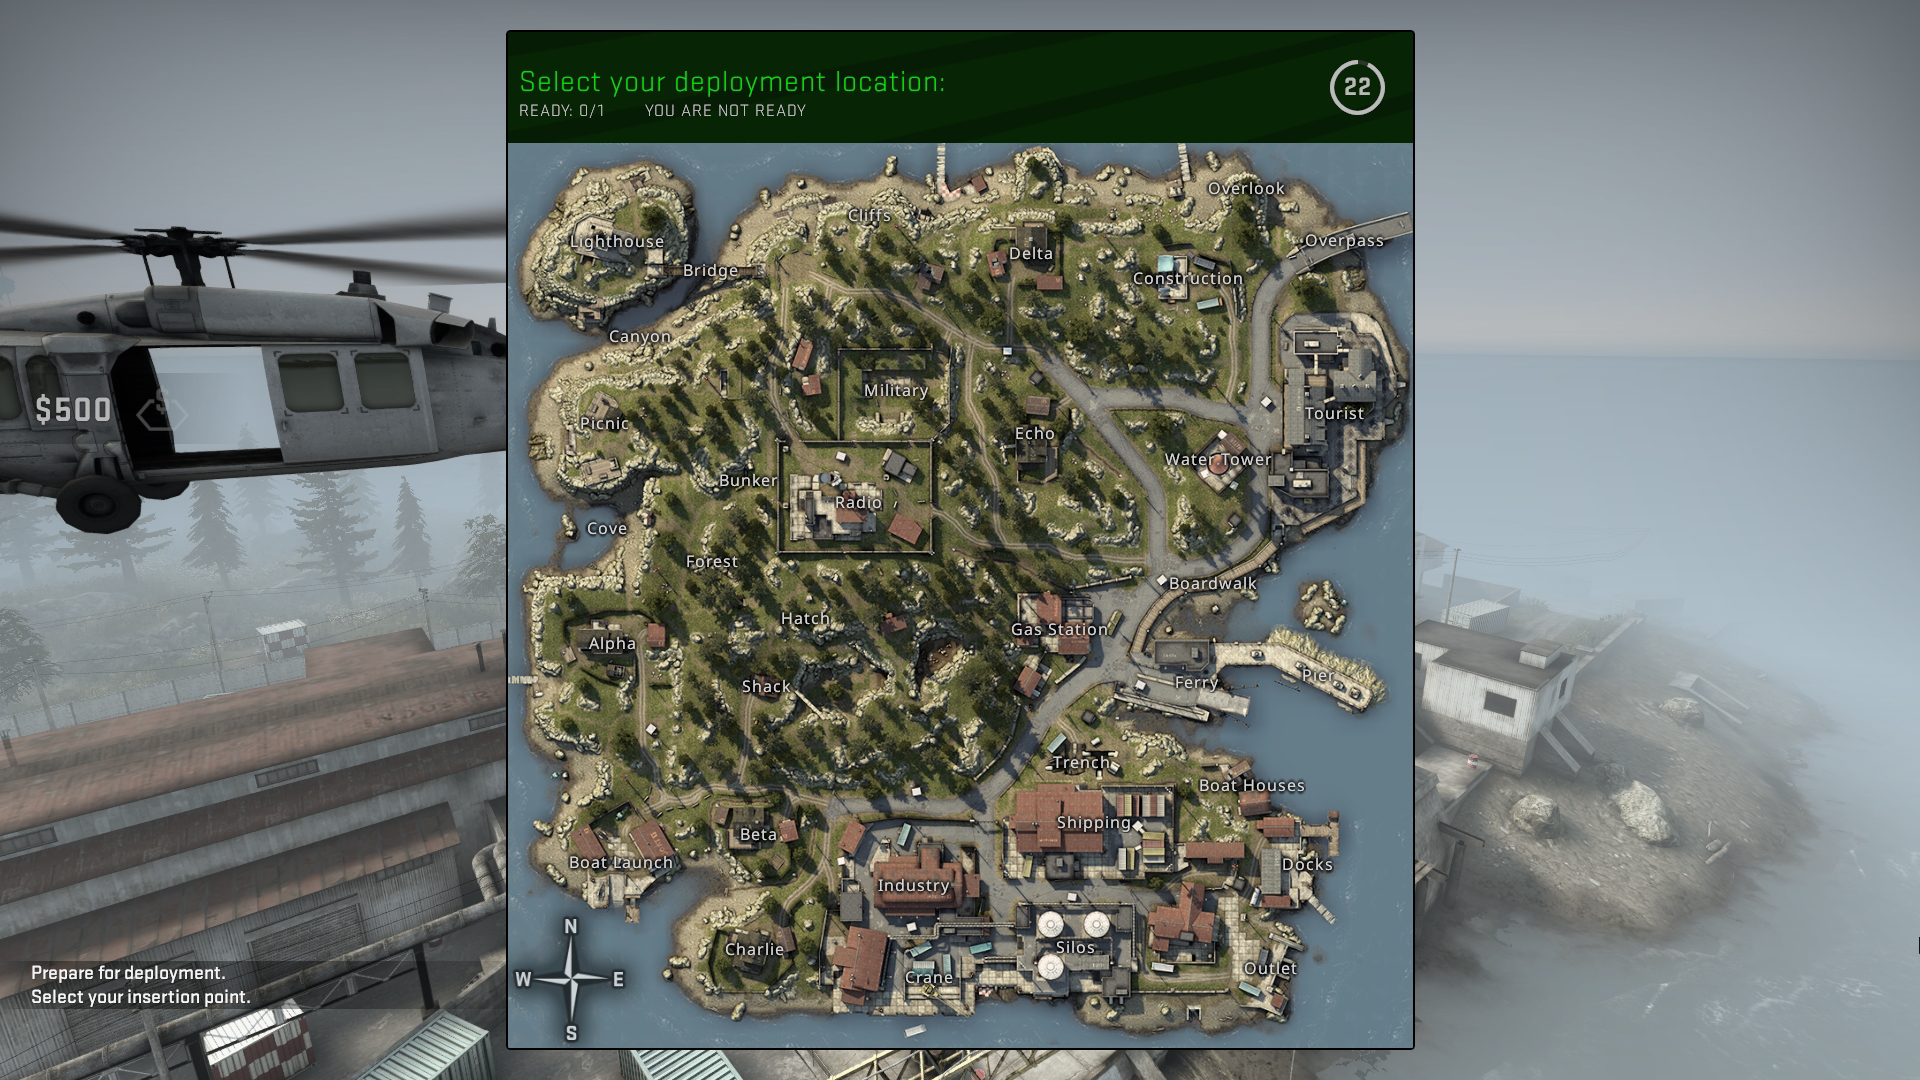
Danger Zone's Blacksite map
Currently Danger Zone has just the one map, called Blacksite - though this may change with time considering CSGO's predilection for community map-making. If you're coming from other battle royale games, you'll discover that Blacksite is much, much smaller than expected. Though, with just 16-18 players instead of 100, it shouldn't actually be that unexpected.
Blacksite is absolutely packed with buildings, walls, and trees for cover, as well as caves, tunnels, and dense grassland areas for staying out of sight. If you're just starting out, you should probably stick to the coast, because it limits the number of directions from which an enemy player can approach; though the centre of the map is where you will undoubtedly end up if you survive long enough, as you'll soon be pushed inward by the red danger zone.
One mechanic unique to Danger Zone is that every player picks a different hex to spawn in, and then everyone rappels down simultaneously. But despite the relative safety of having a hex to yourself at the beginning of the game, the map is so small that it won't take long for you to run into an enemy. Therefore, it's extremely important to get geared up as quickly as possible.
If you want a detailed overview on the best loot points and areas to drop in Danger Zone (as well as a nifty heatmap of weapon spawn locations), take a look at our CSGO Danger Zone best locations guide.
First things to do in Danger Zone
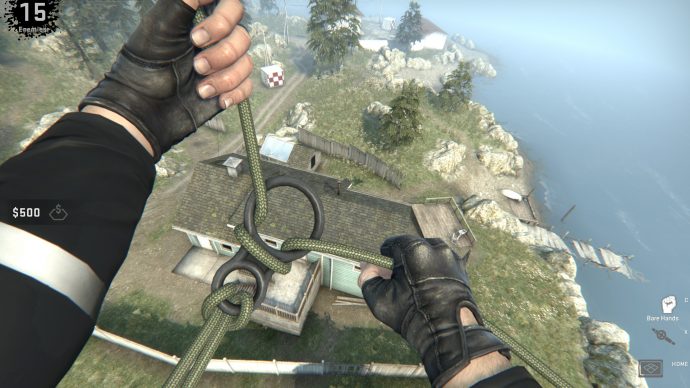
Once you've chosen your drop point, you'll actually have to drop there. The key thing to remember is this: don't just wait to hit the ground. There are two things you can do while rappelling downwards. First: you can swing on it like Tarzan on a vine, allowing you to more accurately pinpoint your landing. Second: you can hold your Use key to drop early, sometimes giving you a second or more's head-start on those around you. Though be careful you don't release while too high up, because you will sustain damage upon impact above a certain point. Where exactly that point is will undoubtedly become known to you soon enough.
Ideally you should try to land on one of the small red crates, because these will always contain a weapon. If you don't see any of them, then the next best thing is a blue crate, which will often contain a melee weapon such as a knife or axe. Make note of the locations of any large red crates, which will contain weapons such as shotguns or SMGs; but you shouldn't land on these ones, because you must use a weapon to break these large crates open, unlike any other crate where your fists will do. Now that you've equipped yourself, you should explore everywhere in the immediate vicinity for money, weapons on the floor, throwables such as frag and stun grenades, and anything else that may be of use.
Once you've looted what you can, hopefully you'll have enough money to buy a basic item to cover any shortcomings. If you lack a melee weapon, buy a knife; if you lack a gun, buy a pistol or an SMG if you can afford it. If you need ammo, buy some. All the while, keep checking your tablet for nearby highlighted hexes. Seriously, don't neglect your tablet. It's as essential to Danger Zone as building is to Fortnite. Players who know what they're doing will check their tablets every 10 seconds.
Danger Zone upgrades and purchases
Your first purchase on the Danger Zone tablet should always be for whatever you didn't find while looting your initial spot, whether that's a gun, a knife, or some armour (armour is hella important in this game if you didn't know). For subsequent purchases, or if you found everything you needed while looting, you have a few more options to consider.
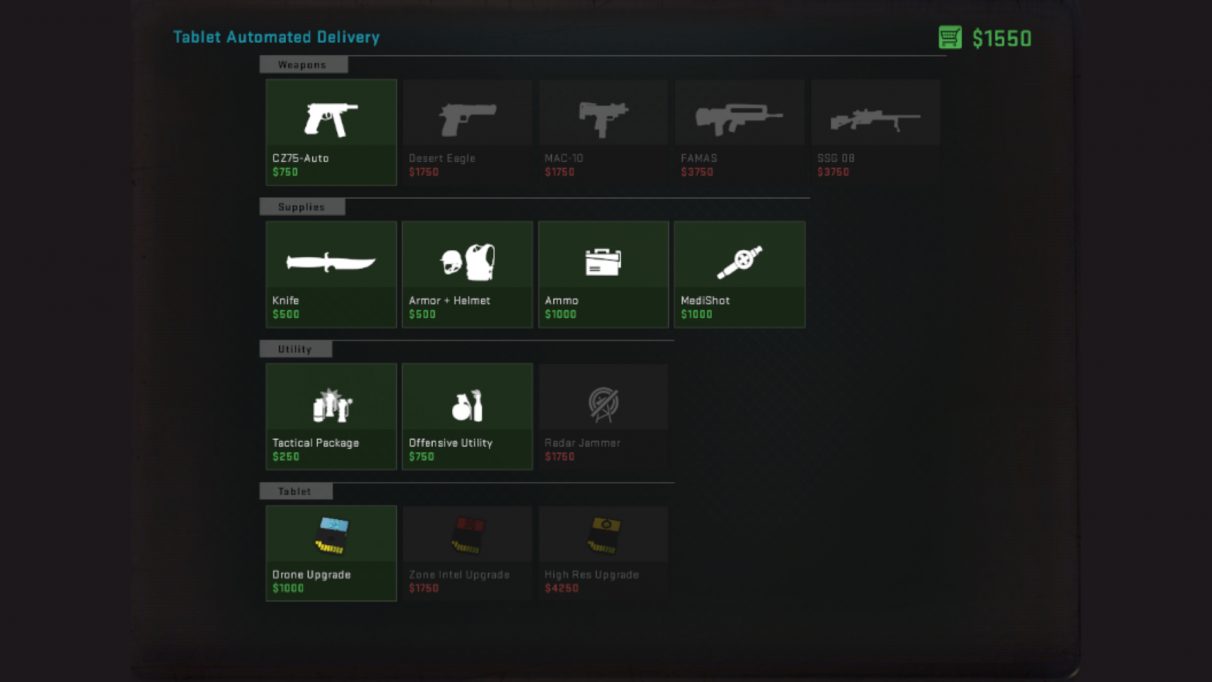
The purchasing screen is laid out in roughly the same way each match:
- Top row: pistol, SMG, premium pistol, assault rifle, SSG ("Scout") bolt-action sniper rifle.
- Second row: knife, armour, ammunition, MediShot.
- Third row: "tactical" utilities package (flashbang, smoke grenade, diversion grenade), "offensive" utilities package (frag grenade, fire bomb), Radar Jammer.
- Fourth row: Drone upgrade, Zone Intel upgrade, High Res upgrade.
The Radar Jammer, by the way, is one of my firm favourite items to purchase, and really shines late-game. Once deployed, enemies in the same or adjacent hexes will find their tablets will no longer provide information on enemy player locations. If you've ever had this happen to you, you know how blind and panicked it makes you feel.
I also feel it's very important to emphasise that that fourth row of tablet upgrades should not be overlooked, because they're all pretty wonderful. The "Drone Upgrade" enables you to see the locations of all drones currently in flight belonging to any player, and also speeds up your own drones. The "Zone Intel Upgrade" allows you to view on the tablet the next step of the danger zone, so you can better respond to its steady consumption of the map. The "High Res Upgrade" is ludicrously expensive and as such rarely sees play, but it divides each hex into slices so that you can pinpoint enemy positions with much greater accuracy.
For most games, it's generally most important to purchase a good gun and ammunition boxes, because ammo is incredibly scarce in Danger Zone, particularly if using automatic weapons. I rarely use the utility packages, because you can find these items easily enough on the map, and it's just not worth the money. Same with the High Res Upgrade; although the effect is fantastic, the extortionate price means you will likely die (or win) before you can afford it. And you can buy some of the best guns in the game with that much money, and still have enough spare for ammo.
CSGO Danger Zone weapons and combat
All of the weapons in Danger Zone have been brought across from the main CSGO game without any changes whatsoever. However, unlike standard CSGO, players in Danger Zone have a max health of 120, which means certain shots that would ordinarily be lethal may turn out not to be. Another difference is that, while very small by battle royale standards, Blacksite is a much more open map than many standard CSGO areas, which means weapon damage drop-off is something worth considering in Danger Zone.
Guns are divided into shotguns, standard pistols, premium pistols, SMGs, assault rifles, and sniper rifles. Sniper rifles are the hardest to obtain, but they're far from essential to winning a match. The undisputed kings of Danger Zone are the assault rifles, but good luck finding the ammunition to use them in a sustained manner. Personally I find that either an AR/pistol or a shotgun/desert eagle loadout should see you through just fine to the very end of the game, though of course, both have very different playstyles.

Lack of ammo, as you will no doubt find out for yourself, will be the death of you half the time in Danger Zone, so you must be incredibly careful with bullet conservation. More than in any other game I can think of, I've come to think of bullets in Danger Zone as a resource with a value that must be considered and weighted carefully before choosing to expend them. Treat ammo with the respect it deserves as such an endangered species upon Blacksite.
There's a tendency to think that purchased weapons must be better than weapons you find on the ground or in crates at the start of a game, but that's not always true. Shotguns will often beat any weapon in the game at close range, provided you can land your shots.
Another thing worth learning the true value of is the MediShot. These shots are the only method of healing in Danger Zone, providing a very quick heal-over-time for around 40 health, and also acting as a sort of adrenaline shot which increases your movement speed for a few seconds. MediShots are extremely fast-acting and can be applied while on the move, so you should not be afraid to use them in the heat of combat. If you haven't already, bind your MediShot action to an easily-accessed key, because administering it quickly during a firefight may mean the difference between victory and defeat.

Danger Zone how to improve, how to win - general tips and tricks
Finally, here are a few more specific tips and tricks on how to secure that victory royale in CSGO's Danger Zone mode.
- If you're a newcomer to CSGO, spend some time adjusting your mouse sensitivity in the options menu until you can reliably target enemies.
- Drones will track to your tablet, rather than you. You can take advantage of this by throwing your tablet on the ground and letting the drones drop your items there, so that it doesn't give away your location.
- The hex highlight will still track you even if you leave your tablet behind in a different hex. It's a shame, I know.
- You can use the console to enter Blacksite on your own and explore the map. Make sure the developer console is enabled in the options menu, then open the console and type "game_type 6; game_mode 0; map dz_blacksite" without the quotes.
- You can climb through windows by jumping and, while in mid-air, holding Crouch and moving forward into the window. With enough practice you can do this quickly and reliably.
- Reload while you're collecting from ammo boxes to save time.
- Desert Eagles can kill with a single headshot, even if the target is at max health and wearing a helmet.
- Tall grass can be burnt away by fire bombs to flush out hidden enemies.
- Keep an eye on enemy drones, because they can give you important information on the positions of their owners.
- Because you can't always tell if an enemy is inside your hex, it's often a good idea to stick to the edge of your hex, so that you can move into the next one and see if your previous hex stays highlighted. If it does, there's an enemy there.
- Only use ammo boxes on guns that you actually need them for. For example, shotguns can kill in one or two shots, so you don't need much ammo for them. SMGs and Assault Rifles, on the other hand...
- If you charge your punch (using right-click), you can punch weapons right out of an enemy's hand.
- Don't be afraid to swap your weapon out for another one if you're low on ammo. Ammo in a bad gun is better than no ammo in a great gun.
- Explosions are incredibly powerful. Don't stand near C4. No really, don't. You're still too close. Further away. Learn from my mistakes.
That's just about everything we can think of to help you get started with CSGO's new Danger Zone battle royale game mode. If there's anything you think we've missed or incorrectly elucidated, do feel free to mention it in the comments. And be sure to revisit this guide as time goes on and adjustments are implemented, so that you can always be up to date with the latest goings-on in the Danger Zone.