
Ascalon Catacombs Dungeon Guide
Story Mode
Welcome to Gaiscioch’s Ascalon Catacombs Story Mode Dungeon Guide. Thank you to my dungeon running buddies who helped in this effort. Brian, Sue, Scott, and Michael who helped me run this dungeon in slow mode so this guide could be written.
We suggest when you're faced with a group of mobs that you target in the following order.
- Rangers – Arrows and Traps can make the going difficult and wear you down quickly. If you get within melee range they stop throwing traps and use only the bows.
- Elementalist – AOE AOE AOE – nuff said?
- Mesmers – Reflect – Condition transfer.
- Monks – Heal mobs, makes the fight last longer.
- Warrior and Necromancers – Fairly easy to defeat.
- Captain – Knockdown, but usually this mob can be found alone.
Start
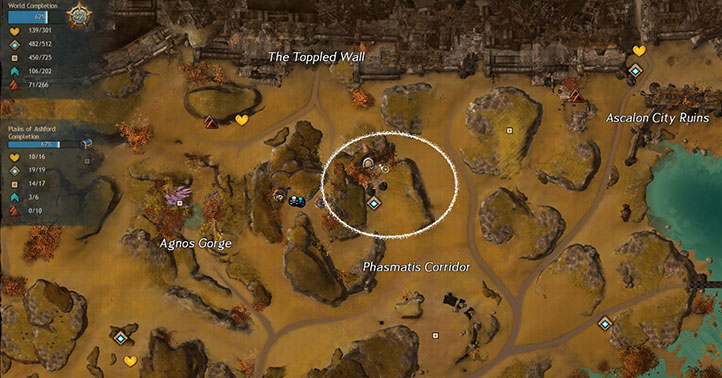
You find Ascalon Catacombs in the Plains of Ashford in Ascalon.
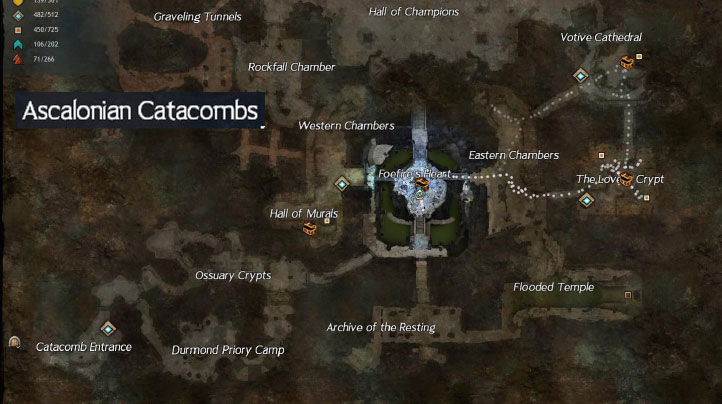
 Once you enter the dungeon, note the repair anvil to the left and back as you go down the stairs. You start the dungeon in a room full of coffins. Beware the light blue dots laying around. Once you get near them they will spawn ghosts. The caskets hold either a ghost or a group of spiders each. To be sure of an easy time of it, we want to take care of the blue dots first, then open the caskets one at a time.
Eventually you'll find the gate guard in one of the caskets. Defeat him and the gate will open. Down the stairs you'll find a room filled with traps. As soon as you get close enough a couple of mid level ghosts spawn to make things more difficult. Across the room on the wall is a gear icon. One party member can run across, avoiding the traps and pull the chains to turn off the traps. The rest of the party keeps the ghosts busy using ranged weapons until the traps disappear. The ghosts shouldn't be much of a problem to melee after that.
 When you leave that room, you will move through a corridor. In that corridor are 3 mobs, including an Elementalist. We suggest you use targeting and take the Elementalist out first. Then the other two mobs. This will only be a problem to lower level groups. Higher levels with their better armor and weapons should get through these mobs quickly.
 The next door needs some help to open. Up the stairs to the left past two rangers, you'll see more traps. Melee the rangers to keep thrown spike traps from coming into play and then have your most agile party member disable the traps. The wall with the trap release mechanism is on the right side, guarded by a Captain. Carefully work along the wall, avoiding the traps and pull the chain to disable the traps so the party can attack the Captain.
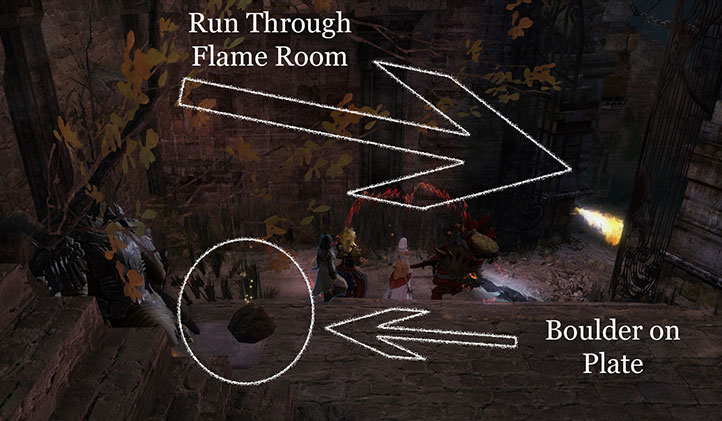
On the floor, usually not far from the trap mechanism, is a boulder. Someone can pick up the boulder and place it on the plate in the lower room. (Look for sparkles on the floor) This will open the door to the Flame Room.
 The flame room is usually a run through. You can try to kill all the flames, but you will most likely also aggro mobs that you don't need to deal with. It’s usually messy, but it’s your choice. We chose to run all the way through and down the stairs in the next room. If you'd rather fight, then target the source of the flames on the walls. Be careful, because as you’re attacking one flame, another will find you. Keep moving and be ready to run out of the room to recharge. If at all possible, stay off the stairs going up as this will aggro the mobs on top of the stairs and add more mess than money to the fight.
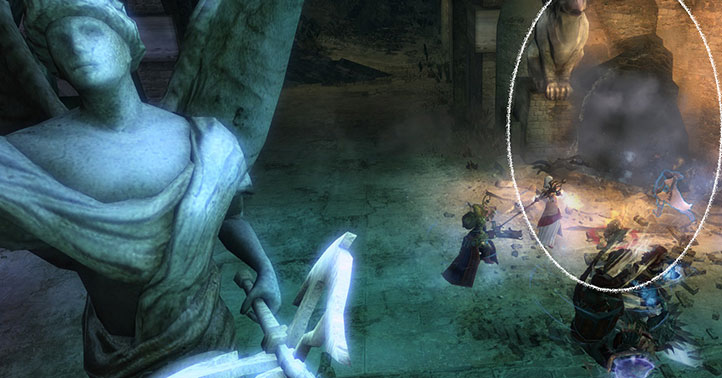
Once we’re all through and recharged, we move on down the stairs into a large room with statues and gargoyles on the walls. Moving forward and up a couple of stairs you will trigger a graveling burrow. Resist the urge to run up the hallway until after the burrow is destroyed and the gravelings are all dead. Note: Some groups leave these gravelings and run up the hallway to engage the ghosts. If you're powerful enough to kill the ghosts quickly, this may work. But if your party wipes and has to run back before the next waypoint spawns, you’ll have to run through them again. I prefer the old battlefield adage I learned in the first Guild Wars, “Don't leave anything alive behind you.”
Once the burrow is gone, you can begin to move up the hallway. The upward sloped tunnel is home to a number of ghosts. There are two ways to fight these ghosts. If you're all well armored and have good aoe, you can meet them in the hallway and just fight. If you’re lower level and you aren't as confident, there is a stack spot above where you can range the ghosts from. This will take longer, but you will be able to kill the mobs with minimal damage to yourselves.
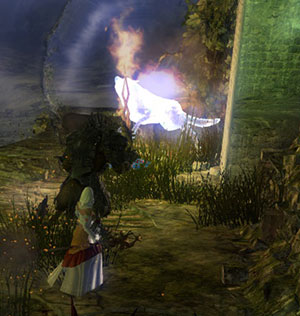
You've Found Eir and Garm
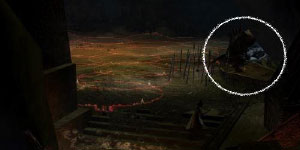
At the top of the hallway is a Captain who shouldn't take long to defeat. Be careful not to wander far from the battle area lest you find a Troll. The Troll is a bonus event, but if triggered at the wrong time can cause even the most experienced party to wipe.
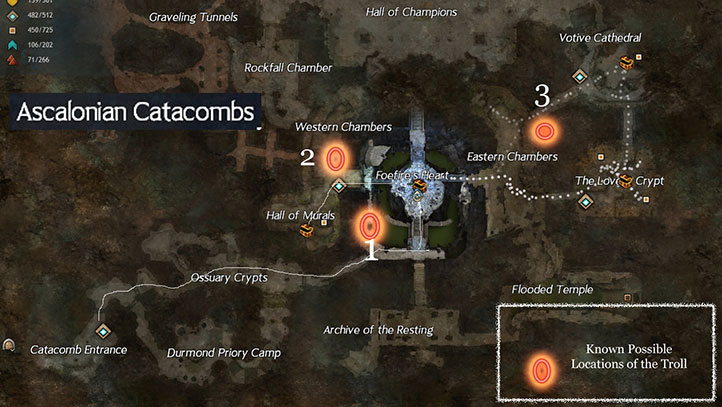
The Troll
A bit of a side trip here. We’re going to talk about the Troll because you never know if or where this guy will appear. In story mode, he’s not a tough fight as long as you haven't got a lot of other mobs to fight. In some places, you can actually convince the troll to fight Lieutenant Kholer for you and as long as you get in a slap or two on both of them, you'll get credit for the kills.
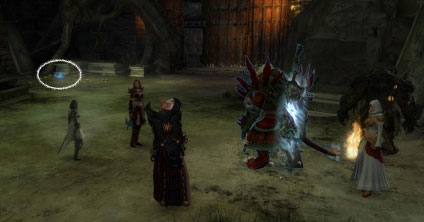
First position is right where you find Eir. He could appear from the left or right. Range him and hit him enough to convince him to follow you. Walk him up the stairs to the middle of the room where the Lieutenant and his squad are. It will take a few seconds for Kholer to finish his speech, but once he does, a few well-placed range hits get his attention as well. Bring them together and run away. If you have to, jump into the water to lose aggro and climb the stairs on the west side and wait until they're both down enough to get your hits in quickly.
Second and third position that we've actually seen the troll are just as we left after defeating Kholer and were on our way to the next boss. We have not tried to entice the troll
to fight our other bosses for us due to the trash mobs we always run into on the way. In story mode, he’s not hard to kill as long as you can keep him alone.
Back to the story!
Lieutenant Kholer can be a bit tricky if you just run in and start the fight. He’s got a lot of help with him. We suggest you spread out and range this fight for the most part.
Kholer has one nasty trick, when he lifts up his sword he is about to pull you in and hit you hard. There’s a simple defense to this move, DODGE. As soon as you get pulled in DODGE back and continue the fight. In story mode, you actually have enough time to hit him once, then dodge back. I suggest you don’t bother with that, dodge then hit him.
We also used AOE to help wipe his adds during the fight. Now, get your chest and take a break. You deserve it. Good time for a photo op!
The Bosses
We suggest that before you get to each boss, you clear the area of trash mobs. Some areas the mobs come running as soon as you get close, in other areas the mobs hide as little blue globs till you get close. Either way, remember the kill order and “Take Out the Trash.”
There is also the possibility of “bonus events” happening, such as the aforementioned Troll or perhaps a Graveling Burrow. We welcome these events and because of a personal dislike of Gravelings, take every opportunity to close the burrow and clean up the mobs. The choice is yours. Just remember, if you run past it, you might have to run past it again, or they might follow you to your next fight.
Nente, The Ranger
 Nente stands on a big rock in the middle of the room. There is a narrow beam to walk across if you want to take your chances on a melee fight. Those with ranged weapons may choose to stand on the ledges all around and hit him from afar. Either way, this fight can be easy, or it can go horribly wrong. Boulders on the outer ledge will knock him or his pets down but do little damage. When we fight this guy, we put a couple of tanks on the rock with him and everyone else stands out on the ledges.
When he gets down to around 70% he will summon Fang who teleports to the outer ledge. (Sometimes Nente joins him.) Fang likes to run around the outer ledge and can do a lot of damage if you ignore him. Take him out fast. If one of your party members is attacked, run to the rescue. Once Fang is down, Nente returns to the rock. Turn your attention back to Nente.
 At about 30%, Nente calls Shadow, his other wolf pet. Again, they teleport out to the ledge till the fight is over. Shadow can either be killed or controlled. We chose to fight both Shadow and Nente because DPS was really good. Choose your own way depending on the makeup of your party. Once Nente is done, Shadow won’t disappear right away and is easily killed by himself.
Well done guys, you’re getting closer to the big fight. Get your chest and take another break. Again, it’s time for a photo op.
Kasha Blackblood, the Necromancer
A likeable girl before the Foefire turned her into a ghost. She trained Necromancers before the searing. Now, all she wants to do is drain the life from you and throw away your dried up corpse. But she’s not all that hard to beat.
Her ADDS are the key, if you let them live they will heal her. So, AOE, AOE, AOE to your hearts content. Kill the ADDS quickly and keep on fighting her. If you hit her with enough DPS, the dance may not last long enough for many ADDS. But don’t get cocky, her ADDS are the key. If you think it’s necessary, dedicate one or two members of your party to the ADDS. (Are you seeing a pattern here?)
That’s pretty much it for this fight. Get your chest, sit back a minute to recharge. Then let’s move on to “The Lovers.”
Ralena and Vassar The Lovers
These two are much more difficult when they're together. The plan we go in with is “Divide and Conquer.” We assign one party member to go play with Vassar, while the rest of us take on the tougher half of the duo, Ralena.
Ralena is an Elementalist, Vassar is a Mesmer. They complement each other greatly. With level 80 characters, the fight is usually not difficult. You'll run into problems if they teleport back to each other, which I've only seen happen once when the player handling Vassar went down and didn't tell us. If you're the player single handling either mob, as soon as you get low on health, yell for help. Another party member will come help you.
Ralena uses lightning balls and confusion. We were able to melee her and once she was down, do the same to Vassar. Vassar has three attacks. Circles that damage and add condition. (Bring some shampoo and “deconditioner.”) A projectile reflecting bubble that bounces your attack and damages you instead of him. And finally little swarming adds. When you’re keeping him apart, just hit and run away from Ralena. Don’t try to take him down by yourself. Your job is to keep them apart.
Another method of separating the two is to use the door trigger plate. Have one person stand on that plate, then the rest of you can aggro one of the two and run out the door. (They will both follow.) Once one of them is outside, step off of the plate and the door will close. Now this means you’re not part of the fight, so stay out of trouble while your party finishes the job. Then, step on the plate again to let them in and all of you go after whoever is left.
If it takes too long to kill one of them, there is a chance that they'll teleport to each other and you'll see the pretty pink hearts. Just separate them again and you'll be fine.
However you did it, you did it. Good job. Just one boss left. The king himself. Get your chest, recharge, if you need to repair, now’s the time to repair. (You can use the Catacomb Entrance Waypoint to get to the Heart Anvil, then the nearest waypoint to the boss you just defeated to rejoin the group.)
And Finally,
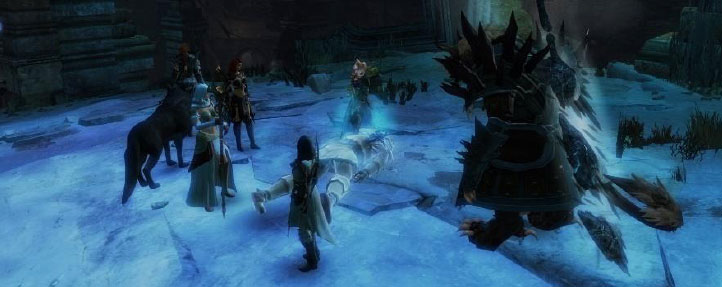
King Adelbern
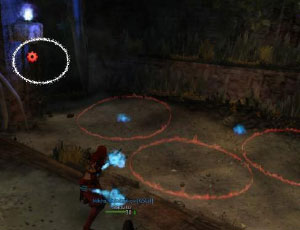
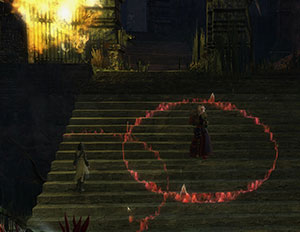
Resist the urge to take a nap, folks. This guy’s like eating second breakfast at the Prancing Pony. Just jump on him and keep on fighting. (Be aware, there may be one or two adds that decide to join the fight, if so, take them out fast.) All you have to remember is to stay OUT OF THE RED CIRCLES and when he pulls you in, dodge back out. It won't be long before you can take a group screenshot, standing around his corpse. Get your chest, get your little chest on the side and you're done.
And that’s it. The end of the catacombs. You can spend a few minutes wandering around exploring, or you can abandon ship and start an explore mode run.
About Guild Wars 2
Guild Wars 2 is an online role-playing game with fast-paced action combat, a rich and detailed universe of stories, awe-inspiring landscapes to explore, two challenging player vs. player modes—and no subscription fees!